A slow coffee maker usually has a restricted path.
The main difference is between a slow water path and a slow drain through the coffee bed. Scale, a restricted valve, or a blocked spray head can limit how water reaches the basket. Fine grounds, too much coffee, or a collapsed filter slow down how fast brewed water leaves it. A good guide should diagnose those paths separately before blaming the heating element for a long brew cycle. If you’re wondering why is my coffee maker slow, start by figuring out which path is restricted.
The same logic applies to a drip machine, a percolator, or one that has started making strange sounds. A percolator has a chamber at the base, a detachable vertical tube that extends upward, and a perforated metal filter basket for the grounds. Water should stay underneath that basket. A drip machine has a different layout, but the question stays the same: is water arriving slowly, or is brewed coffee leaving the grounds slowly?
Key Takeaways
- Separate a restricted water path from a blocked coffee bed before replacing parts.
- Mineral scale can narrow passages and reduce heat transfer inside the water path.
- Fine grounds, excessive coffee, and a collapsed paper filter can slow drainage even when the machine works normally.
- Unplug and cool the machine before cleaning, and follow the manufacturer’s descaling instructions.
Why is my coffee maker slow? Start with the two flow paths
A typical brew cycle shows water moving from the reservoir into the heated path, reaching the spray head, falling into the brew basket, passing through the grounds and filter, then collecting in the carafe. The internal layout varies, so the manual is more helpful than a generic diagram. A long cycle alone doesn’t point to a specific failed part.
A coffee maker with a restricted water path may show weak or uneven dripping from the spray head. A coffee maker with a restricted coffee bed may deliver water normally into the basket but allow liquid to leave slowly. The distinction is useful because cleaning the spray head will not correct an overfilled basket, and changing the grind will not clear mineral scale inside a valve.
How water moves through a drip coffee maker
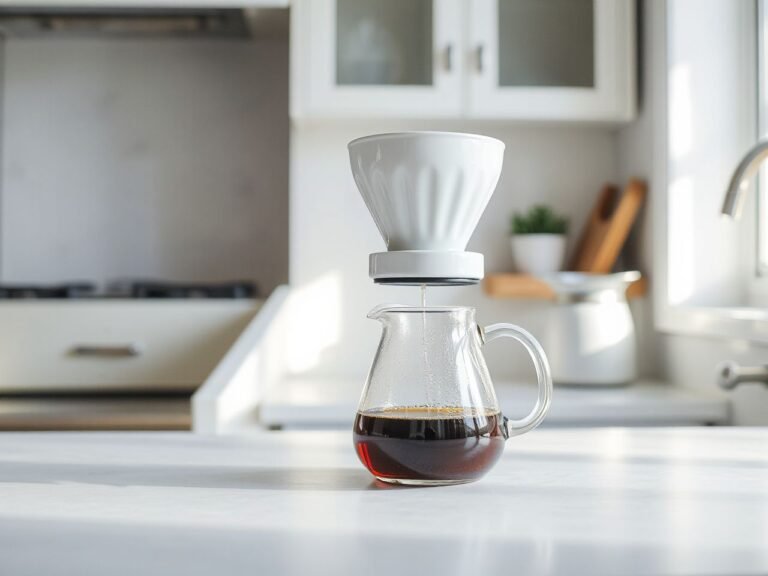
The reservoir supplies water to the heating section. As it heats, the machine pushes water through the water path toward the spray head. The spray head distributes water over the grounds in the brew basket, while the paper filter keeps coffee particles back as liquid drains into the carafe.
A one-way valve helps direct water through the internal path. If mineral deposits block the passage or the valve doesn’t open freely, the spray head may drip weakly or pause during brewing. The machine might seem to heat normally but still deliver water too slowly.
A slow spray head usually points toward a restricted water path rather than a coffee grind problem. Watch the spray head during a cycle only from a safe position, and do not remove covers or reach near hot water or electrical connections.
How a percolator differs
A percolator moves water through a vertical tube from the lower chamber to the upper part. Grounds sit inside a perforated metal filter basket, and the water level should stay below the basket’s base. If the tube or basket isn’t seated properly, the flow pattern can change.
Constantly percolating at the boiling point can cause over-extraction. That taste issue is separate from a slow drip cycle, but both can result from an incorrect setup or a blocked route through the basket. Measure the opening first.
Some coffee percolators have a built-in electric heating element. If you see a visible heating problem, treat it differently from a clogged basket or tube. Internal electrical repair shouldn’t be the first step in cleaning.
How to tell whether the machine is actually slow
Start by checking the manual for normal brew behavior and the selected setting. A programmable machine might pause during part of its cycle, while a percolator may work differently from a drip machine. Don’t compare a drip brewer with a percolator as if they use the same water path.
Run the machine without coffee only if the manufacturer allows it. Watch for even water reaching the spray head and a steady water flow into the carafe. If the empty cycle is weak too, the machine itself needs attention. If the empty cycle seems normal but brewing is slow, start by inspecting the filter and grounds.
Changes in sound can be a clue. A humming, pausing, or repeatedly trying to move water might mean there’s a restriction. But sound alone can’t tell you if the heating element or valve has failed. Use sound as a hint, not a diagnosis.
Causes: scale, valves, spray heads, filters, and grounds
Mineral scale in the water path
Mineral scale can narrow water passages and cut down heat transfer. A slow brew may be caused by restricted flow, not a weak pump or heater. Deposits can build up in the reservoir outlet, heated passage, one-way valve, or spray head. The machine can still produce hot coffee even if water flows less efficiently.
Scale tends to be more of a concern if the machine slowly gets worse, the spray pattern weakens, or a water-only cycle shows the same issue. A sudden change after reassembly suggests an incorrectly seated part, a blocked opening, or a faulty filter.
Cleaning and descaling instructions vary by machine. Follow the manufacturer’s guidance first, especially for the right descaling solution and removable parts. The guide How Often Should You Descale a Coffee Maker: Step-By-Step can help organize the process, but don’t replace the appliance manual.
A restricted one-way valve
The one-way valve is easy to miss because it’s often inside the water route, not in the visible basket area. Mineral deposits or residue may block its movement. A sticking valve can interrupt the water cycle, causing pauses instead of a steady flow.
Don’t force an internal valve with a sharp object. Puncturing it, displacing the seal, or loosening a fragment can lead to leaks or overflows later. If the manual doesn’t show how to access the valve, leave the housing closed and follow the approved cleaning process.
A one-way valve that does not control water movement correctly can make a coffee maker brew slowly even when the reservoir contains enough water. That sentence is also a useful boundary: visible basket cleaning cannot confirm the condition of an enclosed valve.
A blocked spray head
The spray head sits above the brew basket and distributes water over the coffee. Coffee residue, mineral deposits, or a misplaced component can block the openings. Water might then fall in a narrow stream instead of spreading across the grounds.
Unplug the machine and let it cool before inspecting. Remove only the parts the manual says are removable, then clean the spray head using the method the manufacturer recommends. Keep water away from electrical connections, switches, and the plug.
The United States Consumer Product Safety Commission provides appliance-safety information at cpsc.gov; its guidance supports treating an unplugged, cooled appliance as the starting point for cleaning and inspection. Do not use a wet cloth around an energized connection.
Fine coffee grounds or too much coffee
A fine grind creates a more resistant coffee bed than a coarser grind. Using too many grounds makes that bed deeper and can slow liquid movement through it. The machine may still deliver water normally, but the brew basket drains slowly.
Follow the grind setting and coffee amount suggested by the manual or coffee instructions. If the basket fills unusually high, liquid pools above the grounds, or the coffee trickles weakly into the carafe, reduce the amount of grounds as instructed instead of changing internal parts.
Coffee grounds can restrict a brew basket even when the heating element and water path are working normally. This is why the empty-cycle comparison is more useful than guessing from the finished coffee alone.
A collapsed or poorly fitted paper filter
A paper filter can fold against the basket wall, block the outlet, or collapse under the weight of wet grounds. Water can then accumulate above the coffee bed, making it look like a machine blockage. Filter shape and basket shape need to match the instructions for the machine.
Make sure the paper filter sits fully open and doesn’t fold over the rim. If a filter looks torn, crushed, or pressed tightly against the outlet, replace it with the type specified by the manufacturer. Do not stack filters unless the manual explicitly says it’s okay.
A carafe or basket that is out of position
Many drip machines depend on the carafe pressing or aligning with the basket outlet. If the carafe isn’t seated properly, brewed liquid may collect above the outlet or drip poorly into the vessel. A basket that isn’t fully installed can cause similar issues.
After cleaning, compare the reassembled machine with the manual’s diagrams. Check the basket, filter holder, carafe lid, and any drip-stop part the manual mentions. A misplaced component can cause leaks or overflowing, so stop using the machine if water moves toward electrical areas.
Solutions: a safe diagnostic sequence
Step 1: Unplug, cool, and inspect the visible parts
Unplug the coffee maker before removing the carafe, brew basket, filter, or spray-head component. Let hot surfaces and water cool down, and keep water away from the plug, controls, and electrical connections.
Empty the reservoir and check for residue. Look at the spray head for blocked openings, the basket for coffee buildup, and the carafe for any residue that might make the output look abnormal. Keep the machine unplugged while inspecting it.
Food-contact cleaning guidance is available from the United States Food and Drug Administration at fda.gov. While the FDA covers food safety, its general info doesn’t replace the cleaning instructions written for a specific coffee maker.
Step 2: Check the basket before descaling
Use a fresh paper filter that fits the basket and add the amount of coffee the manual recommends. Choose the grind described for a normal drip cycle instead of a very fine grind made for another brewing method.
Check the basket during brewing only if it’s safe to watch without opening hot parts. If water pools around the filter while the spray head works normally, there’s probably a drainage blockage. Coffee that drips slowly but water-only cycles seem normal may indicate a problem with the filter or grounds.
The filter should stay open against the basket walls and shouldn’t block the outlet in ways the manual doesn’t show. A grind that’s too fine can keep the basket wet and full long after water stops flowing.
Step 3: Clean the removable parts
Clean the removable parts like the reservoir, brew basket, paper-filter holder, and carafe following the manual’s instructions. Use appropriate cleaning methods to remove coffee residue instead of scraping delicate openings with metal tools. Rinse everything as directed and make sure parts are reassembled correctly before the next brew.
The reservoir needs special attention because residue at its outlet can disrupt the water flow. The spray head also requires care, since a small blocked opening can change how water reaches the grounds. Clean the carafe separately so its outlet doesn’t interfere with diagnosing issues.
A clean carafe cannot correct a blocked spray head, and a clean spray head cannot correct a collapsed paper filter. Cleaning each path separately makes the next check meaningful.
Step 4: Descale only with approved instructions
Descaling might help if mineral scale has narrowed passages or reduced heat transfer. Use the solution and process recommended by the manufacturer, since machines differ in what they can handle. Some removable parts may not be suitable for certain descaling solutions.
Don’t mix cleaning chemicals or create stronger mixtures than recommended. If the manual doesn’t provide instructions for accessing internal parts, avoid opening the housing to reach the heating element or valve. A faulty component should be repaired by a professional, not fixed with repeated chemical cycles.
After the approved descaling procedure, follow the manual’s rinsing directions. Then compare the spray-head flow and basket drainage separately. If the machine remains slow on an empty cycle, scale may not be the only cause.
Step 5: Reassemble and repeat the comparison
Fit the reservoir, basket, filter holder, and carafe exactly as shown in the manual. Confirm that the carafe is seated and that the paper filter has not folded. Reassembly mistakes can make a clean machine look blocked.
Run the manufacturer-approved check again. A normal water-only flow followed by slow coffee drainage suggests grounds or filter fit. Weak water-only flow after cleaning suggests a remaining blockage, a sticking valve, or an internal heating or electrical fault.
Do not keep operating a machine that leaks toward electrical connections, smells of overheating, trips a protective device, or shows damaged wiring. Stop and seek qualified service for internal electrical inspection.
Step 6: Decide whether the heater is really at fault
A heating element can influence water movement because the heated section is part of the brewing path in many machines. However, a long cycle does not prove that the element has failed. Scale can reduce heat transfer, and a blocked valve or spray head can restrict delivery first.
A heating-element concern becomes more plausible when approved cleaning does not change a weak or abnormal water-only cycle and the machine shows other heat-related symptoms. The user should not test exposed electrical parts without the training and equipment required for that work.
The motor question belongs to a different appliance category. A coffee maker is not a stand mixer, so asking whether its motor is rated for stiff dough or heavy batches does not diagnose a coffee-brewing delay. For any appliance, match the suspected component to the appliance’s actual design instead of borrowing a test from another machine.
Preventive measures for steadier brewing
Use the manual as the primary schedule
Cleaning frequency depends on the machine, water, and use pattern, so a universal descaling calendar would be misleading. Follow the manufacturer’s instructions for the reservoir, spray head, basket, carafe, and descaling solution.
If the water supply leaves visible residue, the water path deserves closer observation. The article what to know about using tap water in a coffee maker offers related guidance, while the appliance manual remains the final authority for acceptable water.
Keep the grind and filter consistent
Use the grind size recommended for the machine and avoid changing several variables at once. If the cycle slows after switching coffee, return to the previous filter and grind setup for comparison. This simple control helps tell apart a coffee-bed problem from a machine issue.
Choose a paper filter that fits the basket and stays open during brewing. Check the filter before starting, especially after removing the basket for cleaning. A folded edge can redirect water and block the outlet.
Clean residue before it becomes a flow problem
Rinse removable parts as the manual recommends and don’t leave wet grounds sitting in the basket. Coffee residue can clog openings and cause poor drainage. Mineral deposits need the proper descaling process, not just rinsing.
Keep the reservoir and carafe free from residue that could look like a machine fault. Never immerse a part unless the manual says it’s safe to do so. Water must stay away from electrical connections.
Watch for energy and coffee waste
A slow brew can keep the machine running longer and waste coffee if the basket overflows, drains unevenly, or makes an underwhelming pot. The appliance’s actual electricity use depends on the model and can’t be judged by cycle length alone.
Don’t assume a longer cycle makes better coffee. In a percolator, constant boiling can cause over-extraction. In a drip machine, a blocked bed can lead to uneven contact and a weak brew.
Know when troubleshooting should stop
Stop routine cleaning if the machine leaks, has damaged wiring, fails to move water repeatedly, or acts strangely after cleaning. Internal valves, heating elements, and electrical parts may need professional repair.
Replacement is often needed when repairs aren’t possible, the body or wiring is damaged, or safe use can’t be confirmed. For more on maintenance, see How Long Does a Coffee Maker Last? A Practical Look, which covers factors affecting lifespan without rushing into a new purchase.
A coffee maker that remains slow after correct filter setup, visible cleaning, and manufacturer-approved descaling needs a service decision rather than endless troubleshooting. That boundary protects the machine and the person using it.
Frequently Asked Questions
Why is my coffee maker slow but the water still gets hot?
Hot water doesn’t always mean the entire water path is clear. Mineral scale can narrow a passage or reduce heat transfer, and a sticking one-way valve or blocked spray head can restrict delivery after heating. Run the approved water-only check, inspect visible openings after unplugging and cooling the machine, and descale only following the manufacturer’s instructions.
Can fine coffee grounds make a working coffee maker seem slow?
Yes, fine grounds make a more resistant coffee bed, and too much grounds can make that bed deeper. A collapsed paper filter can add another restriction. If water reaches the spray head normally but stays above the basket, reset the filter and use the grind and coffee amount recommended for the machine before investigating internal parts.
What should I do if water drips slowly from the spray head?
Unplug the machine and let it cool. Check the manual for instructions on cleaning the spray head, reservoir outlet, and removable parts. Clean only the openings and components the manual specifies, and use the approved descaling process if mineral scale is suspected. Persistent weak flow might mean a restricted valve or an internal fault that needs service.
How can I tell whether the filter or the coffee maker is causing the delay?
Compare an approved water-only cycle with a cycle using the usual filter and coffee setup. Weak flow without coffee suggests an issue with the reservoir, valve, spray head, scale, or heating path. Normal empty flow followed by slow basket drainage points to fine grounds, too much coffee, a collapsed filter, or incorrect basket and carafe positioning.
Should I reset a Mr. Coffee machine that beeps and does not brew?
Use the reset or error procedure in the manual for the exact machine. A reset may clear a control condition, but it cannot remove mineral scale, unclog a spray head, or correct a collapsed paper filter. If the machine still beeps, fails to move water, leaks, or shows an electrical concern after the documented reset, stop using it and seek qualified service.
Slow coffee brewing becomes easier to diagnose once the machine side and coffee-bed side are kept separate. Check the water-only path, then the filter and grounds, then approved cleaning and descaling. That order avoids replacing a heating element when the real problem is a blocked spray head—or changing coffee when a restricted valve is the cause.