Leaks usually have a clear starting point.
The key diagnostic distinction is leak location: liquid escaping at the jar-to-blade joint usually involves the gasket, threads, or mating surfaces, while liquid escaping around the blade shaft indicates a bearing-seal or blade-assembly problem. A sound repair restores the original sealing geometry with the correct gasket or assembly; sealants, excessive tightening, and generic replacement rings can deform the joint, damage threads, or hide a cracked jar rather than fix the leak. That distinction should guide every answer to how to fix a leaking blender.
Key Takeaways
- Unplug the blender, locate the first wet point, and keep liquid away from the motor base.
- A flat, undamaged, exact-fit gasket may solve a bottom-joint leak; shaft leakage usually calls for a complete blade assembly.
- Cracks, warped sealing surfaces, stripped threads, and loose blade shafts are replacement problems, not sealant problems.
How to fix a leaking blender starts with the leak location
Do not begin by tightening the blade assembly. A motor that sounds normal can still be attached to a leaking jar, and a loud motor can distract you from the actual fault. Be sceptical of noise-based diagnosis: heavy batches and stiff dough can make a healthy motor sound strained, while a quiet blender may still be letting liquid into its base.
Unplug the power cord before inspecting, removing, reseating, or tightening the jar, blade assembly, retaining nut, or drive coupling. Do not operate the blender if liquid has entered the motor base; the base should not be submerged or rinsed under running water. The U.S. Consumer Product Safety Commission provides consumer product safety guidance, but the appliance manufacturer’s service instructions remain the controlling source for model-specific disassembly.
Find the first wet point
Empty and dry the blender jar, blade assembly, collar, and accessible outside surfaces. Place the empty jar on a dry towel, then add a small amount of cool water without powering the appliance. Watch the underside and the area around the blade shaft. The first place that becomes wet matters more than the largest puddle, because liquid can travel along threads and collect somewhere else.
- Jar-to-blade joint: Moisture at the lower edge of the jar usually points to the jar gasket or O-ring, the blade-assembly joint, retaining threads, or a damaged sealing surface.
- Blade shaft: Liquid appearing around the point where the shaft passes through the blade assembly can indicate a failed bearing seal. A replacement blade assembly is generally safer than trying to rebuild that internal seal.
- Motor base: Liquid underneath the jar may have reached the drive coupling or base. Stop using the blender until the base has been assessed according to the manufacturer’s instructions.
- Jar wall or corner: A crack, cloudy stress area, warped plastic, or damaged glass surface can let liquid escape even when the blade assembly feels tight.
A leak from the bottom of the jar usually concerns the gasket, blade-assembly joint, retaining threads, or sealing surface rather than the motor itself. Liquid around the shaft changes the repair decision because the bearing seal is part of the blade assembly.
Separate jar, collar, and base designs
Screw-together jars typically use a removable blade assembly, a gasket, and a retaining ring or nut. A fixed blade assembly has fewer user-serviceable joints, so the complete assembly or jar may be the correct replacement. Personal blender cups can use a separate blade lid that seals directly against the cup, while other designs use a collar or drive interface.
The repair method must match the design. A gasket intended for a screw-together jar may not seal a personal cup, even if the ring looks identical. Model-specific instructions matter because the direction of the sealing ring, the order of assembly, and the thread direction vary by design.
Step-by-step inspection and gasket repair
Step 1: Unplug and prepare the parts
Disconnect the blender from power and remove the jar from the motor base. Pour out the contents. If the liquid is hot, allow the jar and its contents to cool before handling the blade assembly. Hot-liquid pressure can worsen an existing leak and can create a burn hazard even when the jar appears correctly assembled.
Use a clean cloth, soft brush, and mild dishwashing solution to remove food residue from the jar edge, gasket groove, threads, and blade assembly. Do not use a sharp blade to scrape the sealing surface. A cut in the gasket or a scratch in the mating surface can create a new leak.
A clean, dry sealing surface is necessary for accurate gasket diagnosis. Food residue can hold the gasket away from the jar and imitate a failed seal.
Step 2: Remove and inspect the gasket
Take the gasket out only if the design allows removal and the manufacturer’s instructions permit it. Examine the ring under good light. Look for cuts, flattening, stretching, twists, hardened areas, missing sections, and compression marks. Check the groove in the jar or blade assembly for dried food, pulp, seeds, and fragments of an older gasket.
The gasket must match the exact jar and blade-assembly design. A visually similar ring can have a different thickness, diameter, cross-section, or material and may seal poorly. Food-grade silicone is common in sealing applications, but material alone does not make an unlisted ring compatible with a particular blender.
- Replace a gasket that is cut, stretched, flattened, twisted, or permanently compressed.
- Clean and reseat a gasket that is intact but displaced or contaminated.
- Do not stack two gaskets to compensate for a gap.
- Do not apply household caulk, glue, thread sealant, or improvised material to the joint.
Step 3: Confirm the direction and position
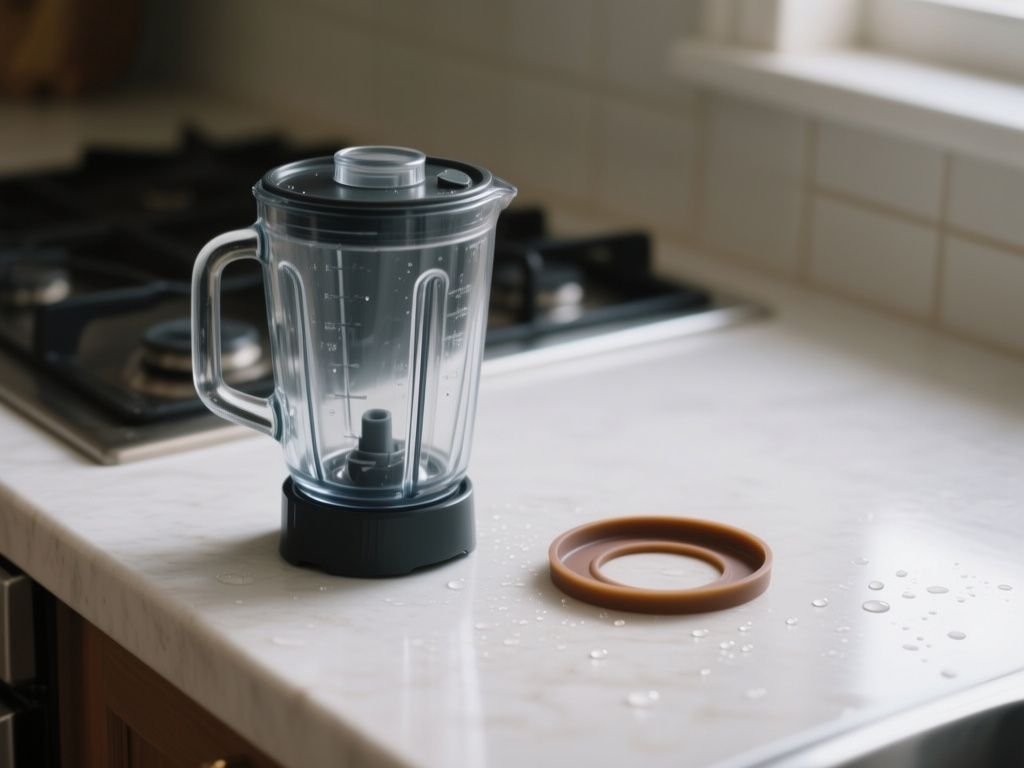
Many sealing rings have a shaped profile rather than two interchangeable faces. The verified assembly instruction for one common design places the sealing ring flat side down to prevent leaking. Follow the marking or diagram for the exact blender rather than assuming every ring installs in the same direction.
Press the gasket into its groove around the entire circumference. The ring should sit flat, without a twist, stretched section, raised area, or portion hanging over the edge. The gasket should not bunch underneath the blade assembly. If the ring moves out of its groove during assembly, remove the parts and start again instead of forcing the retaining nut down over it.
The gasket must remain evenly positioned around the whole sealing path. A ring that looks correct on one side can still be twisted on the opposite side, so inspect the complete circle.
Step 4: Reassemble in the specified order
For a design using a removable ring and blade assembly, the verified order is gasket onto the jar edge, followed by the blades and finally the retaining ring. Other models may use a different arrangement. Use the appliance manual for the exact order, thread direction, and tightening method.
One verified design secures the middle screw by rotating it counterclockwise onto the knives. That direction is not universal. Reverse-threaded or model-specific hardware can be damaged by applying the ordinary clockwise assumption, so stop if the parts do not engage smoothly.
Hand-tighten only as directed. Excessive force can deform the gasket, distort plastic threads, damage stainless-steel threads, or make later removal unsafe. A blade assembly that feels tight is not proof that its sealing surfaces are aligned.
Step 5: Test with cool water
Place the reassembled jar on a dry surface and add a small amount of cool water. Keep the jar off the motor base during the first leak check if the design permits. Observe the underside, blade shaft, and collar area for fresh moisture. If no leak appears, empty and dry the jar before the next check.
Do not jump directly to hot soup, frozen fruit, or stiff dough. A controlled cool-water check isolates the seal without adding heat, pressure, or heavy blade resistance. If the joint leaks again, disassemble it and inspect the gasket position and sealing surfaces rather than tightening harder.
Deciding what to replace
Replace the gasket when the sealing geometry is sound
A gasket-only repair is reasonable when the jar is intact, the blade assembly is not loose, the threads are undamaged, and the leak begins at the gasket contact area. The replacement ring must be listed for the exact jar and blade assembly. Generic replacement rings create compatibility uncertainty and can produce a leak that appears fixed until the blender is filled.
Reseating may solve a displaced gasket if the ring has no cuts, stretching, flattening, or compression damage. Cleaning the groove is part of the repair, not an optional cosmetic step.
Replace the complete blade assembly for shaft leakage
Liquid escaping around the blade shaft can indicate a failed bearing seal inside the blade assembly. The shaft seal is not the same part as the jar gasket. Tightening the retaining ring cannot restore a worn or damaged shaft seal, and household sealant should not be used near a food-contact blade assembly.
A loose blade shaft, rough movement, visible wobble, or leakage that starts at the shaft points toward complete blade-assembly replacement or manufacturer service. Do not keep using the blender to see if the condition improves. A loose shaft can also affect blade clearance and the drive connection.
Replace the jar when the jar itself is damaged
Cracked glass, cracked plastic, warped plastic, damaged stainless-steel threads, and stripped retaining threads are compatibility and safety problems. A crack may open farther as the jar is filled, heated, or subjected to blending forces. Sealant can hide the damage without restoring the original sealing geometry.
Cloudiness alone does not identify a leak, but a cloudy area accompanied by a crack, chip, or visible deformation deserves replacement consideration. The replacement decision should account for the complete mating system: jar edge, gasket, blade assembly, collar, and threads must fit together as designed.
Know when the motor base is involved
Liquid inside the motor base changes the problem from a simple jar repair to an electrical-safety issue. Unplug the appliance and do not switch it on to check whether the motor still runs. Do not submerge or rinse the base under running water.
The U.S. Food and Drug Administration publishes food-safety guidance for materials and contact surfaces; that general information does not make an improvised sealant suitable for a blender. Food-contact parts should be replaced with parts specified for the appliance, and electrical contamination should be handled through the manufacturer or a qualified service route.
A dry motor base does not prove that the internal components are unaffected after liquid entry. Follow the manufacturer’s service instructions before returning the appliance to use.
Why leaks appear during hot or heavy blending
Hot liquids expose weak seals
Hot liquids can increase pressure inside a closed or partially vented jar, and heat can affect the fit of a gasket, lid, or jar interface. A seal that stays dry with cool water may leak with hot soup. Hot contents also increase burn risk if liquid escapes toward the hands, counter, or motor base.
Use only the hot-liquid procedure stated for the blender. Do not seal a hot mixture in a jar that is not designed for that use, and do not assume that a correctly seated gasket makes every hot-liquid operation safe. The jar material, lid design, venting method, and manufacturer instructions all matter.
High-speed and heavy batches reveal alignment problems
High-speed blending creates greater movement and load at the blade assembly than a stationary water check. A heavy batch, including stiff dough, can also load the blades and drive coupling. Motor noise is therefore a poor leak detector. The sound may come from the batch, drive interface, or ordinary load rather than the seal.
The best troubleshooting order is mechanical and boring: locate the wet point, verify the gasket, inspect the threads, check the blade shaft, and only then consider a drive-coupling or motor-base issue. A loud machine should not persuade you to tighten a leaking jar beyond the specified hand-tight position.
Heavy mixtures can reveal a marginal gasket because movement at the joint increases, but a heavy mixture does not repair a damaged seal. Stop blending if liquid appears underneath the jar or inside the base.
Brown liquid needs a separate inspection
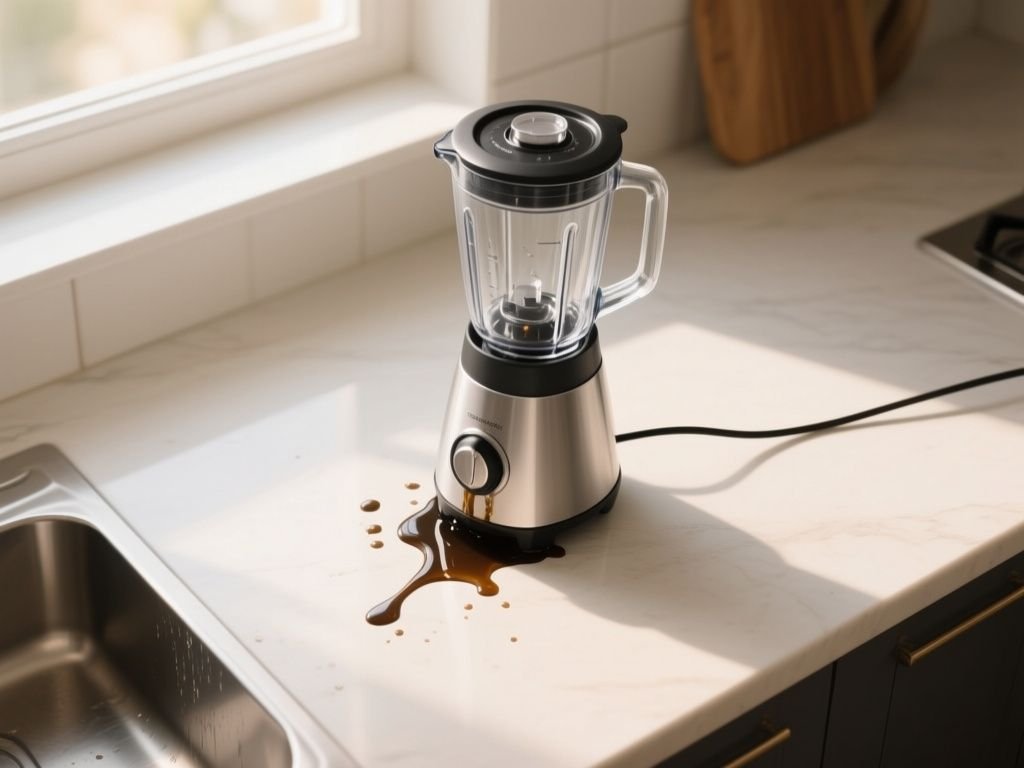
Brown liquid under a blender may be food residue, degraded material, or contamination from a component, but its colour alone does not identify the source. Unplug the blender, separate the jar from the base, and inspect the gasket, blade assembly, underside, and drive area without operating the appliance.
If the liquid comes from around the blade shaft or from the motor base, stop using the blender and seek model-specific service guidance. Do not taste liquid that may have contacted non-food-contact or electrical areas.
Cleaning and maintenance that protect the seal
Clean the gasket without stretching it
Remove food residue promptly using the cleaning method permitted for the model. Wash the gasket and blade assembly with mild dishwashing solution, then rinse and dry them fully. Do not pull the ring sharply, scrub it with an abrasive tool, or leave pulp packed in the groove.
For a fuller cleaning routine, use this guide to cleaning a blender correctly. The central rule is simple: clean the contact surfaces while preserving the gasket’s shape.
Inspect the ring each time it is removed. A small cut, stretched section, or flattened edge can become a leak after reassembly even if the part looked acceptable during washing.
Protect the blade assembly and threads
Do not use the blade edge as a scraping tool. Keep the retaining threads free of dried food and turn the parts gently until the threads engage. Cross-threading can make the assembly sit at an angle, leaving an uneven gap that no amount of tightening will correct.
Stainless-steel threads can still be damaged, especially if the mating part is forced at an angle. Plastic threads can distort under excessive force. Both conditions change the alignment between the gasket and its sealing surface.
Clean the motor base safely
Wipe the outside of the motor base with a suitable damp cloth according to the manual, then dry it. Never submerge the base or rinse it under running water. If liquid has entered openings around the drive coupling, do not power the unit to test it.
The article cleaning mistakes to avoid with a blender is useful for separating washable jar parts from the electrical base. That distinction prevents a cleaning job from becoming a safety problem.
Repair mistakes that make a leak worse
Using sealant or an improvised ring
Sealant changes the thickness and flexibility of a designed joint. It can squeeze into threads, contact food, interfere with blade removal, or hide a crack. An improvised ring can stretch during assembly and leave a thin section that does not compress evenly.
Use the correct gasket or complete assembly instead. If the exact part cannot be identified, pause the repair and use the model documentation or manufacturer service channel.
Testing with the motor base attached
Testing a suspected leak while the jar sits on the base risks sending liquid into the drive area. A blender should not be operated after liquid enters the motor base until the appliance has been assessed according to its service instructions.
Cool-water testing away from the base is the safer diagnostic step when the design allows it. Never place hands near moving blades, even during a brief test.
Assuming every bottom leak is a gasket
A bottom leak can come from the gasket, retaining threads, blade assembly, jar, or shaft seal. Replacing rings repeatedly without locating the first wet point wastes parts and can increase long-term repair cost without correcting the underlying damage.
If a new exact-fit gasket fails after correct installation, inspect the mating surfaces and blade shaft. A cracked jar, warped edge, stripped thread, or loose retaining nut requires a different remedy.
Continuing with heavy batches
Stiff dough and thick mixtures place more resistance on the blades and drive coupling than thin liquids. Don’t use a leaking blender for heavy batches while waiting for a replacement part. The extra load can spread liquid farther and make the source harder to identify.
Motor noise deserves attention, but it does not override a visible leak. Stop the appliance first, then diagnose the mechanical joint.
A practical repair decision tree
Use the following sequence rather than buying parts at random:
- Unplug the blender. Remove the jar and dry the exterior.
- Locate the first wet point. Check the jar-to-blade joint, shaft, jar wall, and motor-base area.
- Inspect the gasket. Confirm exact compatibility, flat placement, correct direction, and freedom from residue or damage.
- Inspect the threads and retaining hardware. Look for stripping, cross-threading, cracks, and a loose retaining nut.
- Check the blade shaft. Shaft leakage or looseness points toward complete blade-assembly replacement or service.
- Check the jar. Replace a cracked, warped, chipped, or otherwise damaged jar rather than sealing over it.
- Test with cool water away from the motor base. Stop if moisture returns.
The correct replacement may be a gasket, blade assembly, jar, or service intervention. Repeated gasket replacement can cost more over time than replacing a damaged jar, but the right choice depends on the appliance, part availability, and the extent of the damage; no universal cost figure applies.
A repair is complete only when the original sealing geometry is restored and the motor base remains dry. A temporary reduction in dripping is not proof that the appliance is safe to operate.
Frequently Asked Questions
How can I tell whether a leaking blender needs a gasket, blade assembly, or jar?
Locate the first wet point with the blender unplugged. Moisture at the jar-to-blade joint points toward the gasket, threads, retaining hardware, or mating surface. Liquid around the blade shaft suggests a failed bearing seal and usually calls for a complete blade assembly. A crack, warped edge, chip, or stripped thread means the jar or related part should be replaced rather than patched.
Can I fix a leaking blender by reseating or replacing the gasket?
Yes, if the jar and blade assembly are intact and the leak begins at the gasket joint. Remove residue, check the ring for cuts or compression damage, and install an exact-fit gasket flat, without twisting or stretching it. Follow the model’s specified direction; one verified design requires the flat side down. Test with cool water before using hot or heavy mixtures.
Why does my blender leak only with hot liquids or high-speed blending?
Heat can increase pressure and change the fit of a marginal seal, while heavy batches place more load on the blade assembly and drive coupling. A cool-water test may therefore miss a weakness that appears during actual blending. Stop using the appliance if liquid reaches the base, follow the manufacturer’s hot-liquid instructions, and inspect the gasket, threads, jar, and shaft.
Is it safe to keep using a blender that leaks underneath the jar?
No. Unplug the blender and determine whether liquid is staying at the jar joint or entering the motor base. Do not operate the appliance if liquid has reached the base, and do not rinse or submerge the base. Replace cracked or warped parts, damaged threads, loose blade assemblies, and failed shaft-seal assemblies rather than relying on sealant or extra tightening.