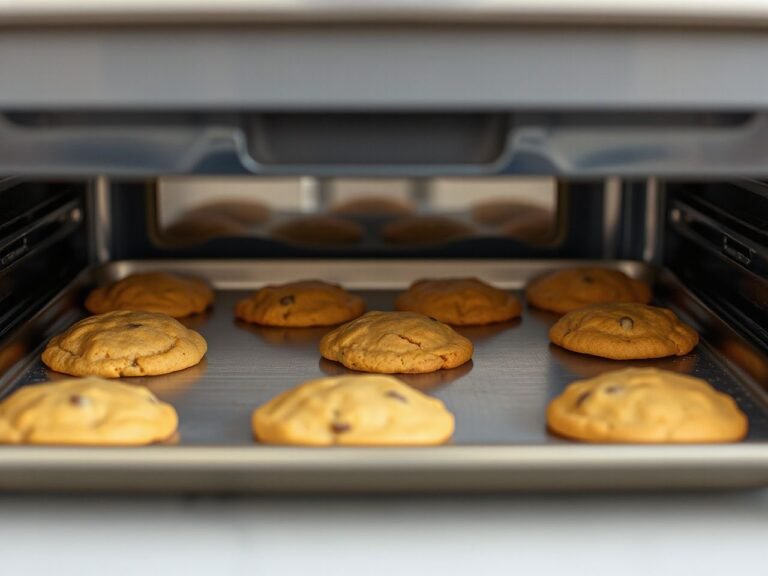
Heat and metal explain more about cookies than most recipes admit. When a batch spreads into one continuous sheet, the recipe is usually not the culprit at all. The baking sheet is. A dark, thin pan transmits heat so aggressively that the butter melts into a puddle before the flour has had time to set and hold a shape. A dark finish absorbs radiant heat instead of reflecting it, and thin metal has no mass to slow that transfer down, so the dough is hit hard from below in the first two minutes, exactly when it has no structure to resist with. That is the real secret to keeping cookies from spreading: you have to control the marriage between your dough temperature and your sheet’s metal.
When cookies spread, the culprit is often the baking sheet itself rather than the recipe. Check the sheet’s color and thickness before blaming the dough: dark, thin sheets transmit heat too aggressively, causing butter to melt and flow before the flour can set. The real fix is pairing the right sheet with the right dough temperature—like using a light-colored aluminum sheet with chilled dough for a controlled rise.
Key Takeaways
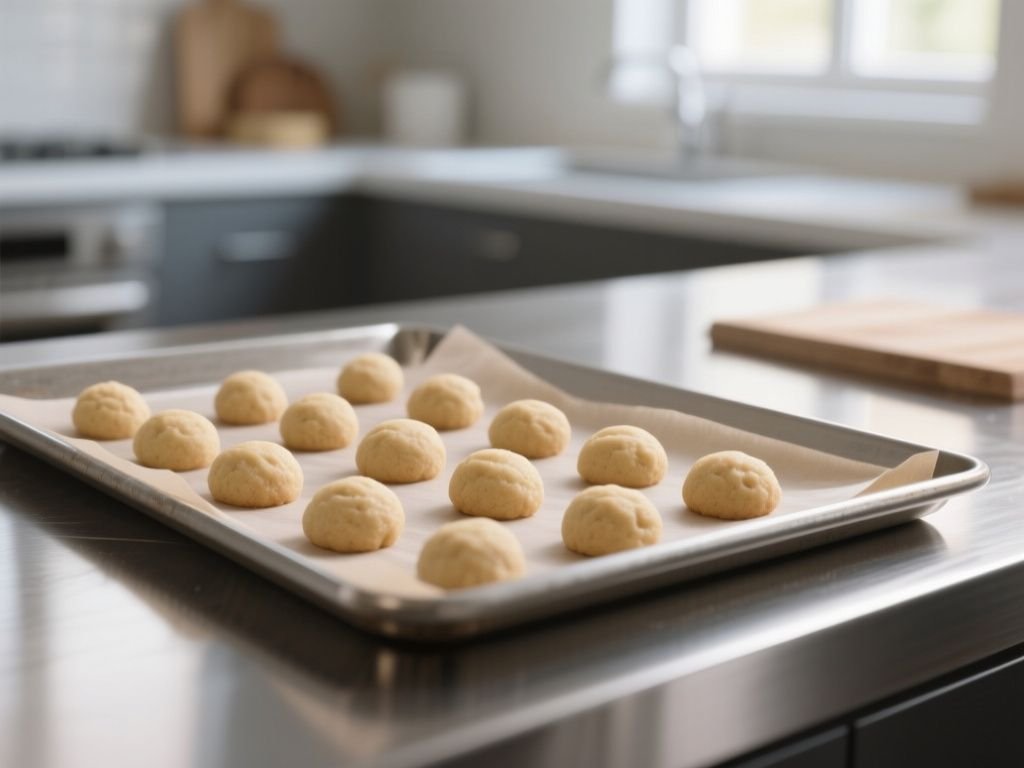
- Use a cool, light-colored aluminum half-sheet pan lined with parchment paper for every batch.
- Chill your dough for at least 30 minutes before scooping and baking; cold butter spreads less.
- Verify your oven’s true temperature with an oven thermometer, and never place dough on a hot pan.
Why Cookies Spread Too Much
Cookies spread for three main reasons: fat that melts too early, dough that starts too warm, and a pan that delivers too much heat too fast. Butter is the usual culprit. At 68°F, butter holds its shape; at 90°F, it begins to slump. If your dough goes into the oven at room temperature on a preheated or dark pan, the butter melts before the egg proteins and starches can firm up. The result is a flat, greasy disk.
Another factor people overlook is sugar. White sugar melts and liquefies in the oven, pulling moisture out of the dough and encouraging spread. Brown sugar, with its molasses, holds more moisture and creates a chewier, less spread-prone cookie. The ratio matters, but that is a recipe discussion. For now, focus on what you can control without changing your recipe: the pan, the parchment, the dough temperature, and the oven’s actual heat.
Step 1: Set Up Your Baking Sheet the Right Way
A baking sheet is not just a flat piece of metal. Its color, thickness, and surface treatment all change how heat reaches your dough. If you want to stop cookies from spreading, start with the sheet itself.
Use a Light-Colored Aluminum Half-Sheet Pan
Dark non-stick sheet pans absorb more radiant heat from the oven’s heating elements. That extra heat hits the bottom of each dough ball the moment you set it down, melting the butter from underneath before the top has a chance to bake. A light-colored aluminum sheet pan reflects heat instead of absorbing it. The dough warms more gradually, giving the flour and eggs time to set the cookie’s structure. If your cookies spread on a non-stick sheet but not on a parchment-lined one, the dark coating is usually the reason, not the non-stick surface itself.
For thickness, look for an 18-gauge aluminum half-sheet pan at minimum. Thinner pans—20-gauge or lower—warp at high heat and create hot spots. A heavy-gauge pan, around 13 to 18 gauge, distributes heat evenly and resists warping. That even heat means every cookie on the sheet bakes at the same rate, so none of them get an extra head start on spreading.
Line with Parchment Paper, Not Grease
Greasing a baking sheet with butter or cooking spray adds extra fat directly under each cookie. That fat liquefies immediately and accelerates spread. You do not need grease to prevent sticking if you use a liner. Parchment paper provides a non-stick barrier and also prevents butter from seeping into the pan’s surface, which would create oily spots and uneven browning. A silicone baking mat works too, but it insulates slightly more than parchment. That insulation can actually slow bottom browning and may reduce spread a touch for delicate cookies, but it also makes the pan surface a hair warmer over time because the mat holds heat. For most drop cookies, parchment is the cleaner, more predictable choice.
If you are baking something like our Brownie Mix Cookies, which have a higher fat content, the parchment layer becomes even more important. The extra butter in brownie-based doughs wants to pool and spread, and a bare metal surface will invite that.
Never Put Dough on a Warm Pan
This is non-negotiable. If you bake multiple batches, you must cool the sheet completely between rounds. Running a hot pan under cold water warps the metal, and wiping it with a damp cloth leaves moisture that can steam the cookies. The simplest method: let the pan sit on a wire cooling rack for 10 to 15 minutes until it feels barely warm to the back of your hand. Then reline with fresh parchment and scoop.
Step 2: Chill Your Dough Like a Seasoning Purist
I treat cookie dough like a cast iron pan: it needs time to settle before it hits the heat. Chilling does two things. First, it firms the butter so it melts slowly in the oven instead of all at once. Second, it lets the flour hydrate fully, which builds a stronger gluten network that resists spreading. The result is a thicker, more even cookie.
Chill for at Least 30 Minutes, Preferably 2 Hours
The minimum chill time that makes a measurable difference is 30 minutes. That is enough to drop the dough’s core temperature below 65°F. For best results, portion the dough first with a cookie scoop, arrange the balls on a parchment-lined plate, and chill them for 2 hours or overnight. Cold dough straight from the fridge goes onto the cool pan, and the butter stays solid until the outer edges start to set. Research from the King Arthur Baking Company confirms that longer resting times also deepen flavor as the sugars and starches break down, but for spread control, 30 minutes is the floor.
Use Cold Butter When Mixing, Not Just Cold Dough
Many recipes call for room-temperature butter, and that is fine for creaming. But if you want less spread, use butter that is still slightly firm—about 60°F to 65°F. It will cream with the sugar but leave tiny solid bits that create steam pockets during baking, helping the cookie puff instead of flatten. If your recipe uses melted butter, you must chill the dough longer, because melted butter has already lost its crystalline structure and will spread more readily.
While the dough chills, you can satisfy any raw-cookie cravings safely with our Edible Cookie Dough Recipe. It is designed to be eaten uncooked, and it will keep you from sneaking spoonfuls of the baking dough, which warms it up and adds moisture.
Step 3: Control Your Oven’s Actual Temperature
Your oven dial might say 350°F, but the real temperature inside could be 325°F or 375°F. That discrepancy changes everything about cookie spread. An oven running hot melts butter too fast; an oven running cold gives the dough time to slump before the outside sets. You need to know the truth.
Invest in an Oven Thermometer
An oven thermometer costs less than a bag of good chocolate chips and solves more problems. Place it in the center of the middle rack, preheat the oven for at least 20 minutes, and read the thermometer before you put the first tray in. If your oven is off by more than 10°F, adjust the dial accordingly. The USDA Food Safety and Inspection Service recommends verifying oven accuracy with a separate thermometer because built-in sensors drift over time. For cookies, a stable 350°F to 375°F is the sweet spot for most drop recipes.
Preheating fully matters too. A short preheat means the heating element stays on longer during the first few minutes of baking, blasting the bottom of the pan with intense radiant heat. That blast accelerates butter melt and spread. Give your oven a full 20 minutes after it beeps.
Position the Rack in the Middle
The middle rack gives the most even air circulation. The bottom rack places the pan too close to the lower heating element, which scorches the bottoms and drives spread unevenly. The top rack can over-brown the tops before the centers set. If you must bake two sheets at once, rotate them top to bottom and front to back halfway through, but for a single batch, stick to the middle.
Do Not Overcrowd the Oven
Air needs to move around each pan. If you cram three sheets into a small oven, the temperature drops and then spikes as the element cycles. That fluctuation causes inconsistent spread. Bake one sheet at a time if you can, or leave at least two inches of space between pans on different racks.
Step 4: Troubleshoot Remaining Spread at the Dough Level
Even with the right pan, parchment, and temperature, some doughs still spread more than you want. That usually comes down to ingredient ratios, mixing method, or portion size. Here is how to diagnose what is left.
Check Your Butter-to-Sugar Ratio
Too much butter relative to flour is the fastest way to a flat cookie. If your recipe calls for 1 cup of butter to 2 cups of flour and you are still getting puddles, try reducing the butter by 2 tablespoons or adding 2 tablespoons of flour. Do not overdo it—flour is not the enemy, but it does dry the cookie. A chewy cookie needs some spread; you just want to cap it.
White sugar promotes spread more than brown sugar. If your recipe uses all white sugar, swap in half brown sugar for a chewier texture and less spreading. The molasses in brown sugar adds moisture and acidity, which reacts with baking soda to create lift.
Use a Cookie Scoop for Uniform Size
Uneven dough balls bake unevenly. A #40 cookie scoop holds about 1.5 tablespoons of dough and produces cookies that all finish at the same time. If you scoop by eye, some balls are small and some are large. The small ones set fast and stay thick; the large ones melt outward before the center cooks. Uniform size means uniform heat absorption, so every cookie spreads the same amount.
Consider an Insulated Baking Sheet Only for Delicate Cookies
Insulated baking sheets have a layer of air between two metal sheets. That air pocket slows heat transfer from the bottom, which can reduce spread on very delicate cookies like lace cookies or meringues. But for standard chocolate chip or sugar cookies, an insulated sheet often prevents the bottom from browning properly, leaving you with a pale, soft cookie that still spreads because the center never gets hot enough to set. A light-colored heavy-gauge aluminum pan with parchment is the better all-purpose choice. If you already own an insulated sheet, use it only for cookies that are prone to burning on the bottom, not spreading.
If you enjoy a cookie with a slightly cakey, brownie-like texture, our Brownie Cookie Dough Sandwich Cookies Recipe uses a thicker dough that holds its shape well. Same principles apply: cool pan, chilled dough, accurate oven.
Frequently Asked Questions
Why do my cookies spread out too much even when I chill the dough?
Chilling helps, but it cannot fix a pan that is dark or hot, or an oven that runs 25°F too high. Check your baking sheet—if it is dark and thin, switch to a light-colored heavy-gauge aluminum half-sheet pan lined with parchment. Then verify your oven temperature with a separate thermometer. If the dough is still too soft, your butter-to-flour ratio may be off; try adding 2 tablespoons of flour or reducing butter by 1 tablespoon per cup.
Does the color of the baking sheet really affect how much cookies spread?
Yes. Dark metal absorbs more radiant heat than light metal. That extra heat melts the butter in the dough from the bottom before the cookie structure sets, causing rapid spread and over-browned bottoms. A light-colored aluminum sheet pan reflects heat, warming the dough more gradually. This is the single most overlooked factor in cookie spread problems. A parchment-lined dark pan will still spread more than a parchment-lined light pan.
Should I use parchment paper or a silicone baking mat to stop cookies from spreading?
Both work, but parchment paper provides a slightly better balance for drop cookies. Parchment is thin, so it does not insulate the bottom of the cookie, allowing the dough to set quickly while still preventing stick. Silicone mats are thicker and hold more heat, which can lead to slightly more spread for butter-heavy doughs. Neither requires greasing, and greasing is worse for spread because it adds extra fat under the dough. For most cookies, reach for parchment.