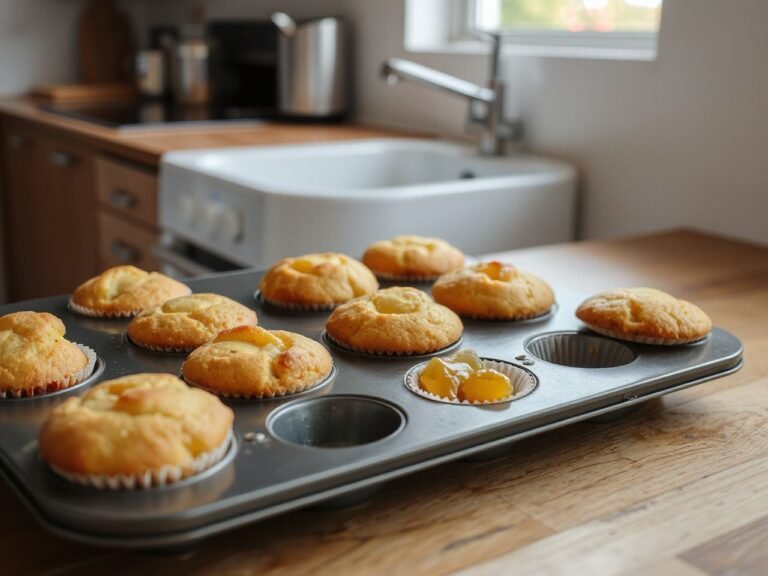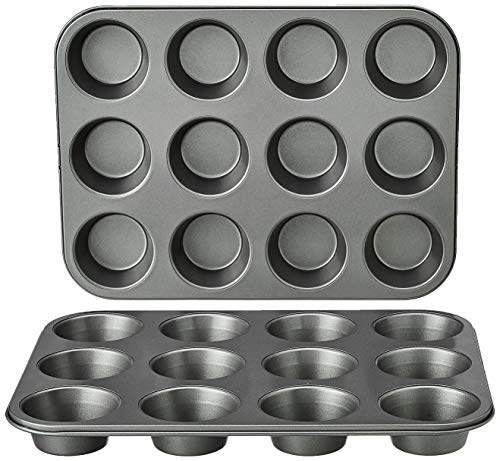
Baking a perfect muffin starts with the pan. Get that wrong, and even the best batter falls flat. The detail most buying advice skips is that the depth of the cup matters as much as the width—standard pans vary from 1-inch to 1.5-inch deep cups, and that changes the proportion of crust to crumb, because a deeper cup gives the same volume of batter less surface area exposed to the oven air. Also, uncoated aluminum pans brown nicely but require thorough greasing, while nonstick pans are convenient but need to be handled gently to keep the coating intact. This muffin pan buying guide walks you through every detail so you can pick the right pan the first time.
Key Takeaways
- A standard muffin pan cup holds about 1/2 cup of batter and measures roughly 2.5 inches across the top.
- Dark metal pans brown faster; drop your oven temperature by 25°F to avoid over-baked edges.
- Uncoated aluminum gives a crisp crust but needs thorough greasing, while nonstick demands gentle care.
- Silicone pans need a baking sheet underneath for stability, and cast iron requires regular seasoning.
Beginner’s Guide to Muffin Pan Basics
You don’t need a dozen pans to bake great muffins. One solid pan that fits your oven and your baking habits will do more good than a drawer full of specialty shapes. But before you buy, understand what separates a workhorse from a waste of money.
Understanding Cup Sizes and Capacity
A standard 12-cup muffin pan typically has cups that measure 2.5 inches across the top and hold about 1/2 cup of batter. That size works for most muffin recipes. Mini muffin pans have cups about 1.75 inches wide and hold 1 to 2 tablespoons each, ideal for bite-sized treats or appetizers. Jumbo muffin pans feature cups up to 3.5 inches across and hold up to 1 cup of batter, perfect for bakery-style muffins or individual frittatas.
What does ‘standard’ actually mean? It varies by manufacturer. Some brands stamp a 12-cup pan with slightly shallower cups, others go deeper. Always check the product details for cup volume if you consistently use a particular recipe. Muffin pan capacity varies by manufacturer, so check the volume marking or product details before you buy. A recipe scaled for a 1/2-cup cup will overflow a pan with only 1/3-cup capacity.
For regular muffins, a 12-cup standard pan is the right starting point. Mini and jumbo pans are specialty tools you can add later once you know what you like to bake.
Material Matters: Metal vs. Silicone vs. Cast Iron
The material of your muffin pan controls how heat reaches the batter. Aluminized steel is the most common choice—it conducts heat evenly, resists rust, and is lightweight. Carbon steel pans are similar but often darker, so they brown more aggressively. Stainless steel muffin pans are rare, heavy, and prone to hot spots, so I rarely recommend them. Silicone pans are flexible, nonstick by nature, and easy to store, but they insulate rather than conduct, so muffins come out paler and softer.
Cast iron muffin pans are a different animal. They hold heat like nothing else, producing a deeply browned, almost fried crust on the bottom of each muffin. But they require seasoning and careful drying to prevent rust. If you’re willing to maintain it, cast iron rewards you with decades of service.
Are silicone muffin pans as good as metal ones? No—not if you want a golden, crisp exterior. Silicone produces a tender but pale muffin, and the pan is floppy. You must place silicone pans on a baking sheet for support when carrying them to and from the oven. Metal wins for browning and structural integrity.
Coating Considerations: Nonstick or Not?
Uncoated aluminum pans brown beautifully but demand a thorough greasing with butter, shortening, or baking spray. Miss a spot and you’ll pry muffins out with a knife. Nonstick coatings—usually PTFE-based—release cleanly but scratch easily. Metal utensils and abrasive scrubbers will strip the coating, so you must handle them gently.
Is a nonstick coating necessary? Not at all. Uncoated pans work fine if you grease them properly. Uncoated aluminum or cast iron is often preferred for most muffin recipes because of the crust those materials produce. Nonstick is convenient for delicate batters or if you dislike greasing, but it’s not a requirement.
The FDA maintains guidelines on perfluorochemicals used in nonstick coatings, and their guidance on PFCs confirms that properly manufactured nonstick pans are safe for food contact at normal baking temperatures. Avoid heating any nonstick pan above 500°F, because that’s when coatings can begin to break down.
Intermediate Guide: Fine-Tuning Your Baking
Once you own a decent pan, the next level is controlling how heat and moisture interact with your batter. Small adjustments in prep, temperature, and maintenance can mean the difference between a bakery-worthy muffin and a soggy disappointment.
Greasing and Lining Techniques
Paper liners are the easiest route—just drop one in each cup and fill. But liners also trap steam, so muffins baked in liners tend to be softer and less browned on the sides. For a crisp exterior, skip the liner and grease the pan directly. Use a pastry brush or your fingers to coat every interior surface.
The classic butter-and-flour method works, but solid vegetable shortening is more reliable because it has no water content. Apply a thin coat of shortening, sprinkle in about 1/2 teaspoon of flour per cup, then rotate and tap the pan to coat all sides. Dump out the excess flour. That’s your nonstick barrier.
Silicone muffin cups and reusable liners are another option. They release well and reduce waste, but they insulate the batter from the metal, so you’ll get less browning. If you prefer soft muffins, they’re a fine choice.
Temperature and Pan Color Adjustments
Dark metal pans produce browner baked goods; you may need to lower the oven temperature by 25°F. That’s not a myth—dark surfaces absorb more radiant heat than light ones. Penn State Extension has published guidance on bakeware color and its effect on browning in their food preservation and baking resources. If your muffins consistently come out too dark on the bottom or edges, drop the temp and add a few minutes to the bake time.
Conversely, shiny aluminum pans reflect heat, so muffins may need the full recipe temperature and a slightly longer bake. Also keep in mind that muffin pans are not all oven-safe at the same temperature; always check the maximum safe temperature. Many nonstick pans are rated to 450°F, but some silicone pans handle 500°F or more. Check the manufacturer’s stamping or packaging before cranking up the oven.
What’s the difference between a muffin pan and a cupcake pan? Practically none—the terms are used interchangeably. Cupcake pans tend to have shallower, more rounded cups, while muffin pans sometimes have slightly straighter sides, but you can bake either in either pan. The real difference comes from the recipe: muffins are denser and less sweet, cupcakes are lighter and frosted.
Pan Care and Maintenance
How you treat your pan after baking determines how long it lasts. Nonstick coatings can be damaged by metal utensils and abrasive cleaners, so use wooden or silicone spatulas and wash with a soft sponge and warm soapy water. Never scrub with steel wool or put a nonstick pan in the dishwasher—the harsh detergents and high heat will degrade the coating.
Uncoated aluminum pans often develop a dark patina over time. That’s actually good—the seasoning buildup improves release. Wash it with hot water and a gentle scrub, but don’t scour off the brown layer. Dry immediately to prevent oxidation.
For burned-on food, fill the pan with hot water and a drop of dish soap, let it soak for 20 minutes, then scrub with a nylon brush. For stubborn residue, make a paste of baking soda and water, apply it to the burned spots, and let it sit for an hour before scrubbing. Avoid oven cleaner on nonstick—it will strip the coating.
Advanced Guide: Specialized Pans and Creative Uses
If you’ve been baking for a while, you might want to branch out into materials and techniques that unlock new textures and flavors. This is where cast iron, carbon steel, and creative savory applications come in.
Cast Iron and Carbon Steel Pans
I’ve stripped and rebuilt more cast iron than I will admit, and a cast iron muffin pan is a thing of beauty. The heavy metal holds heat so well that the bottom of each muffin develops a crust almost like fried cornbread. Preheat the pan in the oven while it heats up, then add your batter. The sizzle when the batter hits the hot iron is the sound of a perfect crust forming.
How do you care for a cast iron muffin pan? Rinse it with hot water immediately after use, scrub gently with a stiff brush (no soap, or only a tiny drop if necessary), then dry it thoroughly on the stove over low heat. Rub a thin coat of neutral oil or shortening into the cups while the pan is still warm, and wipe off the excess. Store it in a dry place. Never let it soak in water, and never put it in the dishwasher.
Carbon steel pans behave similarly but are lighter. They require the same seasoning routine. Both materials are safe at very high temperatures—up to 500°F or more—so they work for cornbread, popovers, and Yorkshire pudding.
Silicone Pans: Pros, Cons, and Best Practices
Silicone muffin pans have one big advantage: nothing sticks to them, ever. No greasing, no liners, no prying. But that convenience comes at a cost. Silicone is an insulator, not a conductor, so the batter cooks more slowly and never develops a browned exterior. Muffins come out pale and soft, almost steamed in texture. For some recipes—delicate custards, mini cheesecakes, very soft muffins—that’s okay.
The biggest practical problem is floppiness. A full silicone muffin pan sags when you lift it, sloshing batter everywhere. You must place silicone pans on a baking sheet for support when carrying. Also, silicone picks up odors over time, so dedicate one pan to sweet baking and another to savory if you use it for both. Wash silicone with hot soapy water and occasionally soak it in a baking soda solution to remove lingering smells.
Beyond Muffins: Savory and Creative Applications
Can you use a muffin pan for savory items like quiches or egg bites? Absolutely. A standard 12-cup muffin pan can also bake individual quiches, egg bites, and even mini meatloaves. Grease the cups well, fill with any savory custard or batter, and bake. The portion control and easy release make muffin pans ideal for meal prep.
Can I use a muffin pan in a toaster oven or on a grill? It depends on the size of the toaster oven and the pan material. Most standard 12-cup pans are too large for a compact toaster oven, but mini muffin pans often fit. On a grill, use indirect heat—place the pan away from the flame and close the lid, keeping the temperature around 350°F. Cast iron pans work exceptionally well on a grill because they tolerate direct heat.
If you’re planning a breakfast spread, an egg bite baked in a muffin pan pairs beautifully with this easy chicken dumpling soup recipe—the soup’s broth balances the richness of the eggs. Or try using a jumbo muffin pan for individual portions of one pot marry me chicken pasta, baked with a crispy top. A muffin pan also makes a great mold for frozen treats like mini ice cream cakes or layered puddings.
Frequently Asked Questions
How do I prevent muffins from sticking to the pan without using liners?
Grease each cup thoroughly with solid vegetable shortening, then dust with flour and tap out the excess. This creates a reliable release barrier. Butter alone can stick because its milk solids caramelize and bond to the metal. For uncoated aluminum or cast iron, preheating the greased pan in the oven before adding batter also helps form a quick crust that releases cleanly.
What’s the best material for a muffin pan if I want crispy edges?
Cast iron or uncoated aluminum give the crispest results. Cast iron holds intense heat and browns the bottom deeply, while uncoated aluminum conducts heat efficiently for even browning. Dark metal pans also promote crisping but may require a 25°F temperature reduction. Nonstick pans produce softer, less browned exteriors because the coating insulates slightly.
Is a nonstick muffin pan safe to use at high temperatures?
Most nonstick muffin pans are safe up to 450°F to 500°F, but you must check the manufacturer’s maximum temperature rating. PTFE coatings begin to break down at temperatures above 500°F, so avoid broiling or using the self-cleaning cycle with a nonstick pan. For very high-heat baking, choose cast iron, carbon steel, or uncoated aluminum.
Can I use a muffin pan for cornbread or other quick breads?
Yes, muffin pans work well for cornbread muffins, popovers, and even individual portions of quick breads like banana bread. Grease the cups well because these batters tend to stick. A cast iron muffin pan preheated in the oven produces cornbread with a beautifully crisp crust, similar to a cast iron skillet. For recipes like this chicken tortilla soup, cornbread muffins baked in a muffin pan make a perfect side.