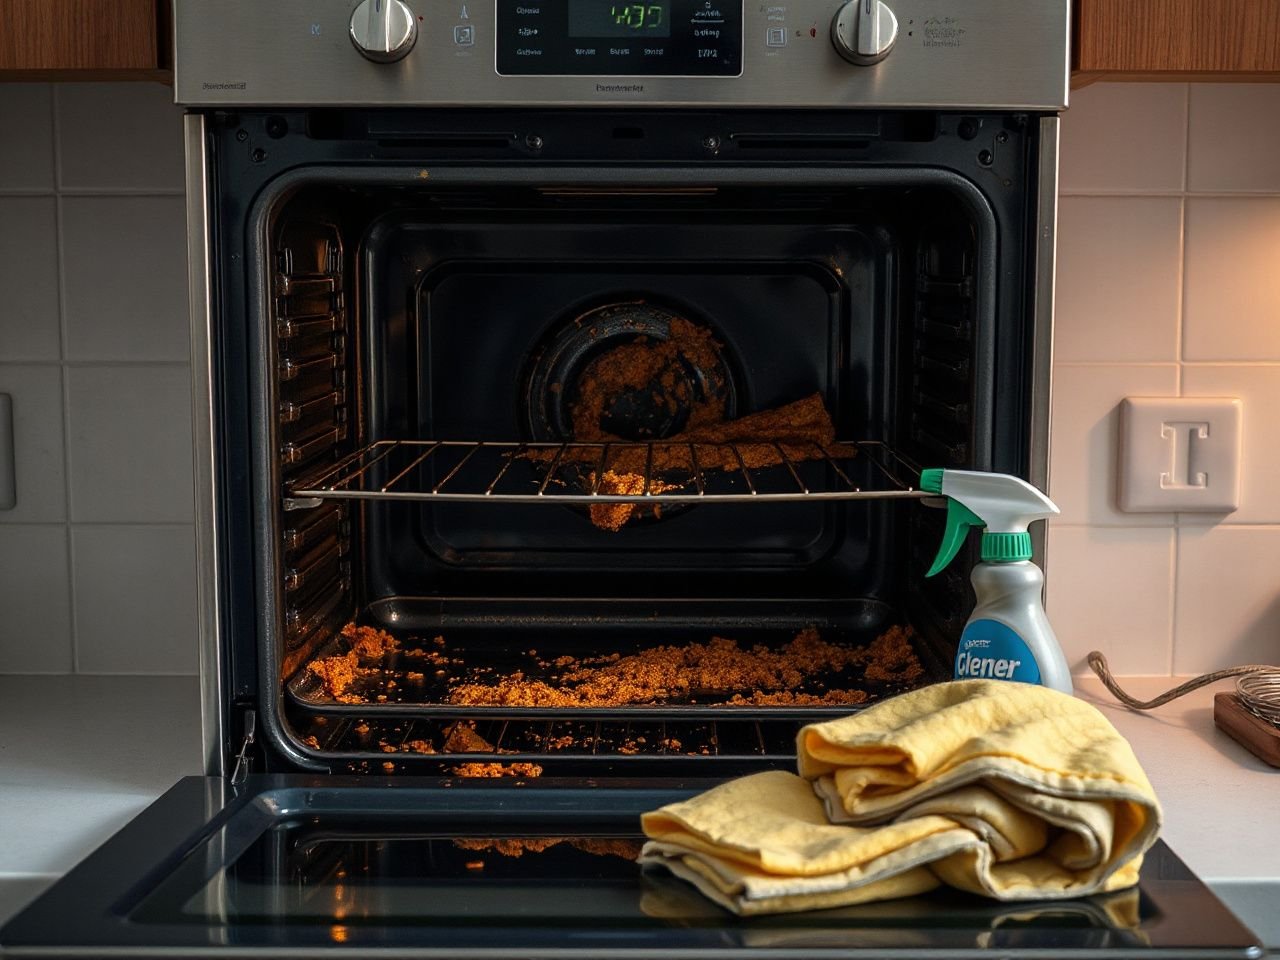
Grease baked onto an oven floor invites the wrong response: reach for the strongest cleaner, spray everywhere, and scrub until the surface looks different from the one described in the manual. Effective oven cleaning depends on matching the method to the oven’s surface and cleaning system, not simply using the strongest chemical available. A manual paste or degreaser works differently from pyrolysis or catalytic liners, and the most common damage comes from treating heating elements, gaskets, aluminum parts, or coated surfaces like ordinary enamel.
These oven cleaning tips begin with identification, then move through a controlled cleaning process. My knife and prep-tool perspective is simple: the first pass matters, but the twentieth cut tells you whether a method is kind to the working surface. Oven cleaning deserves the same discipline. Remove residue without trading a dirty cavity for damaged porcelain enamel, stainless steel, glass, or seals.
Key Takeaways
- Check the oven surface and cleaning system before choosing sodium bicarbonate, detergent, degreaser, steam, or a self-cleaning cycle.
- Keep cleaners and moisture away from heating elements, fans, electrical openings, burners, and the oven door gasket.
- Use light routine wiping to prevent heavy carbon deposits, and reserve deeper cleaning for residue that routine care cannot remove.
Beginner oven cleaning tips: identify the oven before touching the grime
Read the manual and inspect the cavity
Switch the oven off and let it cool completely before cleaning, removing racks, or starting any cleaning cycle. The appliance manual is the controlling reference for removable panels, rack positions, approved cleaners, self-cleaning instructions, and any parts that must remain in place.
The oven cavity may contain several different materials in a small space. Porcelain enamel can tolerate methods that would mark aluminum, while stainless steel and coated glass may react badly to abrasive powders or harsh alkaline products. The oven door gasket is a separate concern because a flexible seal should not be saturated, scrubbed aggressively, or coated with cleaner.
An oven manual determines which parts may be removed and which parts must remain untouched during cleaning. That sentence is worth keeping beside the appliance because guessing about a hidden panel or liner can create more trouble than baked-on grease.
Find out which cleaning system you have
A pyrolytic self-cleaning oven uses a high-temperature cycle to break down residue through thermal cleaning. The cycle may require loose debris, racks, cookware, and other items to be removed first, so the manual matters more than a generic online routine.
Look for terms such as “pyrolytic,” “self-clean,” or “high-temperature clean” on the control panel or in the manual. A pyrolytic oven can become extremely hot during its cleaning cycle, so keep the surrounding area clear, follow the stated ventilation instructions, and do not improvise with added chemical cleaner.
Catalytic oven liners have a treated surface intended to help break down grease during normal heating. They are not ordinary porcelain panels. Catalytic liners should not be scrubbed with abrasive tools or coated with oven cleaner, and a manual should specify whether a liner is removable or washable.
A steam-cleaning function uses moisture and heat to soften light residue. Steam can help with a fresh film or a small spill, but it is not a reliable substitute for manual work on thick, carbonized grease. The listing or manual may describe the required water amount and cycle, so use those instructions rather than adding an unlisted volume.
Choose tools by surface, not by force
A microfiber cloth is a sensible finishing tool for glass, stainless steel, and smooth enamel because it lifts loosened residue without the hard edge of a metal scourer. A soft brush can reach corners, but a brush should not be forced against a gasket, catalytic liner, or electrical opening.
A glass scraper can be suitable for a flat, uncoated glass surface when the appliance manual permits it and the blade is held at a shallow angle with controlled pressure. Do not assume that every oven floor or door panel is plain glass. Porcelain enamel, coated glass, and some decorative finishes can scratch or chip if scraped.
My edge-retention rule applies here: a sharper tool is not automatically a better tool. Scraping should remove a raised deposit, not become a contest between the blade and the surface. If the material is uncertain, soften the residue first and use a plastic scraper or cloth instead.
Intermediate oven cleaning tips: remove baked-on grease safely
Step 1: prepare the oven and the work area
Remove racks and trays only after the oven is fully cool. Shake loose crumbs into a bin, then wipe dry debris from the floor and corners before adding moisture; dry debris is easier to remove before it turns into a paste that spreads across the cavity.
Protect the floor around the appliance with a cloth that can be washed. Open ventilation where practical, keep children and pets away from the work area, and keep cleaners in their original containers. Never combine vinegar or another acid with bleach, ammonia, or caustic oven cleaner.
Sodium hydroxide is used in some commercial oven cleaners and requires ventilation, skin protection, and careful residue removal. A cleaner that cuts grease quickly can still damage skin or leave an unwanted film if the label directions and rinsing instructions are ignored.
Step 2: start with the mildest suitable method
For ordinary grease on compatible enamel, begin with warm water, dish soap, and a cloth. Dish soap helps lift oily residue, while the cloth carries that loosened material away. Apply moisture to the cloth or a small area rather than flooding the cavity.
For stubborn but compatible residue, make a paste from sodium bicarbonate and water. Spread the paste over the deposit, keeping it away from heating elements, fans, electrical openings, burners, the oven door gasket, and catalytic liners. Allow the paste time to soften the residue according to the appliance manual or the product directions, then wipe with a damp microfiber cloth.
Sodium bicarbonate is a mild abrasive, so pressure still matters. Use repeated light passes instead of grinding hard against the surface. The goal is to lift softened grease while preserving the finish beneath it.
Vinegar contains acetic acid and can help remove alkaline residue left by a bicarbonate paste, but it is not a universal grease solvent. Use it only as a separate wipe after the paste has been removed, never as part of a mixture with bleach, ammonia, or caustic oven cleaner. Rinse the cloth, wipe the surface with clean water, and dry the cavity.
Step 3: use commercial oven cleaner only on approved surfaces
A commercial oven cleaner may be appropriate for heavy grease on surfaces named by the manufacturer. Check the label and appliance manual before spraying. Keep sodium hydroxide products away from aluminum, stainless steel components that the manual excludes, heating elements, fans, burners, door seals, and any opening that leads to electrical parts.
Spraying the whole cavity is usually a poor habit because overspray travels farther than the visible grease. Apply the product only where the instructions allow, provide ventilation, wear the stated skin protection, and remove every trace of cleaner with repeated damp-cloth passes. The final wipe should leave no slick feeling, foam, or chemical odor from the product.
Oven cleaner can leave a white film when alkaline residue dries on the surface, when the product is not fully rinsed, or when it reacts with a material that was not approved for that cleaner. Discolored patches may result from chemical contact with a coating, aluminum, stainless steel, or another finish that reacts differently from porcelain enamel.
The safest response to a white film is not more chemical. Use the label’s removal instructions, wipe with clean water, change to a fresh cloth as residue transfers, and stop if the finish appears damaged. If the discoloration remains, consult the appliance manufacturer rather than escalating to a stronger product.
Step 4: clean the oven door glass without trapping residue
Open the cool door and inspect the inner glass, outer glass, edges, and gasket. Use a damp microfiber cloth with dish soap for a light film, or a compatible sodium bicarbonate paste for stubborn marks on approved glass. Keep liquid out of vents, seams, the gasket, and the gap between panes.
Some oven doors allow access to the space between glass panels, while others do not. Do not remove door panels or screws unless the manual gives a procedure for doing so. Trapped residue between panes is a reason to follow the manufacturer’s disassembly instructions, not a reason to pour cleaner into the seam.
A glass scraper may be used on flat, uncoated glass only when the manual permits it. Keep the blade clean and use controlled strokes; grit trapped under the blade can scratch even a suitable surface. Do not scrape the gasket or painted trim.
Dry the glass and inspect the lower edge before closing the door. A clean-looking pane can still hold liquid in a seam, and moisture left there may spread the next time the oven heats.
Step 5: handle racks and baking trays separately
Oven racks and baking trays should be cleaned according to their materials and the appliance instructions. Some racks may be suitable for a dishwasher, while others can lose their smooth movement or finish if exposed to an unsuitable cleaning cycle.
Do not place racks inside a pyrolytic self-cleaning cycle unless the manual specifically permits it. High heat can change the surface of a rack or make it harder to slide. Soak compatible racks separately, loosen residue with a non-damaging brush or cloth, rinse thoroughly, and dry before returning them.
Cleaning oven racks and baking trays outside the cavity also prevents cleaner residue from running onto liners and heating parts. If a rack has a special coating or the material is unclear, use the least aggressive method listed in the manual.
Advanced oven cleaning tips: match stubborn problems to the right solution
Pyrolytic self-cleaning cycles
Pyrolytic cleaning is a built-in thermal process, not a shortcut that makes surface identification unnecessary. Remove loose debris and follow the manual on racks, cookware, liners, ventilation, locking, and cycle selection. Do not add commercial oven cleaner unless the manufacturer expressly permits it.
Keep hands away from the door and controls during the cycle, and wait for the oven to complete its cooling and unlocking process. The manual’s instructions take priority because appliance designs differ. A pyrolytic oven reaches very high temperatures, so this cycle demands more planning than wiping a cool cavity.
After the cycle is complete and the oven is cool, wipe away the remaining ash with a damp microfiber cloth. Do not scour the cavity simply because a small amount of residue remains. If smoke or odor continues, stop using the cycle and seek appliance-specific guidance.
Catalytic liners
Catalytic oven liners need a gentler approach than ordinary enamel. Their treated surface should not receive caustic oven cleaner, abrasive powder, a glass scraper, or aggressive scouring unless the manual specifically says otherwise.
Remove loose crumbs with a soft cloth or the method stated by the manufacturer. Avoid covering the liner with foil or placing a tray where it blocks the intended surface unless the manual allows that arrangement. Grease that repeatedly accumulates on a catalytic liner may indicate that the oven is being used outside the conditions required for the liner to work.
Steam cleaning and light residue
Steam or water-assisted cleaning is useful for fresh splashes and a light film because heat and moisture soften residue. It is less suitable for thick grease that has been repeatedly heated into a hard deposit. Let the function finish, allow the cavity to cool as directed, and wipe the loosened material rather than leaving it to dry again.
Do not pour water into the oven floor unless the manual specifically instructs you to do so. Water near heating elements, burners, fans, electrical openings, or the door gasket can travel into places that are difficult to dry.
Smoke and recurring burnt-on spills
Grease smoke that returns after cleaning usually means residue remains in a corner, on a rack, beneath an edge, or in a place that was not safe to spray. It can also mean new spills are reaching a hot surface during cooking. Inspect the cavity, door area, racks, and trays only when the oven is cool.
Use baking sheets or approved oven-safe liners to catch drips only when the appliance manual permits them. A liner placed over a vent, heating element, or catalytic panel can create a new problem. Clean the stovetop and range hood as well if airborne grease is spreading around the cooking area, but use separate surface instructions for those appliances.
Do not keep repeating a self-cleaning cycle to solve persistent smoke. If careful manual cleaning does not remove the source, or if smoke appears from an electrical area, stop and contact the manufacturer or a qualified appliance professional.
Routine cleaning schedule
Routine domestic cleaning may be weekly, biweekly, or monthly, but the right interval depends on how often spills occur and how quickly residue builds. Wipe fresh splashes after the oven is cool, clean racks when they carry visible residue, and perform a deeper cavity clean when ordinary wiping no longer removes the film.
Fresh grease is easier to remove than carbonized grease. A short wipe after a messy roast can prevent a later session involving stronger chemicals, scraping, and repeated rinsing.
There is no universal calendar that overrides visible condition. A lightly used oven may need less frequent deep cleaning, while repeated roasting or sugary spills may require attention sooner. Record the last deep clean on a note inside a cabinet if household routines make it easy to forget.
What oven cleaning costs over time
Household ingredients such as dish soap, water, sodium bicarbonate, and a cloth have a low direct material cost, but they require manual effort and careful rinsing. Commercial cleaner adds a recurring consumable cost and brings label, ventilation, skin-protection, and residue-removal requirements.
A pyrolytic cycle avoids much of the scrubbing, but it uses the appliance’s high-temperature cleaning function and may require racks or cookware to be removed and cleaned separately. A steam function may use less manual work for light residue, yet heavy grease can still require a manual pass. The lowest long-term cost usually comes from preventing spills and cleaning residue before it hardens, not from selecting the strongest method after buildup becomes severe.
For a closer look at cleaning supplies without treating every surface as interchangeable, see the 2026 guide to oven cleaning products worth considering. Product choice should follow the appliance material and manual, not the promise of maximum strength.
Preventive measures that protect the oven surface
Keep residue from becoming a hard deposit
Covering a suitable baking tray can contain splashes, but foil or an oven-safe liner should never block a vent, touch a heating element, or cover a catalytic liner unless the manual permits it. Wipe spills after the cavity cools rather than allowing several cooking sessions to bake the same grease layer.
Place dishes securely and avoid overfilling them. A spill that reaches the oven floor can carbonize, smoke, and spread during later heating. Prevention is especially valuable for catalytic systems because abrasive cleaning and caustic sprays may be unsuitable.
Keep the gasket and openings dry
The oven door gasket forms part of the door’s seal and should be treated as a delicate component. Wipe it gently with a barely damp cloth if the manual allows cleaning, but do not soak, pull, spray, or scrub the gasket.
Heating elements, fans, burners, and electrical openings should remain free of cleaner and pooled moisture. Never remove an internal panel, fan cover, or heating part unless the manual gives a safe procedure and the oven is disconnected as instructed.
Appliance instructions are the safest authority for cleaning cycles and removable components. For general consumer product safety guidance, the U.S. Consumer Product Safety Commission provides public safety information, but its general material does not replace the oven manufacturer’s instructions.
Know the surface before choosing abrasives
Porcelain enamel, stainless steel, aluminum, coated glass, and catalytic material do not respond identically to the same chemical or tool. A method that is acceptable on a smooth enamel floor can leave marks on stainless steel or damage a treated liner.
Use the softest method that removes the residue. The distinction matters because a clean cavity with a scratched coating or weakened seal has not been properly maintained.
Food-contact surfaces and cleaning chemicals also require careful residue removal. The U.S. Food and Drug Administration publishes food-safety information for consumers; follow the cleaner label and appliance manual for the exact rinsing procedure rather than relying on a generic wipe.
If enamel cookware is part of the same cleaning session, keep its care separate from oven-cavity care. The rules in this guide to cleaning an enameled Dutch oven apply to that cookware surface, not automatically to an oven liner, door gasket, or heating element.
Frequently Asked Questions
What is the safest way to clean an oven with baked-on grease?
Switch the oven off, let it cool completely, and read the manual first. Remove loose debris, then use dish soap or a sodium bicarbonate paste only on compatible surfaces, keeping moisture and cleaner away from heating elements, fans, burners, electrical openings, gaskets, and catalytic liners. Use commercial sodium hydroxide cleaner only when approved, with ventilation, skin protection, and careful residue removal.
Should I use baking soda, vinegar, dish soap, or commercial oven cleaner?
Dish soap suits light oily residue, while sodium bicarbonate paste can soften heavier deposits on approved enamel. Vinegar contains acetic acid and may help remove alkaline residue after a separate wipe, but it should never be mixed with bleach, ammonia, or caustic oven cleaner. Commercial cleaner is reserved for compatible surfaces and requires strict label and manual compliance.
How can I tell if my oven has pyrolytic cleaning or catalytic liners?
Check the control panel, model documentation, and appliance manual for terms such as pyrolytic, self-clean, or catalytic liner. Pyrolytic cleaning uses a very high-temperature cycle and may require racks, cookware, and loose debris to be removed. Catalytic liners are treated panels that should not be scrubbed with abrasive tools or coated with cleaner.
Can I use a glass scraper on the oven floor and door?
Use a glass scraper only on a flat, uncoated glass surface when the manual permits it. Hold the blade at a shallow angle, remove grit first, and use light controlled strokes. Do not scrape porcelain enamel, catalytic liners, coated glass, painted trim, or the door gasket unless the manufacturer specifically approves that tool and surface.
How do I clean oven door glass without damaging the gasket?
Apply a small amount of dish-soap solution or an approved sodium bicarbonate paste to a cloth, not directly into the door seams. Wipe the accessible glass, keep liquid away from the gasket and vents, and dry the lower edge. Never pour cleaner between panes or remove door panels unless the manual provides a removal and cleaning procedure.
Why does oven cleaner leave a white film or discolored patches?
White film commonly comes from alkaline cleaner that dried or was not fully rinsed. Discolored patches can occur when a chemical contacts an unapproved surface such as aluminum, stainless steel, coated glass, or a treated liner. Stop adding cleaner, follow the product’s residue-removal instructions, wipe with clean water, and contact the manufacturer if the finish remains altered.
Is steam cleaning effective for heavy grease?
Steam or water-assisted cleaning is most useful for light residue and fresh splashes because moisture and heat soften the film. Thick, repeatedly heated grease may still need manual cleaning. Use only the water amount and procedure stated in the manual, and never pour water into the cavity unless the appliance instructions specifically direct you to do so.
Can oven racks go in a dishwasher or pyrolytic cycle?
The answer depends on the rack material, finish, and appliance design. Follow the manual before using a dishwasher, soaking method, or pyrolytic cycle. Many instructions require racks to be removed from a high-temperature self-cleaning cycle, and a rack with a special finish may need separate hand cleaning to preserve movement and surface condition.
What should I do if grease smoke keeps returning?
Let the oven cool, inspect corners, racks, trays, the door area, and any approved removable parts, then remove remaining residue with the correct surface-safe method. Check that a liner or baking sheet is not blocking a vent or heating part. If smoke comes from an electrical area or persists after careful cleaning, stop using the oven and seek manufacturer or qualified service guidance.
How often should I clean the oven?
Wipe fresh spills after the oven cools, clean racks when visible residue builds, and schedule deeper cleaning when ordinary wiping no longer removes the film. Routine domestic cleaning can be weekly, biweekly, or monthly, but visible buildup and cooking habits matter more than a fixed calendar. Early wiping reduces chemical use, scraping, and repeated rinsing later.