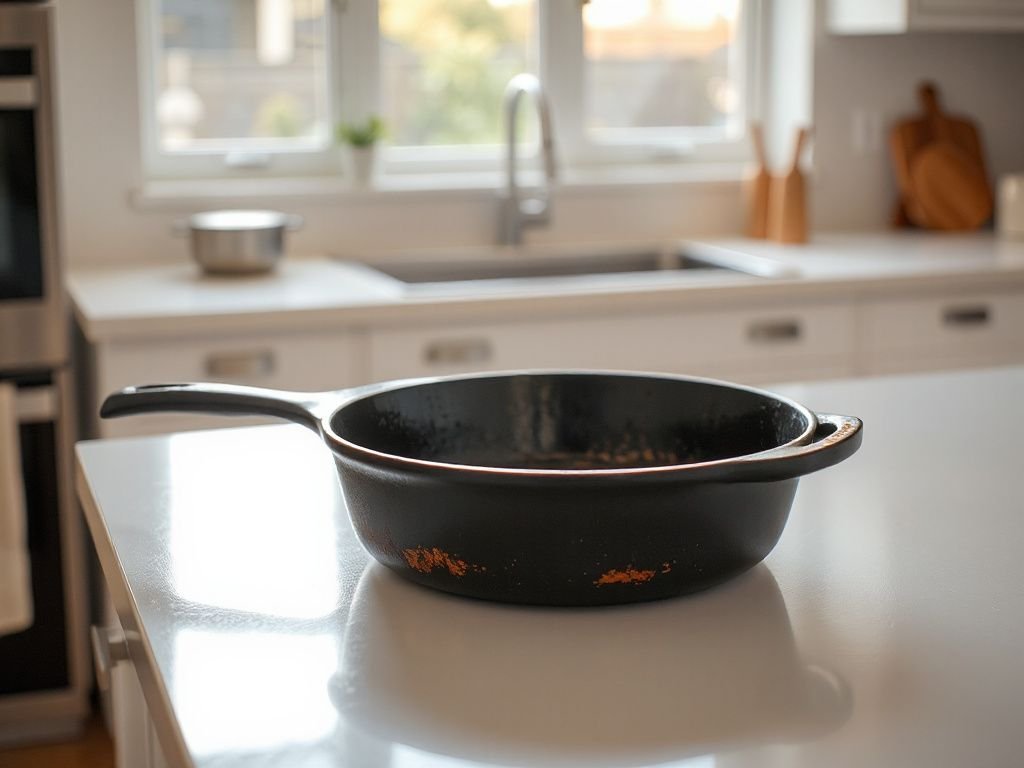
Ignore that orange bloom on your skillet and you will pay for it later. Rust does not stop. It spreads, it pits, and it turns a perfectly good pan into a crumbly, flaky mess that no amount of bacon can save. It takes one humid summer in a cupboard to turn a usable pan into a pitted one, and it takes one wrong tool to turn a rescuable pan into a ruined one. If you are wondering how to remove rust from cast iron without wrecking the pan in the process, you are in the right place, because this is a problem with a correct answer and several very incorrect ones.
The skillet looked like it had been left in a damp basement for decades. A quick scrub with steel wool removes surface rust, but pits that stay orange indicate deeply etched rust that has migrated into the iron’s pores. Surface rust responds to steel wool and vinegar, but pitted rust requires a chemical soak (citric acid, vinegar, or commercial removers) or electrolysis to lift the corrosive pigment from below the surface. Grinding or sanding pits with abrasive paper only leaves rust hidden in the recesses, which later seeps through any seasoning and re-appears as orange bloom.
Key Takeaways
- Surface rust scrubs off with steel wool and a 30-minute vinegar soak, but deep pits need a chemical bath or electrolysis to reach the rust hiding below.
- After any rust removal, dry the pan immediately and rub on a thin coat of oil within minutes to stop flash rust from forming.
- You must remove every trace of rust down to bare gray iron before seasoning, or the new seasoning will flake off within weeks.
Assess the Damage Before You Touch a Tool
Rust is not one problem. It is a spectrum from a light orange dusting to deep, black-rimmed craters that look like the surface of Mars. The fix you choose depends entirely on where your pan falls on that spectrum, and making the wrong call wastes hours or ruins the cooking surface. A wire wheel taken to a pan that only needed a vinegar wipe strips away seasoning and metal that never needed to go, and ten minutes in vinegar barely touches rust that has already worked its way down into the craters of a heavily pitted pan. Both are errors born from skipping the assessment step.
Run your fingers over the rust. If it feels smooth and leaves a fine orange powder on your skin, that is surface rust. It sits on top of the iron and has not eaten into the metal. If the rust feels rough, scaly, or if you can see tiny divots and craters, the rust has migrated into the iron itself. That second type is what separates a ten-minute job from a weekend project.
The Griswold I mentioned earlier had both. The flat cooking surface had surface rust that wiped off with a rag, but the bottom and sidewalls had deep pits where the rust had been working for years. If I had treated the whole pan with the same method, I would have either failed to clean the pits or over-etched the smooth surface. You have to treat each zone according to its own damage level, not the pan as a whole.
Step-by-Step: Removing Surface Rust
This covers the majority of cases: a pan left sitting wet, a garage sale find with a light coat of orange, or a skillet that got splashed and forgotten. Surface rust responds to abrasion plus a mild acid, and you do not need anything exotic. Here is a recommended sequence for cleaning.
Step 1: Gather Your Supplies
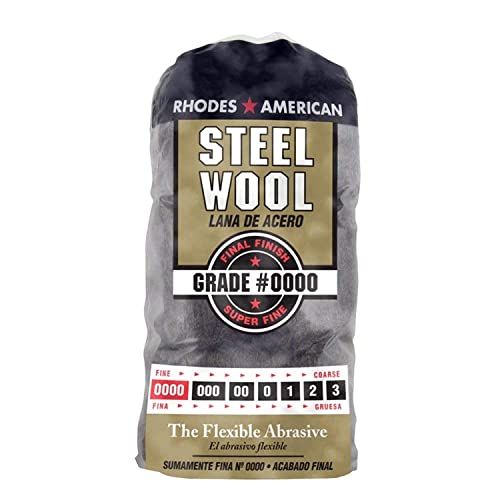
You need fine-grade steel wool (0000 or 000), white vinegar, dish soap, paper towels, a clean dry cloth, and a high-smoke-point oil like grapeseed or canola. A stiff nylon scrub brush helps for getting into corners. Do not use copper wool or anything brass-plated; those metals can transfer onto the iron and create galvanic corrosion later.
Step 2: Scrub With a Soap and Water Base Wash
Wash the pan with warm water and a few drops of dish soap to remove any grease or old seasoning flakes that would block the rust removal. Rinse thoroughly. This step also removes loose surface rust, so do not skip it thinking the vinegar will do all the work.
Step 3: Apply Vinegar and Scrub
Pour a small amount of white vinegar (5% acidity) directly onto the rusted areas. Let it sit for no more than 10 to 15 minutes, then scrub with the steel wool using firm circular pressure. The vinegar dissolves the iron oxide, and the steel wool lifts it away. You will see the rust transfer to the wool as a brown sludge. Rinse the pan under cold water and inspect. If rust remains in spots, repeat the vinegar application for another 10 minutes, but never exceed 30 total minutes of vinegar contact. Soaking cast iron in vinegar for too long will etch the iron surface and cause pitting, turning a smooth pan into a rough one that food sticks to permanently.
Step 4: Rinse, Dry, and Oil Immediately
Once the rust is gone down to clean gray iron, rinse the pan with cold water. Dry it thoroughly with paper towels, then place it on the stove over low heat for 2 to 3 minutes to evaporate any remaining moisture from the pores. The instant the pan is warm and bone-dry, rub a very thin coat of oil over the entire surface, inside and out, using a paper towel. You want the iron to look damp, not greasy. This oil barrier is what stops flash rust, which can form within minutes on bare iron exposed to air.
Flash rust is not a myth. It is a real chemical reaction, and it happens faster in humid kitchens. If you wait even fifteen minutes between drying and oiling, you may see a faint orange haze reappear. If that happens, wipe it off with a vinegar-dampened cloth and oil again. Do not panic; just move faster next time.
Dealing with Deep Pits and Heavy Rust
When the rust has eaten into the iron, surface methods fail. You can scrub until your arm gives out, and the pits will still hold orange pigment. This is the situation where most people give up or reach for a grinder, and both are mistakes. The pits need a chemical or electrochemical treatment to draw the rust out from below the surface, not just off the top.
A self-contained fact worth repeating: deep rust inside pits cannot be removed by sanding or grinding because the abrasive only touches the high spots, leaving iron oxide packed in the recesses below the surface plane. That hidden rust will bleed through any seasoning layer and reappear as orange bloom within a few months.
Method 1: Extended Vinegar Soak (for Moderate Pitting)
If the pitting is shallow and the rust is not black and crusty, a longer vinegar soak can work. Submerge the entire pan in a solution of equal parts white vinegar and water. Check the pan every 30 minutes, scrubbing with steel wool each time you pull it out. Total soak time should never exceed 4 hours, and even that is pushing it for thin vintage pans. The vinegar will slowly dissolve the rust inside the pits, but it also eats iron once the rust is gone, so frequent checks are non-negotiable. I set a timer on my phone and do not leave the room.
After the soak, scrub the entire pan with steel wool under running water, then neutralize the acid with a paste of baking soda and water. Rub the paste over the surface, let it sit for 5 minutes, and rinse. This stops any residual acid from continuing to etch the iron.
Method 2: Citric Acid Soak (Safer for the Iron)
Citric acid works similarly to vinegar but is gentler on the iron and does not leave as strong a smell. You can buy food-grade citric acid powder at most grocery stores or online. Mix 1 tablespoon of citric acid per gallon of warm water. Submerge the pan and let it soak for 2 to 6 hours, checking hourly. The rust will lift out of the pits as a brown sludge. Scrub with steel wool after each check. Neutralize with baking soda paste as described above. Citric acid is my preferred acid for valuable vintage pans because it gives you a wider margin of error before the iron starts to etch.
Method 3: Electrolysis (for Severe, Crusty Rust)
When a pan is so rusted that you cannot see the original surface at all, electrolysis is the only method that reliably removes rust from every crevice without damaging the iron. The setup sounds intimidating, but it is straightforward: you need a plastic tub, a battery charger (manual type, not automatic), washing soda (sodium carbonate), a sacrificial piece of steel or iron, and water. Do not use stainless steel as the sacrificial anode; it produces hexavalent chromium, which is toxic.
The process works by passing a low-voltage direct current through the pan while it is submerged in a washing soda solution. The rust converts and releases from the iron surface, collecting as sludge on the sacrificial anode. According to Lodge Cast Iron’s official care guidelines, electrolysis is the preferred method for heavily rusted or historic pieces because it removes rust without any abrasive action. The pan sits suspended in the solution, connected to the negative terminal, while the sacrificial steel connects to the positive terminal. Run the charger at about 2 amps for 6 to 24 hours depending on the severity.
After electrolysis, the pan will be covered in a black smut that scrubs off with steel wool and soap. Rinse and dry immediately, then oil to prevent flash rust. This method works on the worst cases, including pans that have sat in flooded basements for decades.
Method 4: Commercial Rust Removers (Use With Caution)
Products like Evapo-Rust and Bar Keepers Friend can remove rust, but they are not all food-safe. Evapo-Rust is water-based and claims to be non-toxic, but it is still a chemical that must be rinsed completely. Bar Keepers Friend contains oxalic acid and is primarily a surface polish, not a deep rust remover; it works well for light surface rust but not for pitted pans. Some commercial rust removers, like naval jelly, contain phosphoric acid and are absolutely not food-safe. If you use any chemical remover, you must wash the pan thoroughly with soap and hot water afterward, then bake it dry at 200°F for 10 minutes to drive off any residue. Some chemical rust removers that are not food-safe must be thoroughly neutralized and washed off with soap and water before further seasoning. When in doubt, stick with vinegar or citric acid.
A note on wire brushes and angle grinders: the advice to strip rust quickly with a wire brush mounted on an angle grinder circulates widely. Do not do this on any pan you care about. The wire brush leaves deep scratches that food will stick to forever, and a grinder can remove too much iron, thinning the pan and creating hot spots. The only exception is a pan so destroyed that it is destined for the scrap bin anyway, and even then I would try electrolysis first. An angle grinder is a tool for rebar, not for a skillet that may have belonged to your grandmother.
After Rust Removal: Season the Pan So It Does Not Come Back
Removing rust is only half the job. Bare iron rusts again within hours if you leave it unprotected, and seasoning is the barrier that keeps oxygen and water away from the metal. You must remove every trace of rust down to bare gray iron before seasoning; any residue left will cause the new seasoning to flake off. That is a hard rule. Check the pan under bright light and run a white paper towel over the surface. If the towel shows any orange, keep working.
Once the pan is clean, dry, and has a thin coat of oil, you have two seasoning options: stove-top or oven. I prefer the oven method for pans that have been through rust removal because it builds a more even, durable base layer. Heat the oven to 450°F. Wipe the pan with a very thin layer of oil, then wipe it again with a dry paper towel to remove the excess. Too much oil leaves a sticky, gummy surface that never hardens properly. Place the pan upside down on the middle rack, with a sheet of foil on the rack below to catch drips. Bake for 1 hour, then turn off the oven and leave the pan inside until it is cool to the touch. Repeat this cycle two to three times for a solid base.
The seasoning will look patchy at first. That is normal. The dark color will even out with use. The important thing is that the iron is no longer exposed. After the initial seasoning, cook something fatty like bacon or cornbread in it. Cornbread makes a good test bake for a newly restored pan: if the crust releases cleanly and the bottom browns evenly, the seasoning has taken. If it sticks, the pan needed another round of seasoning, and that is the pan’s fault, not the recipe’s.
If you are restoring a pan and realize the original was not worth saving, or you want a second skillet that arrives already seasoned, check out our Field Company Cast Iron Skillet review for a modern option that needs almost no work out of the box. For a budget-friendly classic that also comes pre-seasoned, our Victoria cast iron skillet comparison covers a solid choice. And if you want a smooth, machined surface that holds seasoning beautifully, the Stargazer skillet guide for 2026 explains what makes that pan different.
Common Mistakes That Make the Rust Come Back
Rust rarely makes a solo appearance. If it shows up, it is usually because of a chain of bad habits. Fix the habits, and the rust does not return. Here are the mistakes I see most often when cooks bring me their re-rusted pans.
Not drying the pan thoroughly after washing. Cast iron is porous enough to hold water in microscopic crevices. Towel drying is not enough; you must heat the pan on the stove for a minute or two after every wash, then oil it while warm. Water left in the pores is the number one cause of repeat rust.
Using too much oil during seasoning. A thick coat of oil turns sticky and never polymerizes fully. That sticky layer traps moisture underneath, and the pan rusts from below the seasoning. You cannot see the rust until the seasoning flakes off, and by then the damage is done. Wipe the pan like you are trying to remove the oil before baking. That thin, almost-dry layer is correct.
Storing the pan with the lid on tight. Cast iron needs air circulation. If you store a pan inside a sealed container or with a tight-fitting lid, any residual moisture stays trapped. Store pans in the open, or at least with the lid ajar. I hang my daily drivers on a wall rack. No lids, no rust.
Soaking the pan to loosen stuck food. Soaking cast iron in water for hours is an invitation for rust. If food sticks, scrub with a nylon brush and coarse salt, then rinse and dry immediately. Save the soaking for the vinegar bath, not for everyday cleanup.
A self-contained fact worth remembering: The single most effective rust prevention habit is to heat the pan on the stove for one minute after every wash and apply a very light oil film before storing. That takes less time than dealing with rust later, and it works every time.
One more note for those restoring a vintage or heirloom pan: sometimes the rust is not the only problem. Old seasoning may be flaking, carbon buildup may be hiding more rust, and the pan may need a full strip before you address the rust. In that case, use an oven cleaner containing lye (yellow-cap Easy-Off) in a sealed trash bag for 24 to 48 hours to strip the old seasoning completely, then start the rust removal process on bare iron. Do not try to remove rust and old seasoning at the same time; you end up doing a bad job of both. Stripping old seasoning with oven cleaner before addressing rust is a recognized step in restoration.
Frequently Asked Questions
Can I use vinegar to remove rust from my cast iron skillet without damaging it?
Yes, but only for short periods. White vinegar at 5% acidity removes surface rust effectively when applied for 10 to 15 minutes at a time with steel wool scrubbing. Total contact time over 30 minutes risks etching the iron and creating pits. For deeper rust, dilute the vinegar 50/50 with water and check every 30 minutes, never exceeding 4 hours total. Always neutralize with baking soda paste after a soak.
How long should I soak cast iron in vinegar to get the rust off?
For surface rust, do not soak at all. Apply vinegar directly and scrub within 15 minutes. For pitted rust, a soak of equal parts vinegar and water can run 2 to 4 hours with hourly checks. Beyond 4 hours, the acid attacks the iron itself. Citric acid is safer for long soaks: 1 tablespoon per gallon of water for up to 6 hours, still with hourly scrub checks.
Is it safe to cook on a pan that had rust removed with chemicals if I rinse it well?
Only if the chemical is food-safe and you rinse thoroughly. Vinegar, citric acid, and Evapo-Rust are considered safe when followed by a hot water and soap wash plus a bake at 200°F for 10 minutes. Naval jelly and most other commercial rust converters are not food-safe and should never be used on cookware. If you are unsure, re-season the pan and cook a test batch of something cheap; any off taste means you need to strip and start over.
How do I prevent flash rust after cleaning the rust off?
Flash rust forms on bare iron within minutes of exposure to air and moisture. Dry the pan completely with heat (stove or oven), then apply a thin oil coat immediately while the pan is still warm. The oil blocks oxygen from reaching the iron. If flash rust appears anyway, wipe it with a vinegar-dampened cloth, dry, and oil again. Speed is the only real prevention, so have your oil and cloth ready before you rinse the pan the final time.