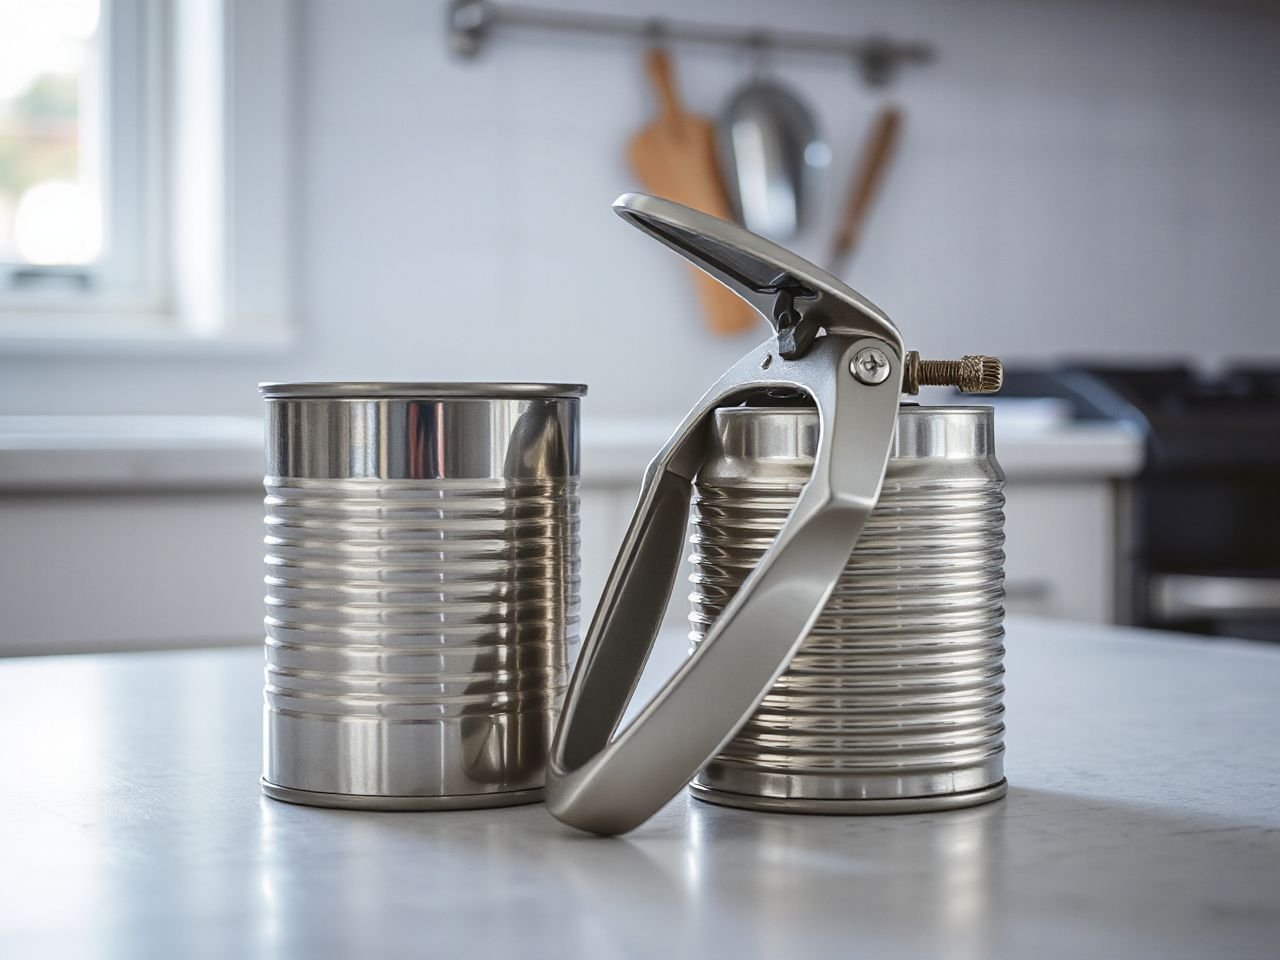
A poor can opener can leave a sharp lid, crush the rim, or force your wrist to repeat an awkward turning motion every time dinner starts with a tin. The useful distinction is not simply manual versus electric: it is how the opener engages the rim, where it cuts, how much hand force it requires, and how easily its food-contact parts can be cleaned. A sound guide should also separate convenience from ownership burden, since an opener that is easy to operate may be harder to clean, store, or use safely when its cutting mechanism wears. This can opener buying guide focuses on grip comfort first, because a handle that feels acceptable for one can may become tiring during longer preparation.”, “
Key Takeaways
- Choose by rim engagement, cutting position, handle comfort, and cleaning access rather than by power source alone.
- Side-cut safety openers leave smoother edges, while top-cut models expose the lid surface to a cutting wheel.
- Stop using an opener with bent lids, loose cutting parts, persistent rust, or metal fragments.
Beginner: Start with the Mechanism, Not the Marketing
How a manual wheel opener cuts a can
A traditional manual wheel opener uses a cutting wheel and a drive wheel. The drive wheel grips the can rim while the turning handle moves the mechanism around the container. As the handle turns, the cutting wheel punctures the lid and follows the lid’s perimeter.
The cutting wheel and drive wheel must engage the rim correctly. Misalignment can make the opener slip, crush the rim, or leave part of the lid attached. A can opener cuts cleanly only when the rim is held securely between the wheels.
Before buying, inspect the point where the wheels meet. The opening should look deliberate rather than loose, and the handle should turn without forcing your fingers into a narrow pinch. A large, rounded turning handle generally gives the hand more room to apply force than a thin bar, but the shape still has to suit the way you naturally hold it.
A manual wheel can opener needs accurate wheel-to-rim engagement to cut consistently. That simple mechanical relationship matters more than a long feature list.
Top-cut and side-cut designs
A traditional top-cutting opener punctures the surface of the lid. The separated lid can have a sharp edge, so the lid should be handled carefully and kept away from fingers, children, and loose food-preparation areas.
A side-cutting safety opener cuts along the exterior border of the rim instead. The can and the lid have smooth edges remaining after use, which reduces the exposed sharpness associated with a top-cut opening. That design answers a real handling concern, although the opener still needs correct alignment and careful cleaning.
“Safety” describes the edge produced by the cutting position; it does not remove every risk. A lid can still be loose, contaminated with food residue, or awkward to lift. The U.S. Consumer Product Safety Commission provides general consumer-safety information, but the opener’s own instructions remain the right source for its operating details.
What to check for rim compatibility
Do not assume one opener works equally well with every can. Cans can vary in rim shape and lid design, and the opener must hold the rim in the position its mechanism expects.
- Read the package or manual for stated can compatibility.
- Look at the wheel gap and locking mechanism before use.
- Check whether the mechanism closes around the rim without crushing it.
- Consider the lid position after cutting, especially if smooth-edge handling is important.
The locking mechanism should hold the opener in place without requiring excessive squeezing. If the opener needs constant hand pressure to stay engaged, the wrist and fingers may carry the load instead of the wheel assembly. That is a poor arrangement for anyone with limited grip strength.

Beginner: Match the Opener to Hand Strength and Wrist Comfort
Grip shape matters more than appearance
A comfortable opener keeps the wrist near a neutral position while the hand supplies force through the handle. A narrow handle may concentrate pressure in the fingers. A slippery surface may make the user squeeze harder. Either problem can become noticeable long before the can is fully open.
Look for a turning handle that provides enough room for the fingers to wrap around it. The handle should not force the thumb against a hard edge, and the palm should not have to press into a sharp transition between the grip and the mechanism. Rounded contours usually give pressure a broader contact area, but the reader should judge the actual shape rather than trust a label.
A can opener handle should let the user turn the mechanism without bending the wrist sharply or pinching the fingers. That is the central comfort test for people with limited grip strength.
Manual, safety, or electric?
A manual wheel opener suits someone who wants a compact tool with direct control and no power source. Its weakness is the repeated turning motion, especially if the grip is small or the locking mechanism requires sustained pressure.
A side-cut safety opener can be a sensible choice when lid-edge handling is a concern. Its cutting position produces smooth edges on both the can and lid, but the user still has to confirm that the side-cut mechanism engages the rim securely.
An electric can opener uses a motorized cutting wheel and a feed wheel to rotate the can. A countertop electric model needs a 120V socket, while a handheld electric model uses USB-C or batteries. Power reduces the turning task, but the choice shifts attention toward storage, cleaning access, charging or battery arrangements, and the condition of the cutting assembly.
For limited hand strength, I would compare the force needed to position and lock the opener before considering the power source. An electric opener may remove manual turning while still requiring awkward placement or a cleaning routine that is easy to neglect. Convenience is real only if the full ownership task remains manageable.
Readers comparing kitchen gadgets may also find the same grip questions useful in a compact stand mixer buying guide, where controls, lifting points, and storage access affect everyday strain.
Left-handed use and shared kitchens
Many openers can be operated from either side, but the handle path and release position may feel different in the opposite hand. Check the diagrams, control placement, and locking action rather than assuming that a symmetrical body guarantees comfortable left-handed use.
Shared kitchens benefit from a mechanism that communicates its position clearly. A user should be able to see how the opener sits on the rim and how the lid will separate. Confusing release controls encourage pulling, twisting, or touching the cut edge.

Intermediate: Read Slipping, Stopping, and Incomplete Cuts
Why an opener slips
Slipping usually begins with poor contact between the cutting wheel, drive wheel, and rim. The opener may sit at an angle, the locking mechanism may not be fully engaged, or the can’s rim may not match the mechanism’s intended shape.
Stop turning when the wheel loses its path. Reposition the opener according to its instructions, then check that the rim sits fully between the wheels. Forcing the handle can deform the lid and increase the chance of fragments or an incomplete cut.
A slipping opener should be repositioned instead of forced around the rim. Force does not correct misalignment.
Why the opener stops turning
A manual opener may stop because the cutting wheel has lost contact, the drive wheel cannot grip, or food residue has collected around the wheel and joints. An electric opener may stop when its cutting assembly no longer engages the can as intended or when its power arrangement needs attention.
Turn off and unplug an electric model before inspecting it. Remove the can according to the manual rather than pulling against the mechanism. A manual model should also be released without twisting the lid or placing fingers near the cut edge.
Rust, bent parts, or a loose cutting wheel can prevent a reliable grip. Cleaning may remove residue, but cleaning cannot restore a damaged cutting edge or a mechanism that no longer holds the rim.
Why part of the lid remains attached
An incomplete cut can result from a wheel that moved away from the rim, a handle that was turned at an angle, or a lid design that the opener does not handle well. Do not rock the opener aggressively to finish the cut. That motion can tear the metal unpredictably.
Follow the opening instructions and inspect the cut path. If the same problem returns after correct placement and cleaning, replace the opener rather than treating the defect as a technique issue.
Opened lids require careful handling, particularly with top-cut models. Move the lid by a safe edge or tool when the design allows, and keep the separated metal away from prepared food. Food storage after opening a can should follow the storage directions for the food and its container.
Intermediate: Cleaning, Drying, and Ownership Burden
Clean the food-contact parts promptly
Food residue can collect around the cutting wheel, drive wheel, gears, and joints. Moisture left in those spaces can encourage corrosion and create a dirty surface for the next use. Prompt cleaning matters more than a polished exterior.
- Separate the opener from the can immediately after use.
- Follow the manual’s washing instructions for the specific mechanism.
- Use a small brush or cloth to reach visible residue around the wheel and joints when the instructions permit it.
- Rinse away cleaning residue if the instructions call for rinsing.
- Dry the food-contact parts thoroughly before storage.
Do not submerge an electric opener unless its instructions explicitly allow that method. Keep electrical parts away from standing water, and disconnect a powered model before cleaning.
A can opener must be dried thoroughly around its wheel and joints because trapped moisture can remain where food residue collects. Storage in a drawer while damp turns a simple cleaning omission into a recurring maintenance problem.
Stainless steel is not a complete cleaning plan
Stainless steel may be used for food-contact parts, but the material does not make residue disappear. The wheel assembly, gears, seams, and joints still need access for cleaning and drying. A smooth-looking body can hide buildup around the mechanism.
Check whether the cutting head can be reached without placing fingers against the wheel. If the design makes the food-contact area difficult to inspect, the ownership burden is higher. An opener that takes less effort to operate may demand more care after every use.
For broader utensil-care habits, the guidance in this budget baking pan buying guide also reinforces a useful principle: surfaces that contact food need a cleaning routine based on access, not appearance.
When replacement is safer than repair
Replacement is the appropriate response to bent lids produced by the tool, loose cutting parts, persistent rust, or metal fragments. Those signs indicate that the opener may no longer control the cut or keep material away from food.
A difficult turn alone does not prove that the opener is ruined; residue and poor alignment can create that symptom. Clean and reposition the tool when the mechanism remains intact. Replace it when the cutting wheel, drive wheel, or locking mechanism remains loose or damaged.
The U.S. Food and Drug Administration provides food-safety information for consumers, while the opener’s manual explains its cleaning limits. Neither source changes the practical rule: a damaged food-contact tool should not be kept in service simply because it still turns.
Advanced: Include Electricity, Storage, and Long-Term Use
Electric convenience has conditions
Countertop electric openers can reduce the hand motion involved in opening a can, but they need access to a 120V socket. Their fixed position may suit a kitchen with clear counter space, yet storage and cord placement become part of the decision.
Handheld electric openers use USB-C or batteries. That makes placement more flexible, but the user must keep the power arrangement ready and store the opener where its cutting assembly will not collect residue or become damaged.
An electric can opener is convenient only when its power source, cleaning access, and storage location fit the kitchen routine. Removing manual turning does not remove the need for inspection.
Inspect the cutting path before regular use
Look at the wheel assembly, feed path, locking mechanism, and lid holder before using an opener repeatedly. A magnetic lid holder can help control a separated lid, but it does not make a sharp top-cut edge safe to touch. The holder should be clean and free of stuck residue.
Run a finger nowhere near the cutting wheel. Instead, inspect the mechanism visually and check the parts named in the instructions. A wheel that wobbles, a drive wheel that fails to grip, or a lid holder that no longer holds its intended position signals a need for cleaning or replacement.
Storage and the wrist are connected
Storage affects how likely the opener is to be cleaned, dried, and returned to service properly. A tool buried beneath utensils may be grabbed wet or forced into a crowded drawer. A tool kept where its wheel is protected is easier to inspect before use.
The wrist also benefits from a predictable setup. If a manual opener must be held at an unusual angle because the counter is crowded, the user may compensate by bending the wrist or squeezing harder. Clear space around the can allows the handle to turn through its intended path.
Readers assessing other hand-operated kitchen tools can apply the same test to a cast iron griddle buying guide: consider how the tool is lifted, positioned, cleaned, and stored rather than judging the object only at the moment of purchase.
A practical decision sequence
- Start with the cut. Choose top-cut or side-cut based on the lid edge you want after opening.
- Check the rim. Confirm that the wheel assembly is intended for the can shapes and lid designs you use.
- Assess the grip. Look for a turning handle that keeps the wrist close to a neutral position.
- Test the locking action visually. Avoid mechanisms that appear loose or demand a hard, sustained pinch.
- Map the cleaning routine. Identify how the wheel, drive wheel, gears, and joints can be reached and dried.
- Account for power. For an electric model, confirm whether the kitchen setup supports a 120V socket, USB-C, or batteries as applicable.
- Set a replacement rule. Discontinue use if bent lids, loose cutting parts, persistent rust, or metal fragments appear.
This sequence keeps the decision focused on ownership rather than novelty. The most comfortable opener is the one whose grip, rim engagement, cut style, and maintenance demands suit the person using it.
Frequently Asked Questions
How do I choose between a manual wheel opener, a safety opener, and an electric opener?
Choose a manual wheel opener for direct control and compact storage if the turning handle suits your hand. Choose a side-cut safety opener when smoother can and lid edges matter. Choose an electric model when reducing manual turning is the priority, then confirm its power source, cleaning access, and storage needs. The right choice depends on the complete routine, not power alone.
Is a side-cutting safety opener really safer than a traditional top-cutting opener?
A side-cutting safety opener is designed to cut along the exterior border of the rim, leaving smooth edges on the can and lid. A traditional top-cutting opener punctures the lid surface and can leave a sharp lid edge. Side-cutting reduces exposed sharpness, but users still need to control the separated lid and clean the food-contact parts.
Why does my can opener slip, stop turning, or leave parts of the lid attached?
The cutting wheel and drive wheel may not be engaging the rim correctly. Misalignment, an unsuitable rim or lid design, residue around the mechanism, or loose cutting parts can interrupt the cut. Stop forcing the handle, reposition the opener according to its instructions, and clean it. Persistent problems or metal fragments justify replacement.
When should I replace a can opener instead of cleaning it?
Clean and dry an opener when residue is the likely problem and the wheels, joints, and locking mechanism remain sound. Replace the tool if it produces bent lids, has loose cutting parts, shows persistent rust, or sheds metal fragments. Those conditions can compromise control of the cut and make the food-contact mechanism unsuitable for continued use.