
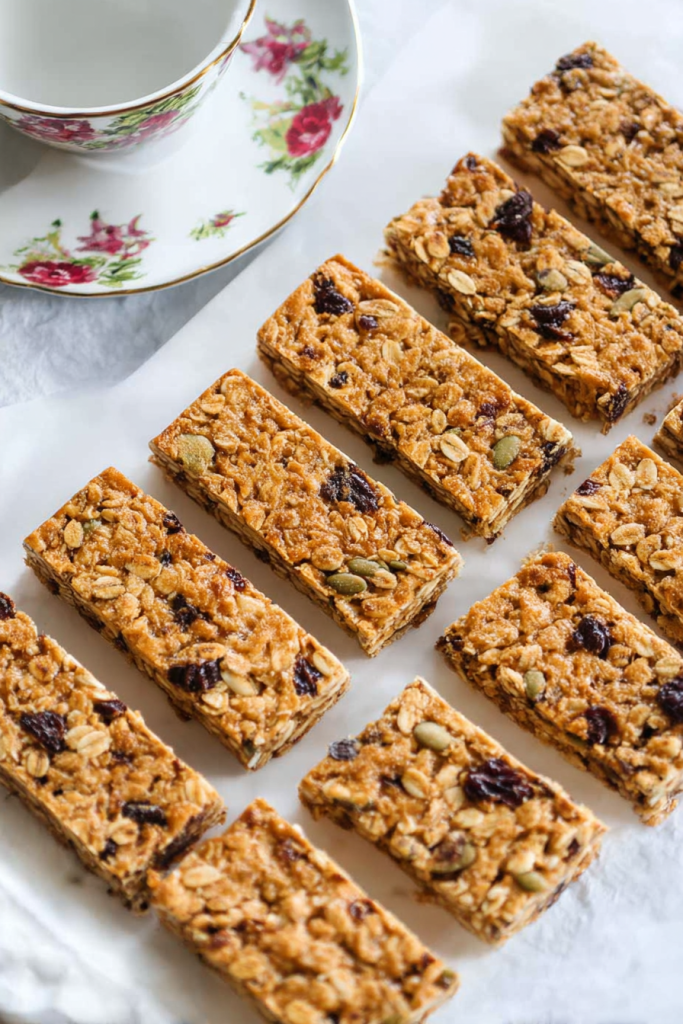
These homemade granola bars are ridiculously easy to whip up with just 5 ingredients. Chewy, satisfying, and totally perfect when you need a quick breakfast or that 3pm energy boost.
Looking for more healthy snack ideas? Try energy bites, oatmeal cookies, and trail mix clusters!
Table of Contents
- Why You’ll Love This Recipe
- Essential Ingredients
- Recipe Timing & Details
- Step-by-Step Instructions
- Pro Tips for Success
- Storage Guidelines
- Frequently Asked Questions
Why You’ll Love This Recipe
Okay, real talk.
I’ve been making these no-bake granola bars for years now. They started as my solution to avoiding those overpriced store-bought bars that cost like $6 for a box of five. Now? They’re my Sunday meal prep staple.
The best part?
You don’t even turn on your oven.
These bars hit that sweet spot. You get nutty flavor, natural sweetness, and just enough crunch to keep things interesting. And unlike those sad homemade attempts that fall apart in your hands, these actually hold together.
I grab one before my morning run. My kids get them in their lunchboxes. Sometimes I eat two for breakfast and don’t feel guilty about it.
The secret? Honey and peanut butter create this sticky magic that keeps everything bound together. No complicated techniques. No fancy equipment. Just mix, press, chill, and you’re done.
Essential Ingredients
Let me break down what goes into these bars and why each ingredient matters.

Quick Cooking Oats
This is your base. And here’s the thing – you need quick oats, not those old-fashioned rolled oats.
Why?
Quick oats are smaller and thinner. They create a softer bar that actually holds together. I learned this the hard way after making a batch with rolled oats that turned out chewy and tough. Not fun to eat.
Creamy Peanut Butter
Your main binder. This is what glues everything together.
Go for smooth and drippy. Natural peanut butter works great. So does regular store-brand creamy peanut butter. Just make sure it’s not the super thick kind that’s been sitting in your pantry for months.
Want to switch things up? Almond butter works beautifully too. It gives a milder, slightly sweeter flavor.
Honey
This does double duty – sweetness plus structure.
I’ve tried making these with maple syrup. They don’t work as well. Honey is thicker and stickier, which is exactly what you need. Keep extra nearby because you might need to add more if your mixture feels dry.
Mini Chocolate Chips
Little pockets of joy in every bite.
I always use mini chips. They spread out better than regular-sized ones. You get chocolate in every single bite without it being overwhelming.
Think of it like this: regular chips are like big chocolate chunks. Mini chips are like chocolate confetti. Way better distribution.
Sliced Almonds
Technically optional. But honestly? Don’t skip them.
They add crunch and protein. The thin slices blend right into the mixture. You can swap these for chopped pecans, walnuts, or even pumpkin seeds if you want.
Recipe Timing & Details
| Detail | Information |
|---|---|
| Prep Time | 10 minutes |
| Chill Time | 45-60 minutes |
| Total Time | 55-70 minutes |
| Servings | 12 bars |
| Difficulty | Easy |
Ingredients Table
| Ingredient | Quantity | Notes |
|---|---|---|
| Quick cooking oats | 2 cups | Not rolled oats |
| Creamy peanut butter | 1 cup | Smooth consistency needed |
| Honey | ¼ cup | Plus extra if needed |
| Mini chocolate chips | ½ cup | Regular size works too |
| Sliced almonds | ½ cup | Optional but recommended |
| Salt | Pinch | Optional, to taste |
| Ground cinnamon | ¼ teaspoon | Optional, for warmth |
Step-by-Step Instructions
Step 1: Combine All Ingredients
Grab a medium mixing bowl.
Dump in your oats first. Then pour in the peanut butter and honey. Add your chocolate chips and almonds. Now grab a sturdy wooden spoon or rubber spatula.
Time to mix.
And I mean really mix. Stir vigorously for about two minutes. At first, it’ll look dry and you’ll think something’s wrong.
Keep going.
After a couple minutes, the peanut butter and honey coat everything evenly. You want a thick, sticky consistency. When you squeeze a handful, it should clump together.
Too crumbly? Drizzle in another tablespoon of honey. Mix again. Test it. The mixture should hold its shape when squeezed.
Step 2: Prepare Your Pan
Line an 8×8-inch square baking dish with parchment paper.
Here’s the trick: let the paper hang over the edges by at least two inches on opposite sides. These become your handles later for lifting the whole thing out.
Some people spray the parchment with cooking spray. I never bother. Up to you.
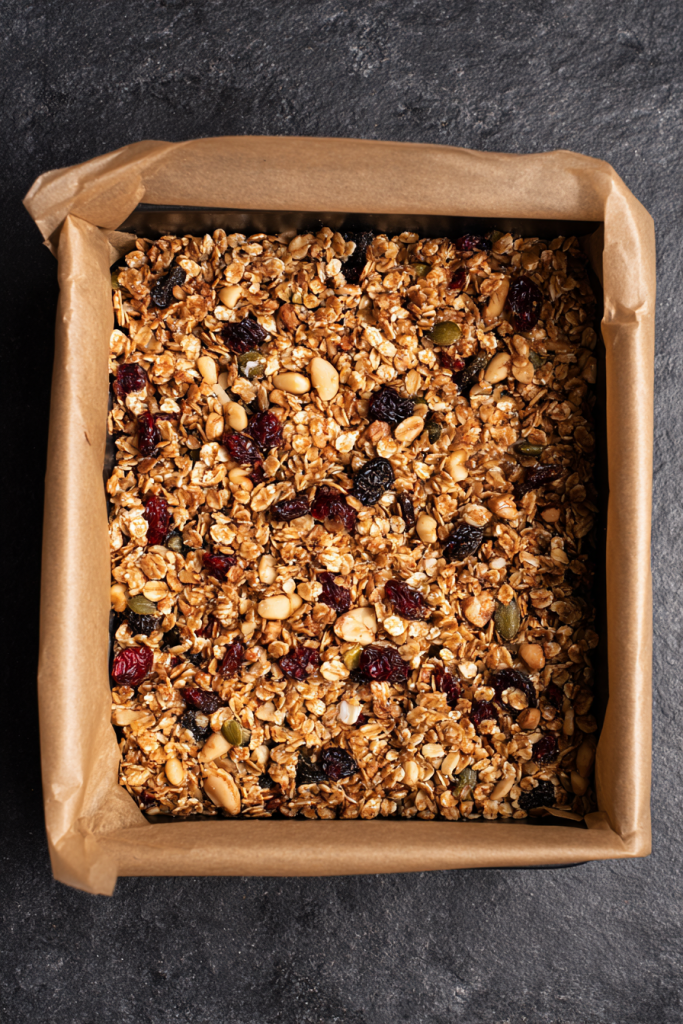
Step 3: Press Firmly Into Pan

Transfer your sticky mixture into the pan. Spread it around roughly with your spatula.
Now here’s where most people mess up.
They don’t press hard enough.
Use the back of your spatula or a flat-bottomed measuring cup. Press down hard. I’m talking serious pressure here. Compress it into every corner. Press for at least 30-45 seconds, moving across the entire surface.
The firmer you press, the better your bars hold together. Don’t be gentle. Really smoosh it down.
Step 4: Chill Until Firm
Stick the pan in your freezer. Leave it uncovered.
45 minutes to an hour does the trick. The cold solidifies the honey and peanut butter. Your mixture transforms into something you can actually slice.
Can you use the fridge instead? Sure. But it takes 2-3 hours longer. Freezer is faster.
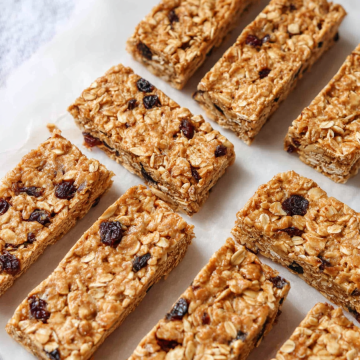
Step 5: Cut Into Bars
Pull the pan from the freezer.
Grab those parchment paper handles and lift the entire block out. Set it on a cutting board. Get a sharp knife.
Cut the block in half down the middle. Then cut each half into six equal rectangles. Boom – twelve bars.
Want cleaner cuts?
Wipe your knife between slices. This stops the dragging and tearing thing that happens.
Pro Tips for Success
Perfect Texture Every Time
Your nut butter consistency matters. A lot.
If it’s thick or separated, microwave it for 15-20 seconds first. This makes mixing way easier. Trust me on this.
When Bars Fall Apart
Two usual suspects here:
- You didn’t press hard enough
- You need more honey
Next batch, add an extra tablespoon of honey. And really press that mixture down.
Adding Extra Stuff
Want to get creative? Go for it.
Chia seeds work great. So do ground flaxseed and dried cranberries. Just remember this rule: keep total add-ins to about one cup max.
Too many extras and your bars won’t bind properly.
Meal Prep Gold
I make a double batch every Sunday morning. They last all week. Grab-and-go breakfast sorted.
For the Kids
Cut these into smaller squares. Pop them in mini cupcake liners. Suddenly you have adorable little snacks perfect for lunchboxes.
My kids’ friends always ask for these at playdates.
Storage Guidelines
In the Fridge
Wrap each bar individually in parchment paper or plastic wrap. Stack them in an airtight container.
They stay fresh for up to two weeks.
I actually prefer eating them cold. The texture is firmer and somehow tastes better.
In the Freezer
These freeze beautifully for up to three months.
Wrap individually. Toss them in a freezer-safe bag or container. Write the date on it with a marker (because you will forget).
Need a snack? Pull one out. They thaw in 10-15 minutes on the counter.
Or eat them slightly frozen. Extra chewy and delicious.
Creative Variations
The basic recipe is solid. But here’s how to switch it up:
Tropical Version Swap chocolate chips for dried mango chunks and shredded coconut. Tastes like vacation.
Protein-Packed Add ½ cup vanilla protein powder plus an extra tablespoon of honey. Perfect post-workout snack.
Seed-Based Replace almonds with pumpkin seeds and sunflower seeds. Great for nut-free zones.
Spiced Delight Throw in ½ teaspoon cinnamon and ¼ teaspoon nutmeg. Cozy fall vibes.
Berry Bliss Use dried blueberries or cranberries instead of chocolate. More tart, less sweet.
Frequently Asked Questions
Can I use regular rolled oats instead of quick oats?
You can, but fair warning.
The texture gets chewier. Sometimes too chewy. Quick oats are smaller and softer. They create better cohesion.
If you only have rolled oats? Pulse them in a food processor a few times first. Makes them smaller and works better.
Why are my granola bars falling apart?
Two main reasons:
First, you didn’t press hard enough. These need serious compression.
Second, too many dry ingredients. Check that you measured accurately. Don’t overfill those measuring cups.
Still falling apart? Add another tablespoon of honey.
Can I make these nut-free for school?
Absolutely.
Replace peanut butter with sunflower seed butter. Skip the sliced almonds. Done.
They taste just as good. My friend makes them this way for her daughter’s school lunches.
Do these need to be kept cold?
For best results? Yes.
At room temperature, they soften. Especially in warm weather. They can get messy to handle.
Keep them cold. Eat within 30 minutes of pulling them from the fridge. That’s the sweet spot.
Can I double this recipe?
Yep! Use a 9×13-inch pan instead.
Press the doubled mixture evenly. Chilling time stays the same. You’ll get about 24 bars.
Perfect for big families or serious meal preppers.
Enjoy your homemade granola bars! Way better than anything you’ll buy at the store. And your wallet will thank you.
Easy 5-Ingredient Homemade Granola Bars (No-Bake)
Ingredients
- 2 cups quick cooking oats not rolled oats
- 1 cup creamy peanut butter smooth consistency needed
- 1/4 cup honey plus extra if needed
- 1/2 cup mini chocolate chips regular size works too
- 1/2 cup sliced almonds optional but recommended
- pinch salt optional, to taste
- 1/4 tsp ground cinnamon optional, for warmth
Instructions
- In a medium mixing bowl, combine quick cooking oats, peanut butter, honey, mini chocolate chips, and sliced almonds. Add optional salt and cinnamon if using.
- Mix vigorously with a sturdy wooden spoon or rubber spatula for about 2 minutes until everything is evenly coated and the mixture is thick and sticky. The mixture should clump together when squeezed. If too crumbly, add another tablespoon of honey.
- Line an 8×8-inch square baking dish with parchment paper, letting the paper hang over the edges by at least 2 inches on opposite sides to create handles.
- Transfer the sticky mixture into the prepared pan. Using the back of your spatula or a flat-bottomed measuring cup, press down firmly and evenly for 30-45 seconds, compressing the mixture into every corner. Press hard to ensure bars hold together.
- Place the pan in the freezer uncovered for 45-60 minutes until firm. Alternatively, refrigerate for 2-3 hours.
- Remove from freezer and lift the entire block out using the parchment paper handles. Place on a cutting board. Using a sharp knife, cut the block in half down the middle, then cut each half into 6 equal rectangles to make 12 bars. Wipe knife between cuts for cleaner slices.


I never knew peanut butter and honey tasted so good together