This garlic butter beef rice recipe is my ultimate weeknight dinner solution when life gets hectic and I need something on the table fast. There’s something magical about how tender ground beef, fluffy rice, and that incredible cheesy garlic butter sauce come together in one pan. No juggling multiple pots, no complicated techniques—just pure comfort food that makes everyone at my dinner table happy.
I stumbled upon this recipe during one of those chaotic weeks when my grocery list got forgotten at home. Standing in my kitchen with basic pantry staples, I decided to throw caution to the wind. Ground beef, rice, some cheese, garlic, and butter—what could go wrong? That experimental dinner turned into our family’s most requested meal, and I’ve been perfecting it ever since.
Why This Recipe Works So Well
Quick and Efficient – Everything cooks in about 25 minutes from start to finish. Perfect for those nights when hunger strikes and patience runs thin.
One-Pan Wonder – My least favorite part of cooking is the cleanup afterward. This recipe keeps dirty dishes to an absolute minimum.
Budget-Friendly – Ground beef and rice are affordable protein and carb bases. The other ingredients are pantry staples most people already have.
Kid-Approved – Even my pickiest eater devours this without complaint. The cheesy, buttery flavors win over everyone.
Customizable – This base recipe adapts beautifully to whatever you have on hand or dietary preferences.
The secret lies in building flavors layer by layer. Starting with aromatic onions and garlic creates the foundation. The beef adds heartiness while the rice absorbs all those delicious pan drippings. That final cheese sauce? It transforms everything into restaurant-quality comfort food.
Essential Ingredients That Make the Magic
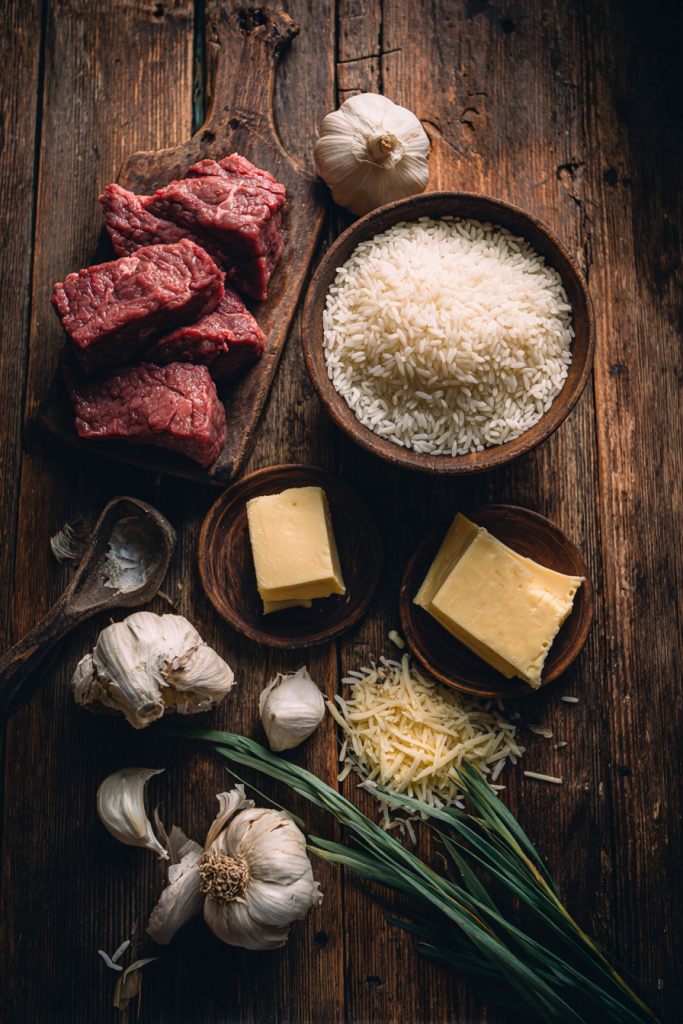
Ground Beef – I always reach for 85/15 ground beef. It provides enough fat for flavor without leaving you with a greasy mess to drain.
Long-Grain White Rice – This variety holds its shape beautifully and doesn’t turn mushy. Each grain stays separate and fluffy.
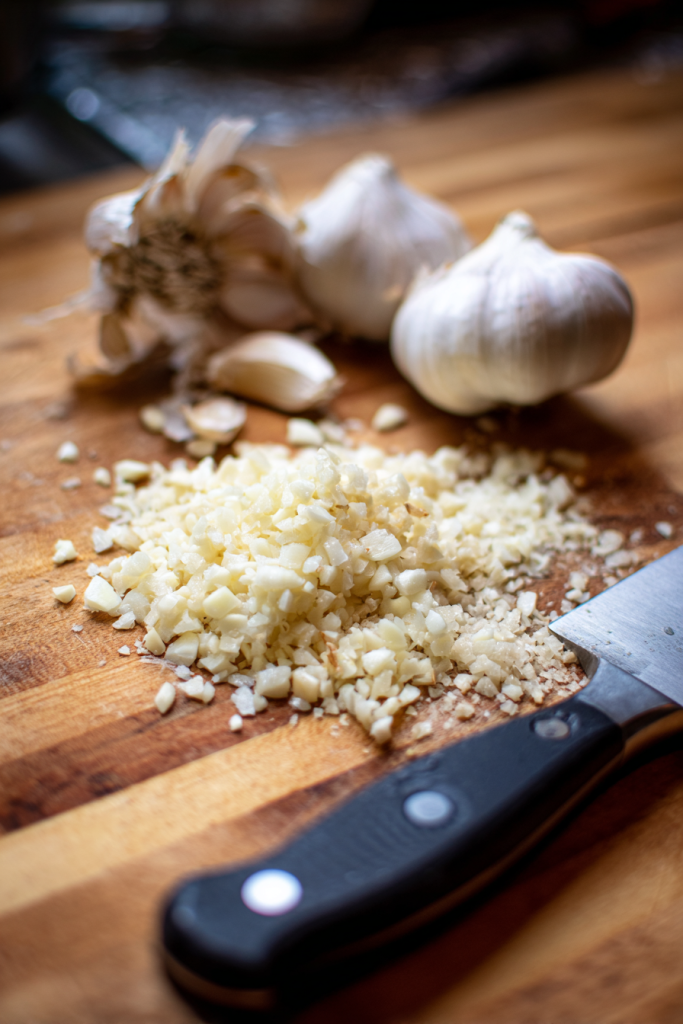
Fresh Garlic – Never skip the fresh stuff here. Pre-minced garlic just doesn’t deliver that same aromatic punch.
Quality Butter – Unsalted butter gives you control over the salt levels. It creates richness that margarine simply can’t match.
Sharp Cheddar and Parmesan – Hand-grated cheese melts smoother than pre-shredded. The combination gives both creaminess and sharp, nutty depth.
Low-Sodium Beef Broth – This becomes your rice cooking liquid. Low-sodium lets you control saltiness while adding tremendous flavor.
Whole Milk – Creates the silky cheese sauce base. The fat content is crucial for smooth melting.
The beauty of this ingredient list is its simplicity. Nothing exotic or hard to find, yet the combination creates something truly special.
| Ingredient | Quantity | Notes |
|---|---|---|
| Long-grain white rice | 1 cup uncooked | Avoid short-grain varieties |
| Ground beef | 1 lb | 85/15 fat ratio preferred |
| Yellow onion | 1 small, diced | Sweet onions work too |
| Fresh garlic cloves | 4, minced | Don’t substitute dried |
| Whole milk | 1/2 cup | Higher fat content is better |
| Sharp cheddar cheese | 1 cup, shredded | Hand-grated melts smoother |
| Parmesan cheese | 1/2 cup, grated | Fresh grated recommended |
| Low-sodium beef broth | 3 cups | Controls salt levels |
| Unsalted butter | 3 tablespoons | Divided use |
| Italian seasoning | 1 teaspoon | Dried herb blend |
| Salt and black pepper | To taste | Season throughout cooking |
| Fresh parsley | 2 tablespoons, chopped | Optional garnish |
Recipe Timing:
- Prep Time: 10 minutes
- Cook Time: 15 minutes
- Total Time: 25 minutes
- Servings: 4
- Difficulty: Easy
Detailed Cooking Instructions
Now comes the fun part—bringing all these simple ingredients together into something absolutely delicious. The key to this recipe’s success lies in the order of operations and timing. Each step builds flavor while keeping everything manageable.
Step-by-Step Cooking Process
Start with the Aromatics Heat your largest skillet over medium heat. I learned the hard way that starting with too high heat burns the garlic later. Melt one tablespoon of butter until it starts foaming—this tells you it’s hot enough. Add your diced onion and let it cook for 3 to 4 minutes. You want it translucent and just starting to caramelize around the edges. This creates the flavor foundation for everything that follows.
Brown the Beef Properly Add the ground beef to your onions and break it up with a wooden spoon or spatula. Here’s where patience pays off. Let the meat actually brown instead of just cooking through. This takes about 5 to 7 minutes. You’ll hear sizzling and see the meat developing color. If excess fat accumulates, drain most of it but leave a tablespoon or two for flavor.
Add the Garlic Push the beef to one side of the pan and add your minced garlic to the cleared space. This prevents it from burning while giving it direct contact with the pan. Stir it around for just one minute—you’ll smell when it’s ready. That fragrant aroma means it’s time to move on.
Incorporate Rice and Seasonings Here’s where things get interesting. Add your uncooked rice directly to the pan along with Italian seasoning, salt, and pepper. Stir everything together so the rice gets coated with all those flavorful drippings. This step adds an extra layer of taste that you can’t achieve by cooking rice separately.
Add Liquid and Simmer Pour in all three cups of beef broth. The mixture should just cover the rice and beef. Bring everything to a rolling boil, then immediately reduce heat to low. Cover with a tight-fitting lid—if yours doesn’t fit well, use aluminum foil. Let it simmer undisturbed for 18 to 20 minutes. Resist the urge to peek! The steam does important work here.
Creating the Perfect Cheese Sauce
While your rice cooks, start the cheese sauce that transforms this from good to absolutely incredible. In a small saucepan, melt the remaining two tablespoons of butter over low heat. Low heat is crucial—high heat will break your sauce.
Add the milk and warm it gently until small bubbles form around the edges. Now add both cheeses gradually, whisking constantly. The sauce should come together smoothly and coat the back of a spoon. If it seems too thick, add milk one tablespoon at a time. Too thin? Let it cook a minute longer.
Final Assembly Magic
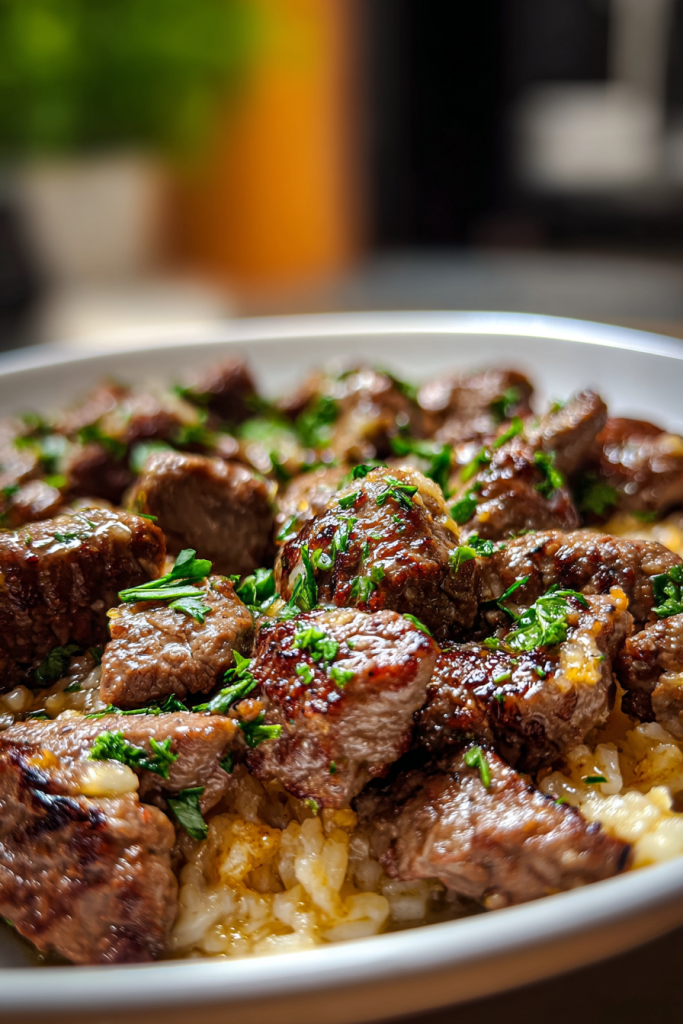
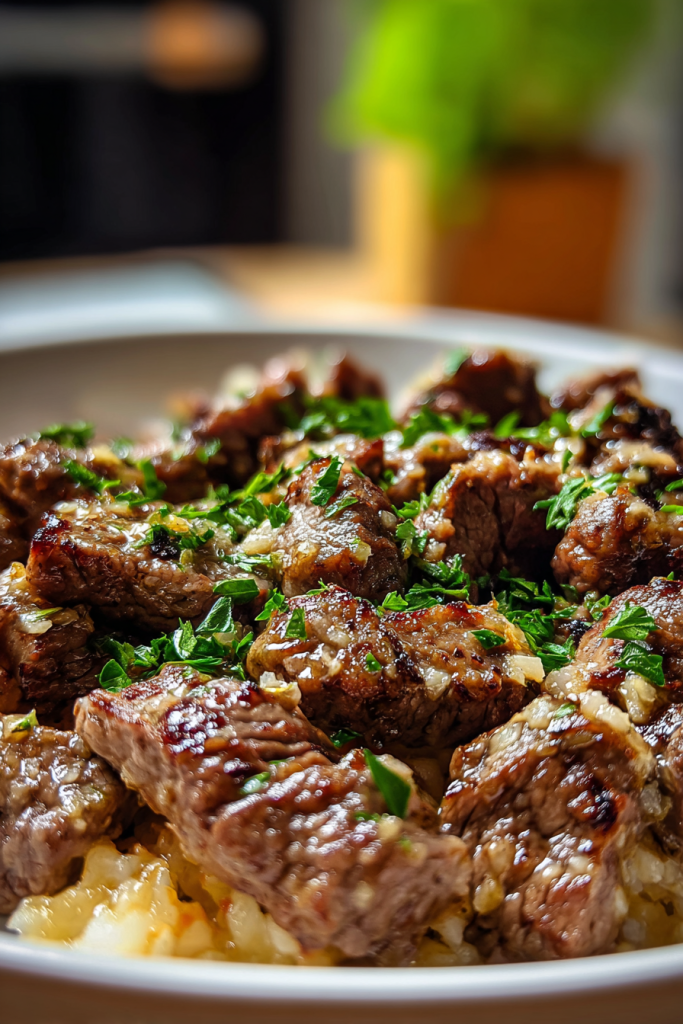
When your rice timer goes off, check that the grains are tender and most liquid has absorbed. The bottom should not be sticking or burning. Remove from heat and immediately pour your warm cheese sauce over everything. Fold gently to coat every grain and piece of beef.
Let the mixture rest uncovered for 2 to 3 minutes. This allows any remaining liquid to cook off and flavors to meld. The final result should be creamy but not soupy, with distinct rice grains coated in that gorgeous cheese sauce.
Pro Tips That Make the Difference
Control Your Heat – Medium heat for browning, low heat for simmering. This prevents burning while ensuring proper cooking.
Don’t Skip the Resting – After cooking, let the rice sit covered for 5 minutes before adding cheese sauce. This ensures perfect texture.
Fresh Cheese Matters – Pre-shredded cheese contains anti-caking agents that can make your sauce grainy. Grate your own for silky smoothness.
Layer Your Seasoning – Season the beef while browning, season the rice mixture, and taste the final dish. Building flavor at each step creates depth.
Segment 3: Serving, Storage, and FAQs
How to Serve This Crowd-Pleaser
This dish stands beautifully on its own as a complete meal, but I love pairing it with simple sides that complement rather than compete. A crisp green salad with lemon vinaigrette cuts through the richness perfectly. The acidity brightens each bite and adds fresh contrast.
Steamed broccoli or roasted vegetables work wonderfully too. The key is keeping sides simple so this star can shine. Sometimes I’ll toast some garlic bread to scoop up every last bit of that cheese sauce—pure indulgence, but totally worth it.
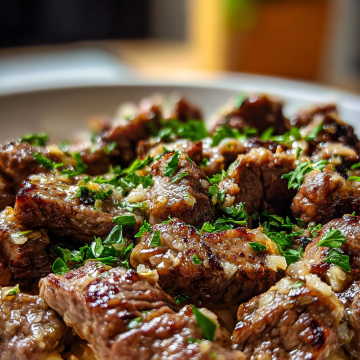
For presentation, I like serving this family-style directly from the skillet. It keeps everything warm and creates that casual, homey atmosphere we all crave. Sprinkle fresh chopped parsley over the top for a pop of color and freshness.
Storage and Reheating Secrets
Leftovers keep beautifully in the refrigerator for up to three days in a covered container. The flavors actually develop more overnight, making day-two portions even better than the original.
For reheating, add a splash of milk or beef broth to restore creaminess. Heat gently on the stovetop over low heat, stirring frequently. The microwave works too—use 70% power in 30-second intervals, stirring between each burst. This prevents the cheese from breaking and keeps everything smooth.
Creative Variations I Love
Lighter Version – Substitute ground turkey or chicken for beef. The cooking method stays exactly the same.
Veggie-Packed – Fold in frozen peas, diced bell peppers, or chopped spinach during the last few minutes of cooking.
Spicy Kick – Add red pepper flakes to the cheese sauce or use pepper jack cheese instead of cheddar.
Different Grains – Brown rice works but needs extra cooking time and liquid. Cauliflower rice creates a low-carb version.
Frequently Asked Questions
Can I use brown rice instead of white rice? Absolutely! Brown rice needs about 45 minutes total cooking time and an extra cup of broth. The nutty flavor actually complements the garlic beautifully. Just be patient with the longer cooking time.
What if I don’t have beef broth? Chicken broth works perfectly fine, or even vegetable broth for a lighter taste. In a pinch, dissolve bouillon cubes in water. The key is having enough seasoned liquid for the rice to absorb.
Can I make this ahead of time? Yes! The complete dish reheats wonderfully. You can also prep ingredients in advance—brown the beef and store it separately, pre-dice vegetables, and grate cheese. Assembly becomes super quick on busy nights.
How do I prevent the cheese sauce from breaking? Keep heat low and add cheese gradually while stirring constantly. Room temperature cheese melts more smoothly than cold. If it does break, try whisking in a tablespoon of cold milk.
Can I freeze leftovers? While technically possible, rice dishes don’t freeze as well as other foods. The texture changes and becomes slightly mushy when thawed. I recommend enjoying leftovers within those three refrigerated days instead.
What other proteins work well? Ground turkey, chicken, or even Italian sausage create delicious variations. Vegetarian? Try crumbled firm tofu or cooked lentils. Adjust seasonings accordingly.
This garlic butter beef and rice skillet has become my family’s ultimate comfort food for good reason. It’s reliable, delicious, and adapts to whatever we have available. The combination of savory beef, perfectly cooked rice, and that incredible cheese sauce creates something special from simple ingredients.
Every time I make this dish, I’m reminded why simple food often tastes the best. No fancy techniques or exotic ingredients—just good, honest cooking that brings people together around the dinner table. That’s the kind of recipe that truly matters in our everyday lives.
Garlic Butter Beef and Rice Skillet
Ingredients
- 1 cup uncooked long-grain white rice
- 1 lb ground beef
- 1 small onion diced
- 4 garlic cloves minced
- 1/2 cup whole milk
- 1 cup sharp cheddar cheese shredded
- 1/2 cup Parmesan cheese grated
- 3 cups low-sodium beef broth
- Salt and pepper to taste
- 1 tsp Italian seasoning
- 3 tbsp unsalted butter
- 2 tbsp fresh parsley chopped (optional)
Instructions
- Heat large skillet over medium heat. Melt 1 tablespoon butter until foaming. Add diced onion and cook 3-4 minutes until translucent.
- Add ground beef to skillet. Break apart and cook 5-7 minutes until browned. Drain excess fat if needed.
- Push beef to one side, add minced garlic to cleared space. Cook 1 minute until fragrant.
- Add uncooked rice, Italian seasoning, salt, and pepper. Stir to coat rice with drippings.
- Pour in beef broth. Bring to boil, then reduce heat to low. Cover tightly and simmer 18-20 minutes until rice is tender.
- Meanwhile, melt remaining 2 tablespoons butter in small saucepan over low heat. Add milk and warm gently.
- Gradually add both cheeses to milk mixture, whisking constantly until smooth sauce forms.
- Remove rice from heat. Pour cheese sauce over beef and rice mixture. Fold gently to combine.
- Let rest uncovered 2-3 minutes. Garnish with fresh parsley if desired and serve warm.
Notes
Hand-grated cheese melts smoother than pre-shredded
Don’t lift lid while rice cooks – steam is essential for proper cooking
Add splash of milk or broth when reheating leftovers to restore creaminess
Store leftovers in refrigerator up to 3 days