Welcome to my kitchen.
Today, we are bringing back a classic. A real retro favorite.
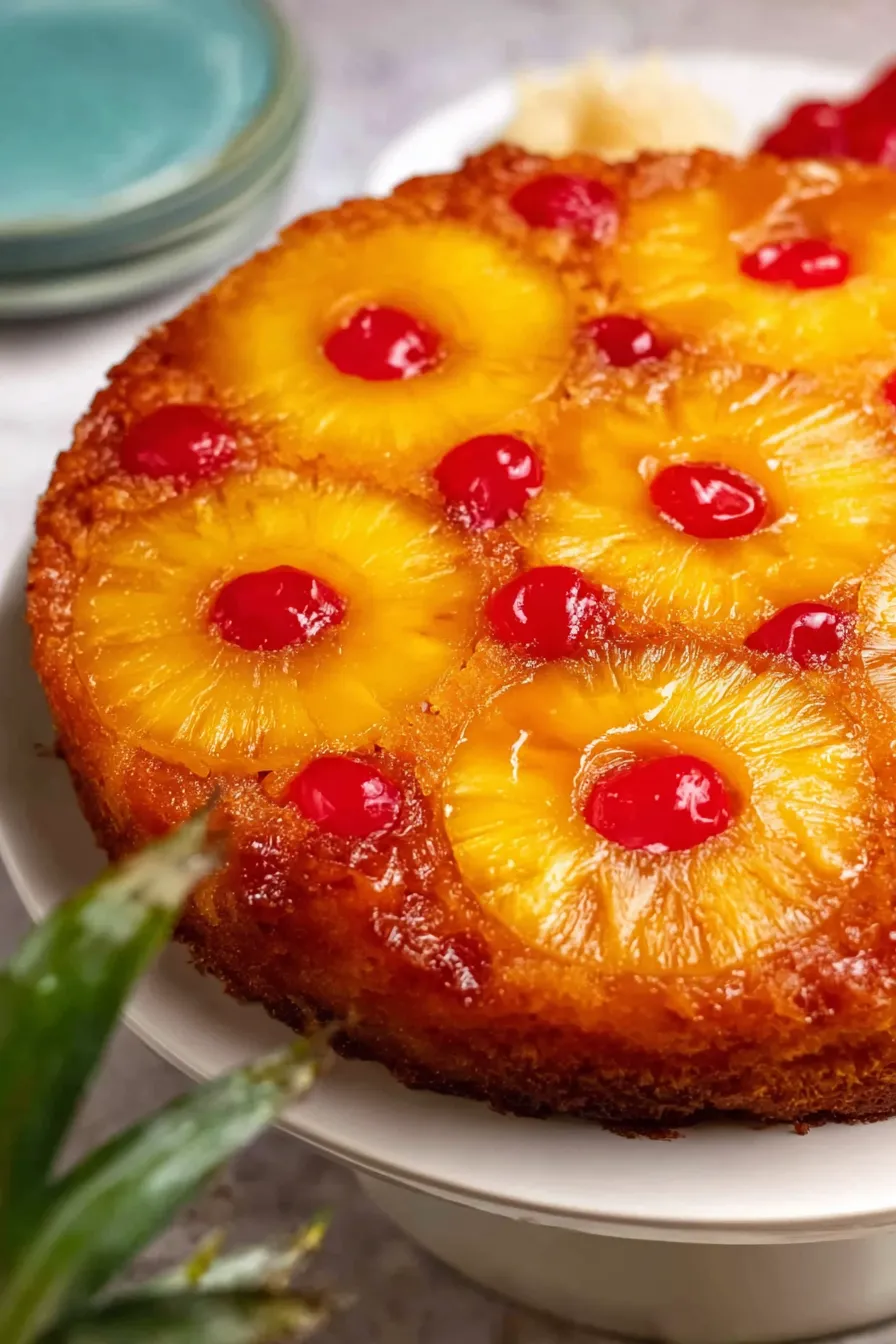
Pineapple Upside Down Cake.
Look back over a week of home baking and a pattern tends to show up. Everything is brown. A heavy chocolate cake on Monday. Sticky caramel tarts on Wednesday. A batch of dark molasses brownies on Friday.
The problem? The whole kitchen starts to look dull. Somewhere in there you need color.
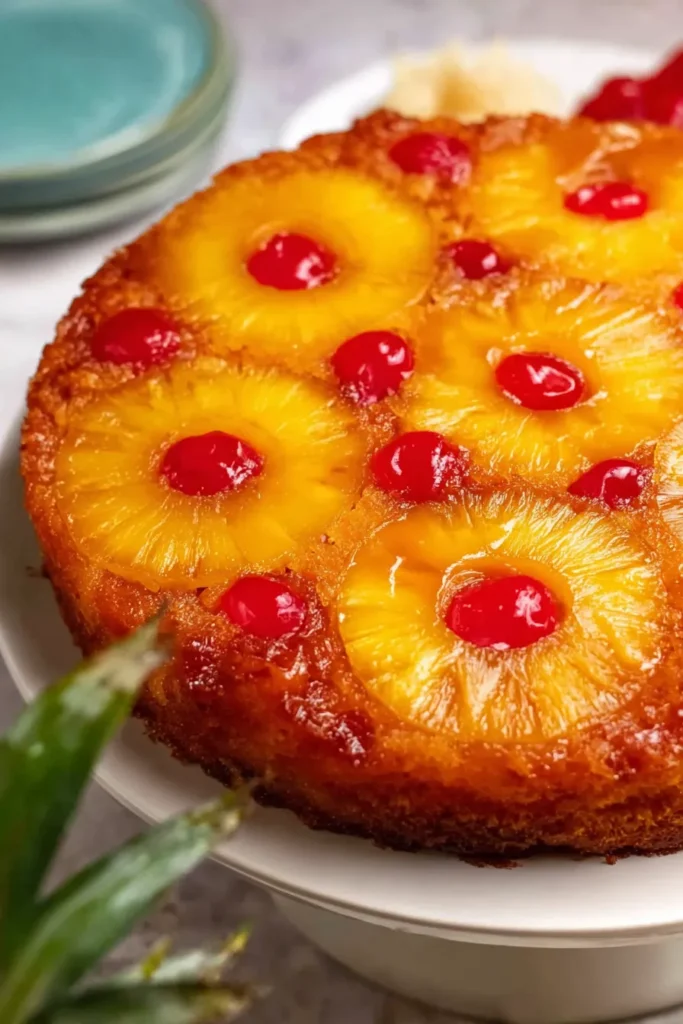
The good news? This bright and cheerful cake delivers exactly that. Big time.
It features a sticky, sweet caramel topping. Vibrant fruit creates a beautiful visual for your table. And the cake underneath? Incredibly tender.
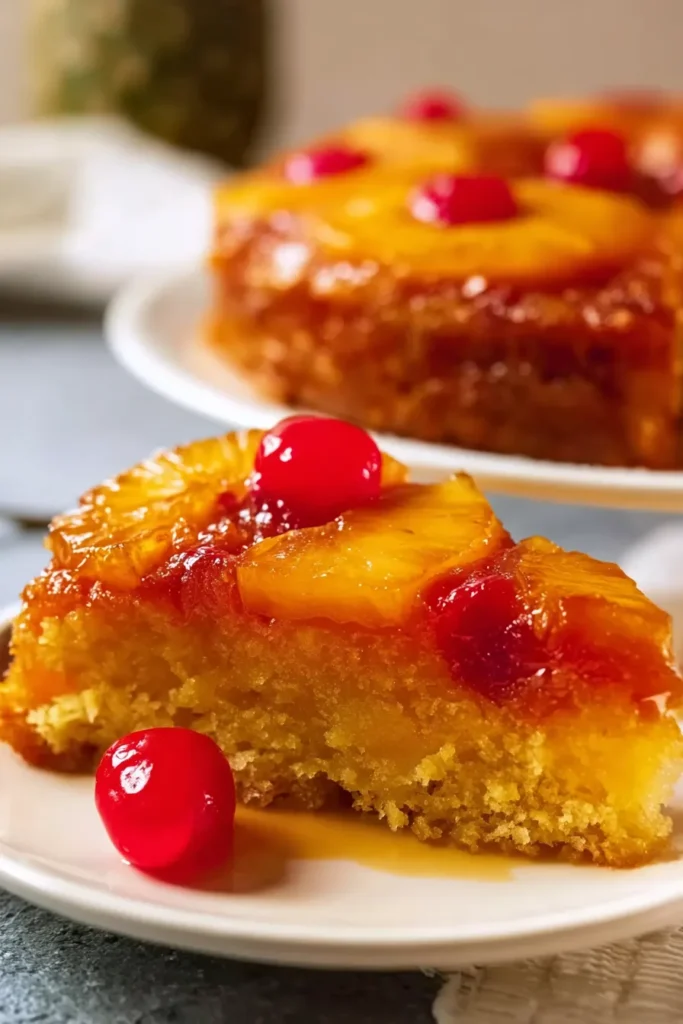
When you flip this cake, magic happens. A beautiful caramelized design appears.
Buttery brown sugar melts right into the bright pineapple rings. Sweet red cherries peek through the fruit.
It looks stunning. It feels completely nostalgic.
And baking it is easier than tying your shoes. If you can stir ingredients in a bowl, you can make this dessert. It really is that straightforward.
We use natural pineapple juice right in the batter. This adds sweet tropical notes to every single bite. The crumb turns out soft, fluffy, and perfectly moist.
Let’s walk through the process together. I will guide you through every single step.
You will get bakery-quality results. Right in your own kitchen.
Recipe Overview and Ingredients
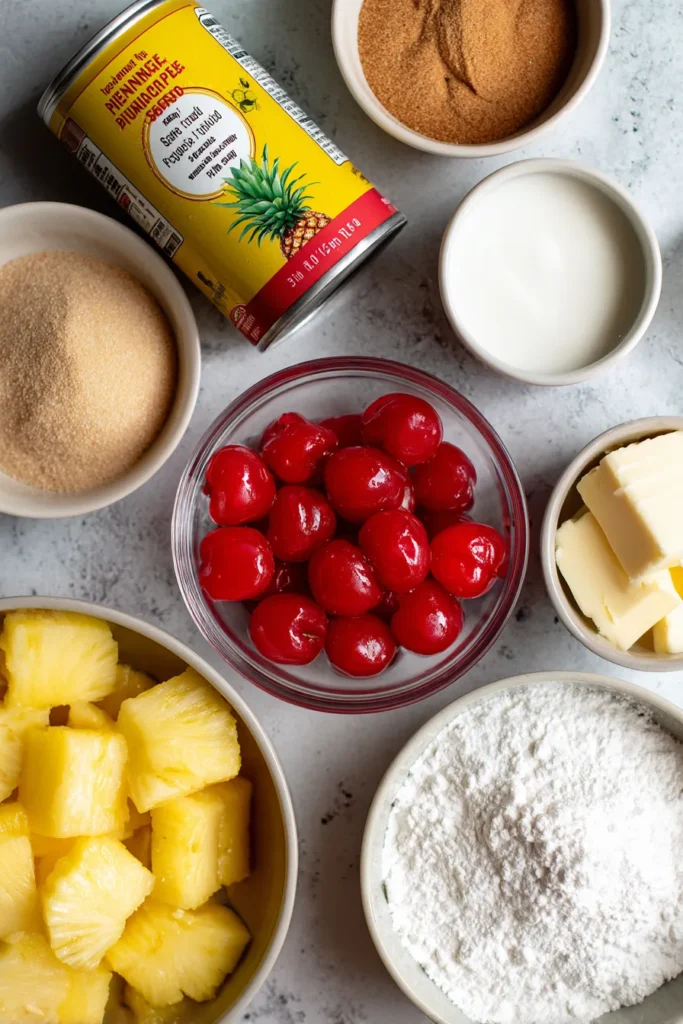
Before we start baking, let’s gather our stuff.
Preparation is the secret to stress-free baking. Having your ingredients measured out makes the whole process wonderfully smooth.
Here is a quick look at the timing and details for this recipe.
| Prep Time | Cook Time | Total Time | Servings | Difficulty |
| 20 minutes | 45 minutes | 1 hour 5 minutes | 10-12 | Easy |
We divide our ingredients into two distinct parts. First, we need items for our sticky fruit topping. Second, we need ingredients for our rich vanilla batter.
Pay close attention to the specific temperatures requested. Room temperature dairy blends together much more smoothly. This creates a superior, softer crumb for your final dessert.
| Ingredient | Quantity | Notes |
| Canned pineapple slices | 565g / 20 oz | In juice, not in syrup. |
| Maraschino cherries | 12 – 18+ pieces | Drain these very well. |
| Unsalted butter (Topping) | 60g / 4 tbsp | Melted completely. |
| Brown sugar | 1/2 cup | Light or dark works fine. |
| All-purpose flour | 1 1/2 cups | Spooned and leveled. |
| Baking powder | 1 tsp | Check expiration dates! |
| Baking soda | 1/4 tsp | Can substitute 1 tsp baking powder. |
| Salt | 1/4 tsp | Balances the overall sweetness. |
| Milk | 1/3 cup | Full or low-fat is fine. |
| Pineapple juice | 1/4 cup | Reserved from the canned fruit. |
| Sour cream | 1/4 cup | Full fat. Substitute plain yogurt. |
| Vanilla extract | 1 tsp | Vanilla essence also works well. |
| Unsalted butter (Batter) | 115g / 1 stick | Softened to 18°C/64°F. |
| White sugar | 3/4 cup | Granulated provides the best texture. |
| Large eggs | 2 whole | Must be at room temperature. |
| Leftover pineapple | Varies | Chopped into small pieces. |
I highly recommend using canned pineapple in juice.
Heavy syrup will make the finished dessert entirely too sweet. Plus, we need that natural, thin juice for our batter. It adds the perfect level of moisture.
Your butter needs to be softened. But it should not be greasy.
Aim for a cool room temperature around 18°C/64°F.
If the butter is shiny and melting? It is simply too warm. Warm butter will not trap air during the creaming process. That leads to a dense, flat sponge.
Sour cream is my absolute secret weapon for this recipe.
It provides wonderful richness. And it does this without thinning out the batter.
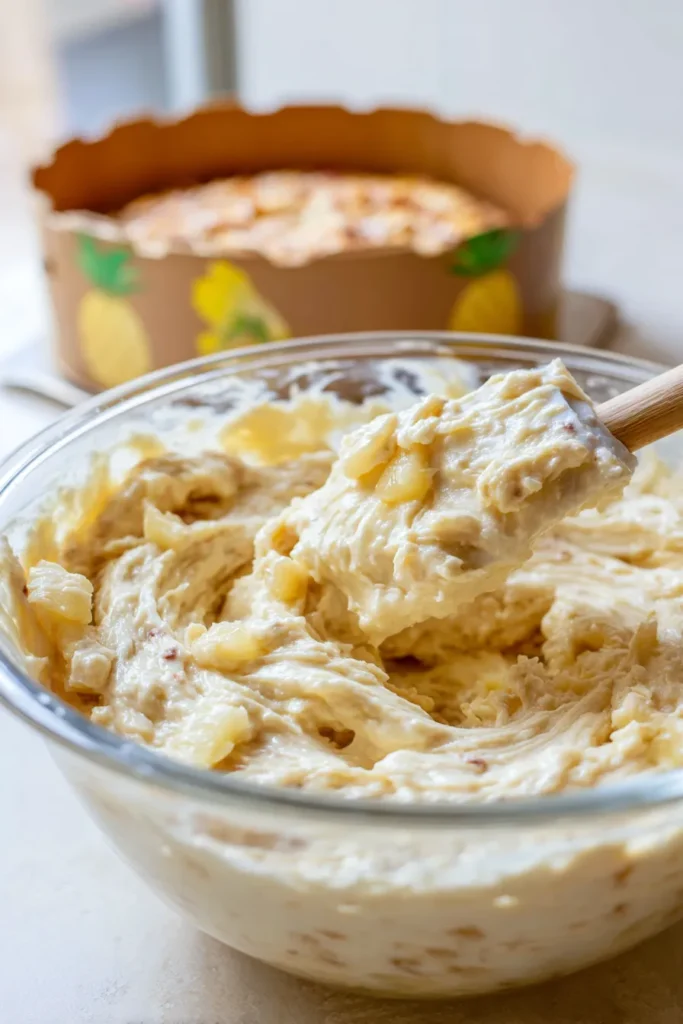
We need a sturdy, thick batter for this specific cake. A thick batter will not seep underneath the fruit layer and ruin the design.
Step-by-Step Baking Guide
Now that our ingredients are ready, let’s begin.
Follow these steps carefully for the best possible results. Take your time. Enjoy the wonderful aromas filling your kitchen.
Preparing the Caramel Fruit Topping
1. Preheat your oven. Set the temperature to 180°C/350°F. If you are using a fan-forced oven, use 160°C.
2. Dry the fruit completely. Line a tray with paper towels. Place your pineapple rings and cherries on the towels. Pat them completely dry. This prevents watery fruit from ruining your caramel glaze.
3. Prepare the cake pan. Pour your melted butter into a 23cm/9-inch round pan. Ensure the pan is at least 5cm/2-inches deep. Do not use a springform pan. It will leak caramel all over your oven. Brush the butter up the sides of the pan.
4. Add the sugar. Sprinkle the brown sugar evenly over the melted butter. Do not worry about making it perfectly smooth. The sugar will melt and spread naturally during the baking process.
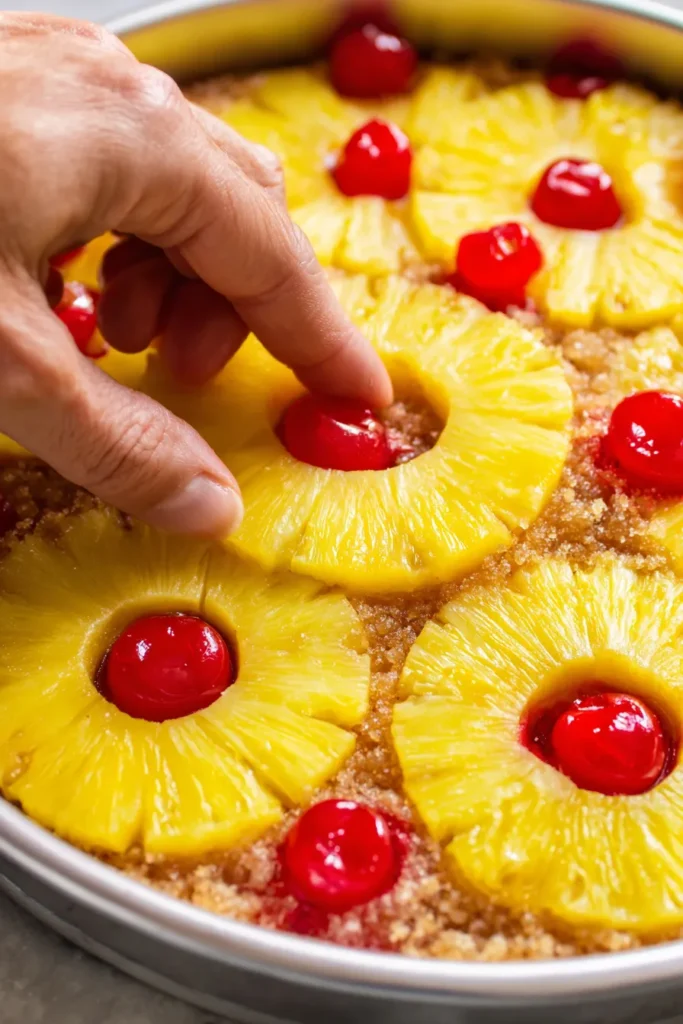
5. Arrange your design. Place one pineapple ring directly in the center. Surround it with halved or whole rings. Place your cherries in the center holes of the pineapple rings.
6. Press firmly. Press the fruit down firmly into the sugar layer. This ensures the fruit touches the bottom of the pan directly. Direct contact provides the most vibrant fruit colors after flipping.
Mixing the Cake Batter
1. Whisk the dry ingredients. In a medium bowl, combine the flour, baking powder, baking soda, and salt. Whisk them together thoroughly.
2. Whisk the wet ingredients. In a separate small bowl, combine the milk, sour cream, and pineapple juice. Add the vanilla extract and whisk until perfectly smooth.
3. Cream the butter and sugar. Place the softened butter and white sugar into a large mixing bowl. Beat them together on medium-high speed for about two minutes. The mixture should look very pale, light, and fluffy.
4. Incorporate the eggs. Add the room-temperature eggs to the butter mixture one at a time. Beat the mixture for twenty seconds after adding each egg.
5. Combine wet and dry mixtures. Add one-third of your dry flour mixture to the butter. Fold it gently using a rubber spatula. Next, fold in half of your wet milk mixture.
6. Finish the batter. Add another third of the flour. Follow that with the remaining milk mixture. Finally, fold in the last of the flour. Stir gently until just combined.
7. Add leftover fruit. Take any remaining chopped pineapple pieces. Gently fold them into your finished batter.
Baking and Cooling
1. Fill the pan. Carefully scrape your thick batter over the arranged fruit topping. Use your spatula to spread the batter out gently. Smooth and level the surface as best as you can.
2. Bake the cake. Place the pan on the middle rack of your preheated oven. Bake uncovered for exactly 30 minutes.
3. Tent with foil. After 30 minutes, remove the pan briefly. Loosely cover the top with aluminum foil. This prevents the top of the cake from burning. Return it to the oven for another 15 minutes.
4. Test for doneness. Insert a wooden toothpick directly into the center of the sponge. It should come out completely clean or with dry crumbs. If you see wet batter, bake it for five more minutes.
The Art of the Flip
Many people feel nervous about flipping an upside-down dessert.
I remember my first time flipping one. My hands were shaking. My heart was racing. I stared at the pan for five whole minutes.
The pressure is on. You wonder if the fruit will stick. You worry the cake will break in half.
But I promise you, there is absolutely nothing to fear. It is actually quite simple.
1. Let it cool. Remove the pan from the oven. Set it on a wire rack. Let the cake cool in the pan for exactly 20 minutes. Do not rush this step.
2. Loosen the edges. Take a blunt butter knife. Run it carefully around the inside edge of the pan. This releases any sticky caramelized sugar from the sides.
3. Prepare to flip. Place your serving platter upside down over the cake pan. Place one hand firmly on the platter. Place your other hand under the warm pan.
4. Flip with confidence. In one quick, fluid motion, flip the pan and platter over. Tap the base of the pan gently. Slowly lift the pan straight up to reveal your masterpiece.
Serving, Storage, and FAQs
Congratulations on completing your beautiful tropical dessert.
The hard work is done. Now it is time to enjoy the fruits of your labor.
Let the cake cool entirely before slicing it. Warm cake is incredibly fragile. It might crumble right under your knife.
Serving it at room temperature allows the flavors to truly shine.
Because anytime you let the cake rest, the sponge will:
- soak up every last drop of that sweet caramel
- become even softer in texture
- taste even better on the second day
- cut into perfectly clean slices
Storage Instructions
This dessert stores beautifully if handled correctly.
Refrigeration
Place any leftover slices in an airtight container. Store the container in the refrigerator. It will stay fresh and delicious for up to five days.
Serving Leftovers
Nobody enjoys eating a freezing cold sponge cake. Bring your chilled slices out of the fridge early. Let them sit on the counter for thirty minutes before eating.
Freezing
You can freeze this dessert, but the fruit texture may alter slightly. Wrap individual slices tightly in plastic wrap. Freeze for up to two months. Thaw overnight in the fridge before serving.
Frequently Asked Questions
Can I substitute the sour cream in the batter?
Yes, absolutely. If you do not have sour cream on hand, plain yogurt works perfectly. Choose a full-fat yogurt for the best moisture and texture. Greek yogurt is acceptable, but standard plain yogurt mimics sour cream best.
Why did my cake stick to the bottom of the pan?
Sticking usually happens for two reasons. First, the cake might not have cooled long enough. You must wait exactly 20 minutes before flipping. Second, you might have hesitated during the flip. Always flip quickly and with total confidence. Gently tapping the bottom of the pan also helps release the fruit.
Can I use fresh pineapple instead of canned fruit?
I highly recommend sticking to canned pineapple slices in juice. Canned fruit has a consistent moisture level and tenderness. Fresh pineapple can be quite tough. It also releases unpredictable amounts of water. If you must use fresh, slice it very thin to ensure it softens during baking.
What do I do if my butter is too soft?
If your butter feels greasy and sloppy, do not use it yet. Place the bowl of butter into the refrigerator for ten minutes. You want it pliable but still holding its shape. Creaming melted butter will ruin the structure of your sponge.
Why do I need both baking soda and baking powder?
This batter is quite heavy due to the sour cream and fruit juices. Baking soda provides a massive lift when combined with acidic ingredients. Baking powder offers a steady, even rise. Using both guarantees a wonderfully fluffy texture despite the dense ingredients.
Enjoy baking this retro classic for your family and friends. It is guaranteed to bring smiles to the table.
Classic Pineapple Upside Down Cake
Ingredients
Caramel Fruit Topping
- 565 g canned pineapple slices in juice, not in syrup
- 12-18 pieces maraschino cherries drain these very well
- 4 tbsp unsalted butter melted completely
- 1/2 cup brown sugar light or dark works fine
Cake Batter
- 1 1/2 cups all-purpose flour spooned and leveled
- 1 tsp baking powder check expiration dates
- 1/4 tsp baking soda can substitute 1 tsp baking powder
- 1/4 tsp salt balances the overall sweetness
- 1/3 cup milk full or low-fat is fine
- 1/4 cup pineapple juice reserved from the canned fruit
- 1/4 cup sour cream full fat, substitute plain yogurt
- 1 tsp vanilla extract vanilla essence also works well
- 115 g unsalted butter softened to 18°C/64°F
- 3/4 cup white sugar granulated provides the best texture
- 2 large eggs must be at room temperature
- leftover pineapple chopped into small pieces
Instructions
- Preheat your oven to 180°C/350°F. If you are using a fan-forced oven, use 160°C.
- Line a tray with paper towels. Place your pineapple rings and cherries on the towels. Pat them completely dry.
- Pour melted butter into a 23cm/9-inch round pan (at least 5cm/2-inches deep, do not use a springform pan). Brush the butter up the sides.
- Sprinkle brown sugar evenly over the melted butter.
- Place one pineapple ring directly in the center. Surround it with halved or whole rings. Place your cherries in the center holes of the pineapple rings. Press the fruit down firmly into the sugar layer.
- In a medium bowl, combine the flour, baking powder, baking soda, and salt. Whisk them together thoroughly.
- In a separate small bowl, combine the milk, sour cream, pineapple juice, and vanilla extract. Whisk until perfectly smooth.
- Place the softened butter and white sugar into a large mixing bowl. Beat them together on medium-high speed for about two minutes until pale, light, and fluffy.
- Add the room-temperature eggs to the butter mixture one at a time. Beat for twenty seconds after adding each egg.
- Add one-third of your dry flour mixture to the butter. Fold gently. Next, fold in half of your wet milk mixture. Add another third of the flour. Follow that with the remaining milk mixture. Finally, fold in the last of the flour until just combined.
- Gently fold any remaining chopped pineapple pieces into your finished batter.
- Carefully scrape your thick batter over the arranged fruit topping. Spread the batter out gently and level the surface.
- Bake uncovered on the middle rack of your oven for exactly 30 minutes. Remove briefly, loosely cover the top with aluminum foil, and return to the oven for another 15 minutes.
- Insert a wooden toothpick directly into the center. It should come out completely clean or with dry crumbs.
- Remove the pan from the oven and set it on a wire rack. Let the cake cool in the pan for exactly 20 minutes.
- Take a blunt butter knife and run it carefully around the inside edge of the pan. Place your serving platter upside down over the cake pan. In one quick, fluid motion, flip the pan and platter over. Tap the base of the pan gently and slowly lift the pan straight up.