Look, I’ve made a lot of pancakes in my life.
Too many to count, honestly.
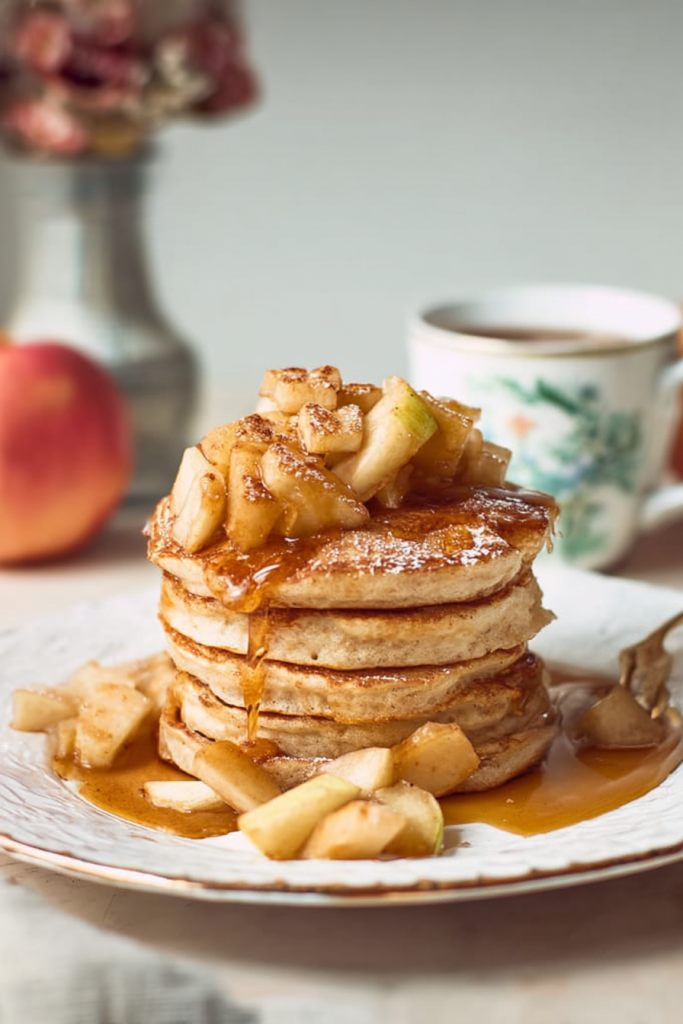
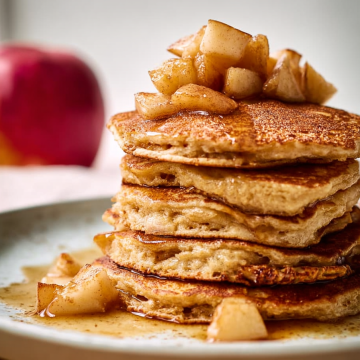
But something about apple pancakes just hits different. Especially on those crisp fall mornings when the air smells like changing leaves and you’re still in your pajamas.
There’s this magic combination happening here. Tender apples. Warm spices. Fluffy batter that practically floats off your fork.
This recipe? It’s my weekend go-to now.
And here’s the secret I figured out after way too many experiments: you need apples in two forms. One grated right into the batter for moisture and sweetness. Another diced and caramelized with butter for the topping.
Trust me on this.
What Makes These Different
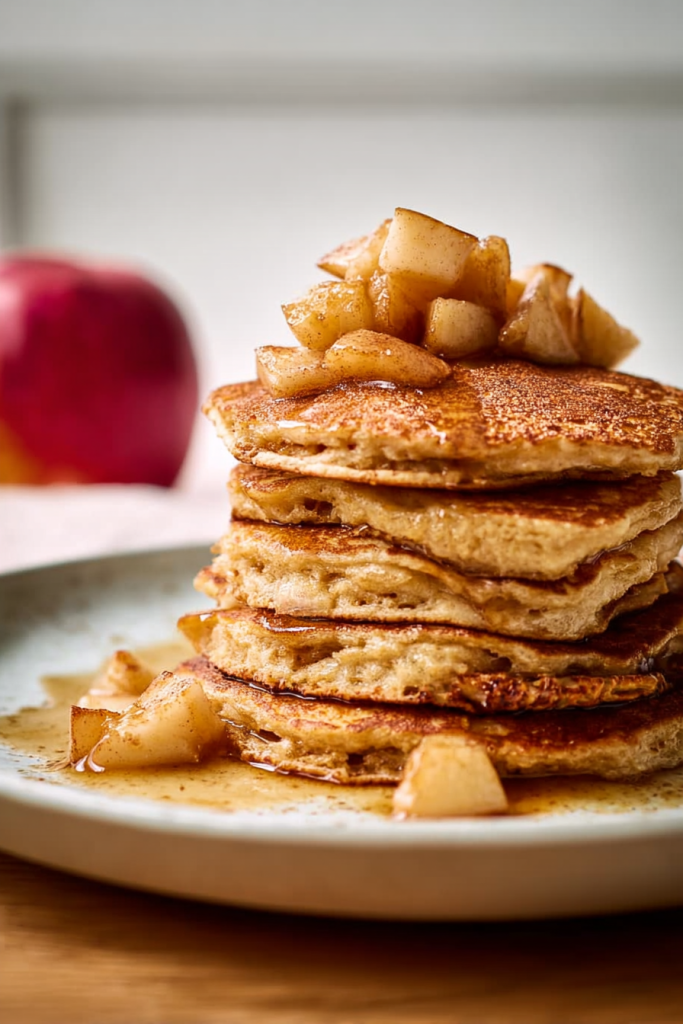
These aren’t your regular pancakes.
They’re thicker. Fluffier. And packed with actual apple flavor in every single bite.
The texture? That’s what gets me every time.
When you let the batter rest for five minutes, something beautiful happens. The flour hydrates. The pancakes become incredibly soft. They literally melt in your mouth.
And the grated apple adds this amazing moisture without making things soggy. No dense, heavy pancakes here.
Then there’s the topping…
Oh man, the topping.
I cook diced apples with brown sugar, cinnamon, and butter until they’re tender and syrupy. It’s like having apple pie for breakfast.
But better.
Way better.
Why You Need This in Your Life
Picture this:
You’re standing in your kitchen on a Saturday morning. These pancakes are cooking. The smell of cinnamon and caramelized apples fills every corner of your house.
It’s the kind of aroma that makes everyone come running to the kitchen.
“What are you making??”
The best part? They’re surprisingly simple. I can make these from start to finish in about 35 minutes. That includes everything—prep, cooking, making the apple topping.
And if you’re new to pancake-making?
Don’t sweat it.
The batter is thick and forgiving. It works every single time. No pancake fails here.
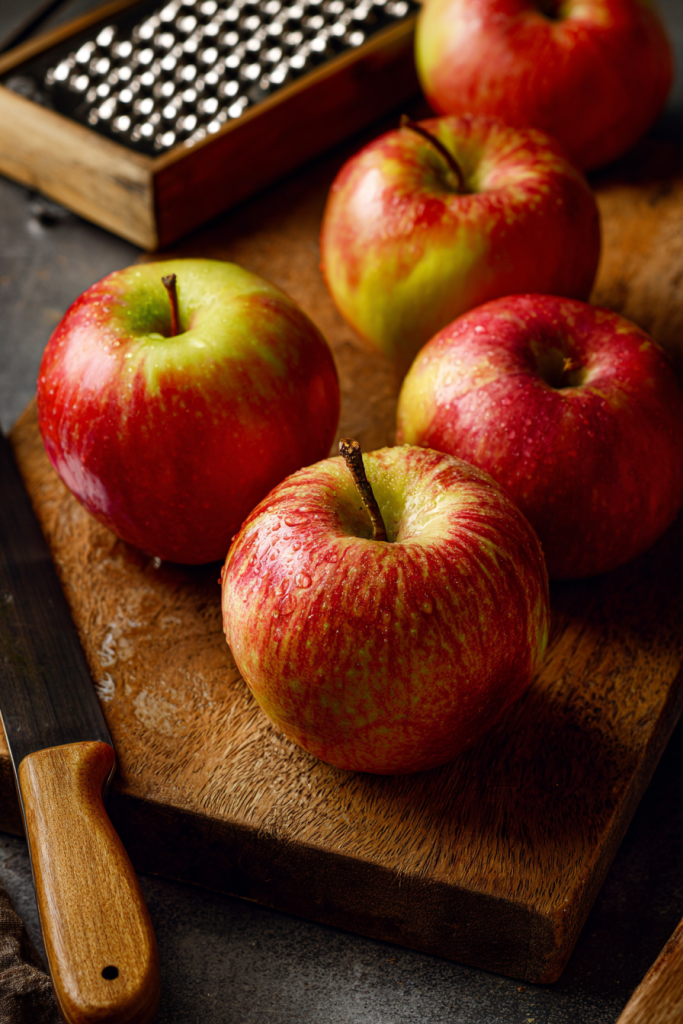
Picking Your Apples (This Actually Matters)
Here’s something most people don’t think about:
Apple selection changes everything.
I always grab sweet-tart varieties. Honeycrisp is my personal favorite—crisp, juicy, that perfect balance. Pink Lady works beautifully too, with a bit more tartness.
Stay away from Red Delicious apples though.
They turn mushy when you cook them. You lose that nice texture contrast. If you want something really tart, Granny Smith apples work in a pinch.
But Honeycrisp? That’s the winner in my book.
Breaking Down the Ingredients
Let me tell you what each ingredient actually does here.
Brown sugar isn’t just for sweetness. It adds this subtle caramel note that white sugar can’t match. Light or dark? Either one works great.
Butter creates richness in both the batter and that amazing apple topping. I use unsalted so I can control the salt myself. Just make sure your melted butter cools down before mixing it in.
Cinnamon brings the warmth. Don’t skip it. This is what gives you that cozy fall flavor everyone loves. Vanilla extract rounds everything out.
Baking powder is your fluff factor. Make sure yours is fresh. Old baking powder? You’ll get flat, sad pancakes. Nobody wants that.
Now let’s actually make these.
The Complete Ingredient List
| Ingredient | Quantity | Notes |
|---|---|---|
| Unsalted butter (for topping) | 2 tablespoons | Room temperature works fine |
| Sweet-tart apples (diced) | 2 medium (2 cups) | Honeycrisp or Pink Lady preferred |
| Brown sugar (for topping) | 1 tablespoon | Light or dark both work |
| Ground cinnamon (for topping) | 1/2 teaspoon | Fresh is always better |
| Kosher salt (for topping) | 1 pinch | Really enhances the sweetness |
| Unsalted butter (for pancakes) | 4 tablespoons | Let it cool after melting |
| All-purpose flour | 1 1/2 cups | Spoon and level for accuracy |
| Brown sugar (for batter) | 2 tablespoons | Pack it when measuring |
| Baking powder | 2 teaspoons | Check that expiration date |
| Ground cinnamon (for batter) | 1 teaspoon | This is essential |
| Milk | 1 cup | Whole milk is best |
| Large eggs | 2 | Room temp if you have time |
| Vanilla extract | 2 teaspoons | Use the real stuff, not imitation |
| Kosher salt (for batter) | 1/2 teaspoon | Balances everything |
| Sweet-tart apple (grated) | 1 medium (1 1/4 cups) | Grate it fresh, right before using |
| Canola or vegetable oil | 4 teaspoons (divided) | For cooking |
| Maple syrup | Optional | For serving |
Prep Time: 15 minutes | Cook Time: 20 minutes | Total Time: 35 minutes
Servings: 4 | Difficulty: Easy | Makes: 12 pancakes
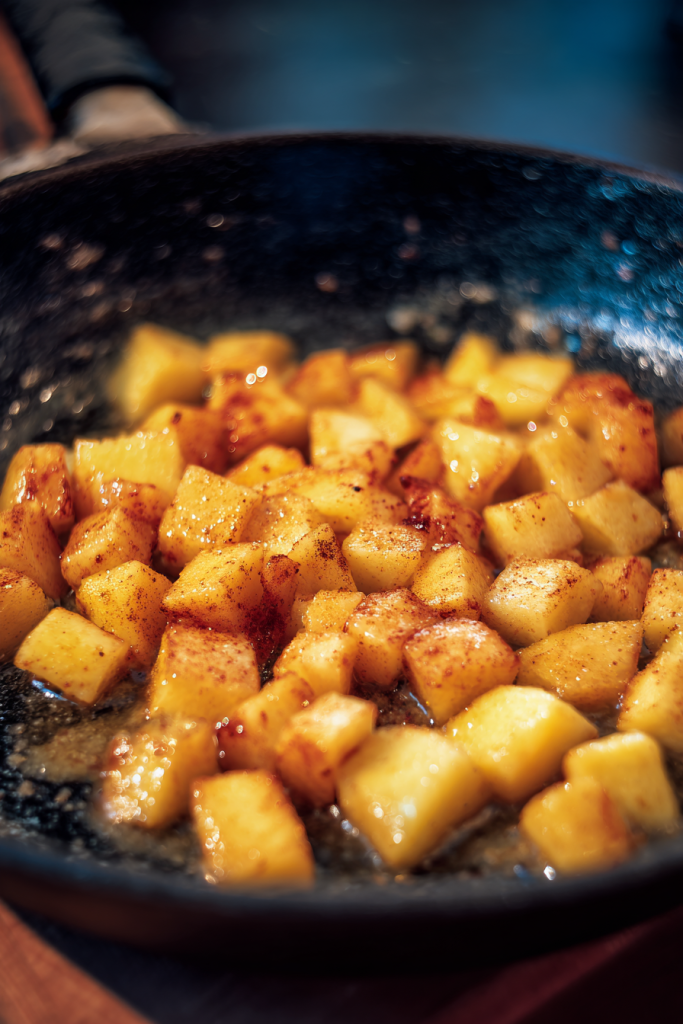
Step 1: Make That Apple Topping
I always start here.
Why? Because the topping can just sit and stay warm while you handle the batter.
Grab a medium skillet. Medium heat. Drop in your butter and let it melt completely. You want it foaming a bit.
Now add your peeled, diced apples.
Sprinkle in the brown sugar, cinnamon, and that pinch of salt. Stir everything so the apples get coated in all that buttery goodness.
Cook for 3-5 minutes. Stir occasionally.
You’ll know it’s ready when the apples start getting soft and the sugar turns into this syrupy coating. The apples should hold their shape but feel tender when you poke them with a fork.
Turn off the heat.
Set it aside.
Done.
If it cools down later, just warm it gently before serving.
Step 2: Mix Your Batter
Grab a medium bowl first.
Whisk together your dry ingredients: flour, brown sugar, baking powder, and cinnamon. Whisk it really well. You want zero lumps and everything distributed evenly.
Now take a separate large bowl.
Time for the wet ingredients. Add milk, melted butter, eggs, vanilla extract, and salt. Whisk hard until everything combines and gets a little frothy.
Here’s where people mess up:
Don’t overmix.
Fold the dry ingredients into the wet ingredients with a flexible spatula. Use gentle folding motions. Not aggressive stirring. Combine just until you can’t see dry flour anymore.
Add your grated apple.
Fold it in gently.
See a few lumps in the batter? Perfect. That’s exactly what you want. Overmixing = tough, dense pancakes. Nobody wants that.
Now here’s the secret step most people skip:
Let the batter rest for 5 minutes.
Just sit there and wait.
This lets the flour absorb the liquid. The batter thickens slightly. This is what gives you those tall, fluffy pancakes.
Step 3: Cook These Beauties
Heat your nonstick or cast-iron skillet over medium heat.
Give it at least 2 minutes to warm up properly. This matters more than you think. Even heating = golden-brown color.
Add 1 teaspoon of oil. Swirl it around.
The oil should shimmer but not smoke. If it’s smoking? Your heat’s too high. Turn it down.
Grab a 1/4-cup measuring cup.
Pour 3-4 portions into the pan, depending on how big your skillet is. Leave space between them. They need room to breathe.
Now watch for bubbles on the surface.
This takes about 2-3 minutes. The edges will start looking set instead of wet. Check the bottoms—they should be deep golden-brown.
Time to flip.
Use a wide spatula. Be gentle. Cook the second side for another 2-3 minutes. It should match the first side in color.
Transfer to a plate.
Making multiple batches? Keep the finished ones warm in a 250°F oven. Add another teaspoon of oil before starting your next batch.
Repeat until all the batter’s gone.
Quick Tips That Actually Matter
Temperature control is everything.
If your pancakes are browning too fast, drop the heat to medium-low. You want even cooking all the way through. Not burnt outsides with raw centers.
Don’t press down on the pancakes.
I see people do this all the time with their spatula. Don’t. You’re just squeezing out all the air that makes them fluffy. Let them cook undisturbed.
Grate your apple fresh.
Right before mixing the batter. Not an hour before. Not even 15 minutes before. Fresh grating releases more juice and prevents that brown, oxidized look.
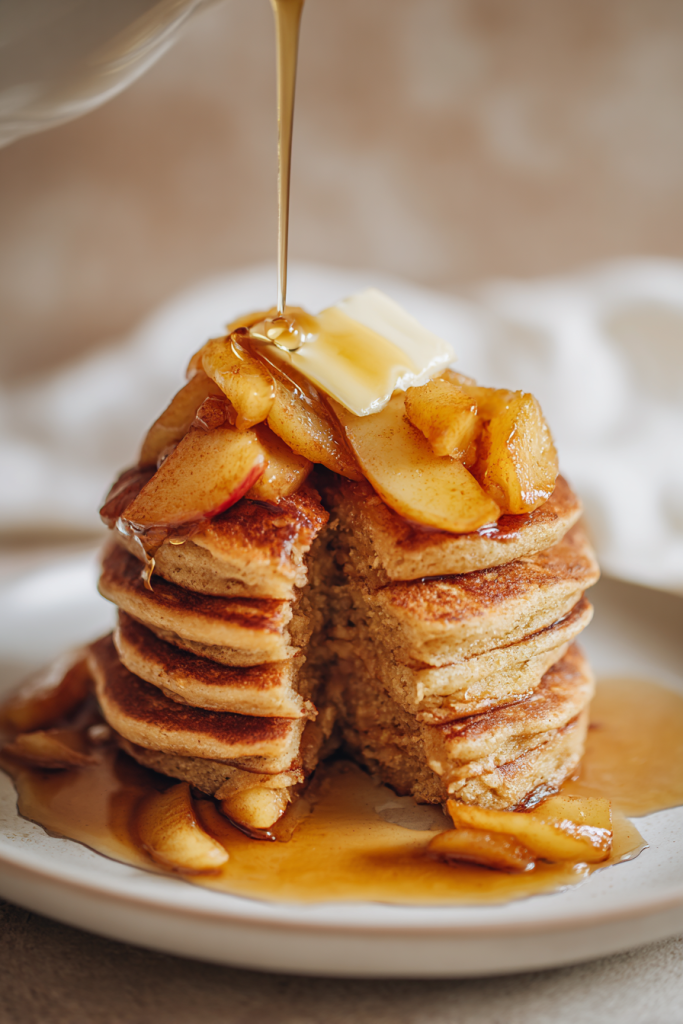
How to Serve These
I keep it simple:
Big dollop of butter on top. The heat melts it perfectly. Then spoon that warm apple topping over the whole stack.
Maple syrup is classic. Always good.
But you could also try:
- Apple cider syrup (this is incredible)
- Powdered sugar for a fancy look
- Whipped cream or Greek yogurt for tanginess
- Chopped pecans or walnuts for crunch
Storing Leftovers
Got extras? Lucky you.
Stick them in an airtight container in your fridge. They’ll stay fresh for up to 5 days. Stack them with parchment paper between each one so they don’t stick together.
Reheating options:
Toaster or toaster oven works great. You get some of that crispness back.
Microwave for 20-30 seconds if you’re in a hurry. They’ll be softer this way though.
Freezing for later:
These freeze beautifully for up to 2 months.
Let them cool completely first. Wrap each one individually in plastic wrap. Toss the wrapped pancakes in a freezer-safe bag.
When you want them, thaw overnight in the fridge. Reheat on the stovetop with a little butter. This brings back that fresh-cooked texture way better than the microwave.
The apple topping? Store it separately in a sealed container. It’ll keep for about 3 days in the fridge. Warm it gently before serving.
Make-Ahead Strategy
Want to prep some stuff the night before?
The apple topping can be made a full day ahead. Cool it completely, then refrigerate. Honestly, this helps the flavors blend together even better.
You can also whisk your dry ingredients together and store them in an airtight container. When morning comes, just mix the wet stuff and combine everything. Saves time when you’re still half-asleep.
But here’s what I don’t recommend:
Mixing the complete batter ahead of time.
Baking powder starts working the second it hits liquid. You want that happening right before cooking, not hours before. Fresh batter = fluffiest results.
Your Questions Answered
Can I use different apples?
Yep! Honeycrisp and Pink Lady are my favorites, but Gala and Fuji work great too. Just avoid super soft varieties that turn to mush. Want it tart? Go with Granny Smith.
What if I don’t have brown sugar?
Regular white sugar works in a pinch. You’ll lose that caramel-y depth, but the pancakes will still taste good. Coconut sugar is another option if you want something different.
Can I make these dairy-free?
Absolutely. Swap in your favorite non-dairy milk—almond, oat, soy, whatever. Replace the butter with coconut oil or plant-based butter. The texture changes slightly, but they’re still tasty.
Why are my pancakes flat?
Two main culprits here:
First, check your baking powder. Is it fresh? Expired baking powder = flat pancakes.
Second, are you overmixing? Gentle folding keeps those air bubbles intact. Aggressive stirring destroys them.
Can I add other spices?
Sure! A pinch of nutmeg or ginger adds extra warmth. Apple pie spice is a great cinnamon substitute. Use the same measurements the recipe calls for.
My Final Thoughts
These apple pancakes have become our weekend tradition.
My kids ask for them. My husband makes extra coffee. The kitchen fills with that amazing cinnamon-apple smell.
They’re special enough for lazy Sunday brunches. But simple enough that I’ve made them on random Tuesday mornings too.
The recipe is flexible. Adjust the spices. Try different apples. Make it your own.
But here’s the thing about pancakes:
Patience matters.
Don’t rush that 5-minute rest. Don’t crank up the heat too high. Let them cook properly.
Take your time.
Enjoy the process.
And then enjoy those fluffy, apple-packed pancakes.
Happy cooking!
Recipe Yield: 12 (3-inch) pancakes
Best Served: Immediately while warm
Keywords: apple pancakes, breakfast recipe, fluffy pancakes, apple cinnamon pancakes
Easy Apple Pancakes with Caramelized Apple Topping
Ingredients
Apple Topping
- 2 tablespoons unsalted butter
- 2 medium sweet-tart apples peeled and diced (2 cups), Honeycrisp or Pink Lady preferred
- 1 tablespoon brown sugar
- 1/2 teaspoon ground cinnamon
- 1 pinch kosher salt
Pancake Batter
- 1 1/2 cups all-purpose flour
- 2 tablespoons brown sugar packed
- 2 teaspoons baking powder
- 1 teaspoon ground cinnamon
- 1/2 teaspoon kosher salt
- 1 cup milk whole milk preferred
- 4 tablespoons unsalted butter melted and cooled
- 2 large eggs
- 2 teaspoons vanilla extract
- 1 medium sweet-tart apple grated (1 1/4 cups)
- 4 teaspoons canola or vegetable oil divided, for cooking
For Serving
- maple syrup optional
- butter optional
Instructions
- In a medium skillet over medium heat, melt 2 tablespoons butter. Add diced apples, brown sugar, cinnamon, and a pinch of salt. Stir to coat the apples.
- Cook for 3-5 minutes, stirring occasionally, until apples are tender and syrupy. Turn off heat and set aside.
- In a medium bowl, whisk together flour, brown sugar, baking powder, cinnamon, and salt until well combined.
- In a large bowl, whisk together milk, melted butter, eggs, vanilla extract, and salt until frothy.
- Gently fold the dry ingredients into the wet ingredients using a flexible spatula. Mix just until no dry flour remains. Do not overmix – lumps are okay.
- Fold in the grated apple gently. Let the batter rest for 5 minutes to thicken.
- Heat a nonstick or cast-iron skillet over medium heat for 2 minutes. Add 1 teaspoon oil and swirl to coat.
- Pour 1/4 cup batter per pancake into the skillet, making 3-4 pancakes depending on skillet size. Leave space between them.
- Cook for 2-3 minutes until bubbles form on the surface and edges look set. The bottoms should be deep golden-brown.
- Flip gently with a wide spatula and cook the second side for 2-3 minutes until golden-brown.
- Transfer to a plate and keep warm in a 250°F oven if making multiple batches. Add 1 teaspoon oil before each new batch.
- Serve warm pancakes topped with butter, the caramelized apple topping, and maple syrup if desired.