Easy Muffin Almond Granola Recipe | Homemade & Healthy
There’s something magical about the aroma of homemade granola wafting through my kitchen on a Sunday morning. I discovered this incredible muffin almond granola recipe during one of those experimental baking sessions that turned into pure gold. What started as a quest to recreate the expensive granola from my local café became my signature breakfast creation that friends and family constantly request.

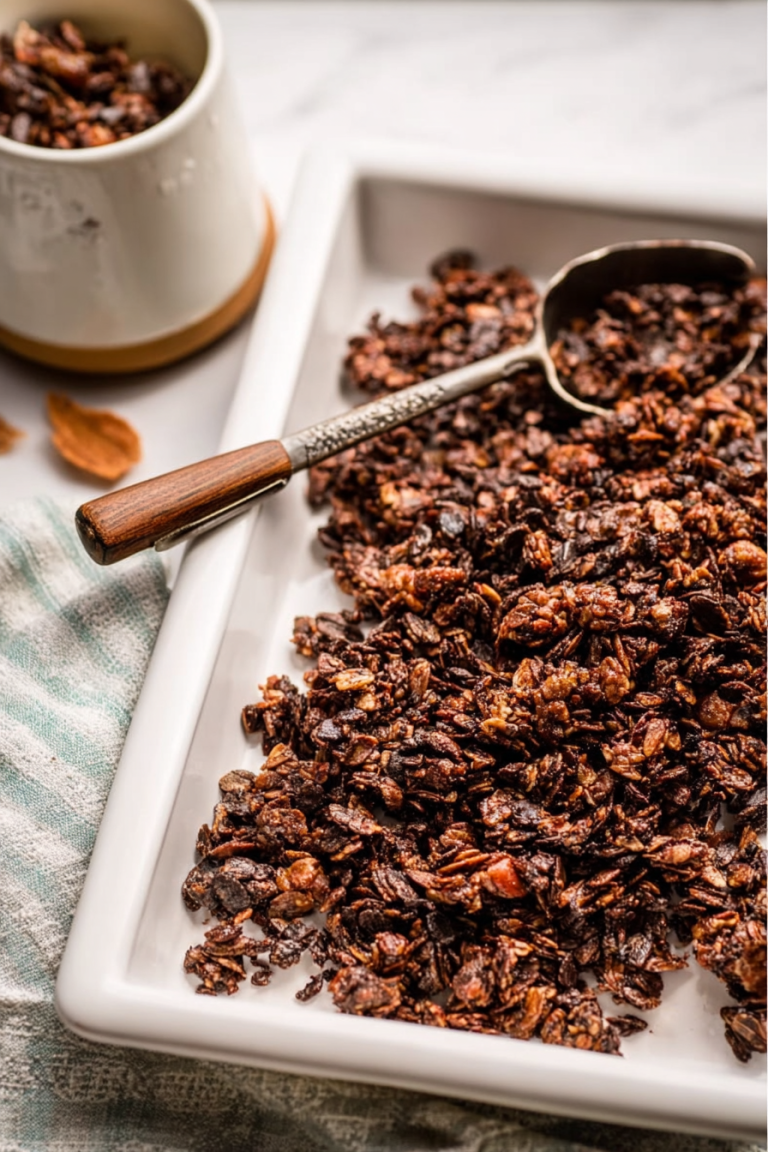
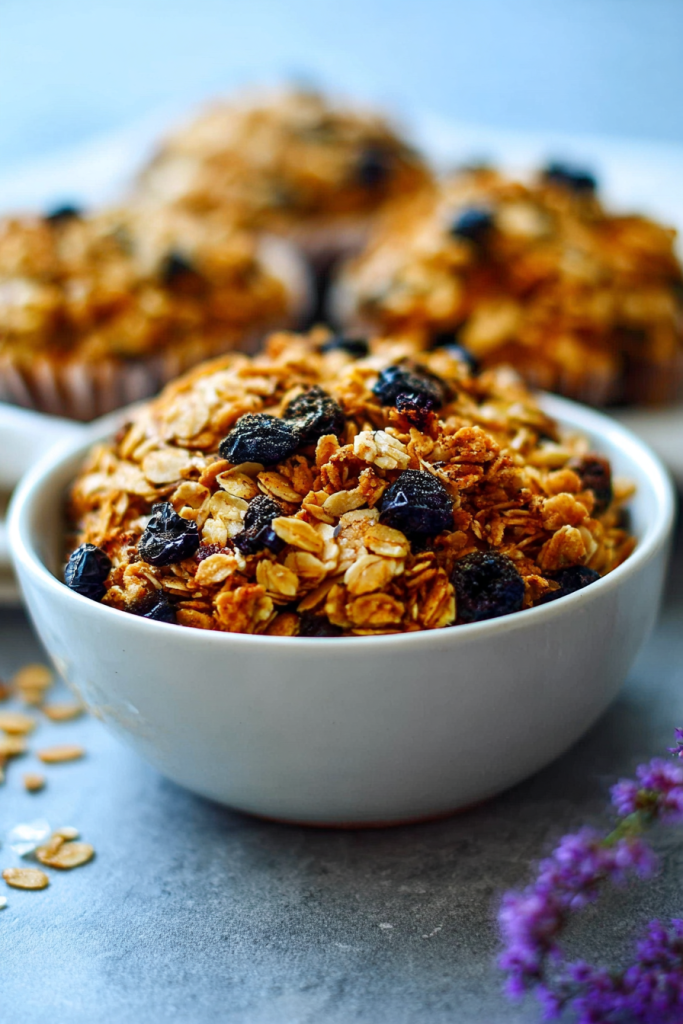
The beauty of this muffin almond granola lies in its perfect balance of textures and flavors. Unlike store-bought versions loaded with artificial ingredients and excessive sugar, my recipe combines wholesome oats, crunchy sliced almonds, and aromatic spices that create clusters reminiscent of your favorite blueberry muffin. The addition of dried blueberries ties everything together, delivering that nostalgic muffin flavor in every bite.
I’ve spent countless mornings perfecting this recipe, adjusting the maple syrup ratio and experimenting with different spice combinations. The breakthrough came when I realized that the secret wasn’t just in the ingredients—it was in the technique. The way you mix the wet and dry ingredients, the oven temperature, and even the cooling process all contribute to achieving those coveted golden clusters that make this granola irresistible.
What sets this muffin almond granola apart is its versatility. I’ve served it over Greek yogurt for protein-packed breakfasts, sprinkled it on smoothie bowls for added crunch, and even enjoyed it as a healthy snack straight from the jar. The combination of coconut oil and maple syrup creates a natural sweetness that satisfies without the sugar crash, while the almond extract adds that distinctive muffin-like flavor that makes this recipe truly special.
The nutritional benefits are impressive too. Each serving provides heart-healthy fats from almonds and coconut oil, fiber from oats, and natural energy from maple syrup. I love knowing that I’m starting my day with wholesome ingredients that fuel my body properly.
Recipe Overview
Prep Time: 10 minutes | Cook Time: 25 minutes | Total Time: 35 minutes
Servings: 8 cups | Difficulty: Easy
Ingredients Table
| Ingredient | Quantity | Notes |
|---|---|---|
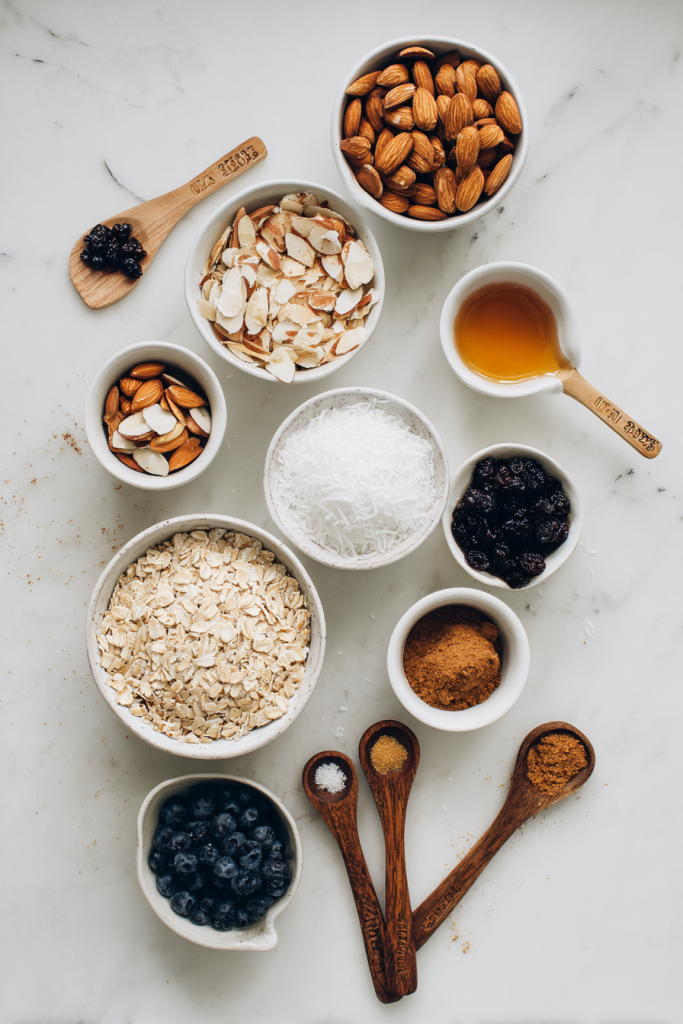
| Old-fashioned rolled oats | 3 cups | Avoid instant oats for best texture |
| Sliced almonds | 1 cup | Raw, unsalted preferred |
| Shredded coconut | 1 cup | Unsweetened works best |
| Ground cinnamon | 1 teaspoon | Fresh ground for maximum flavor |
| Ground nutmeg | 1/4 teaspoon | A little goes a long way |
| Coconut sugar | 1/4 cup | Brown sugar is a good substitute |
| Salt | 1/4 teaspoon | Enhances all other flavors |
| Maple syrup | 1/2 cup | Pure maple syrup only |
| Melted coconut oil | 1/2 cup | Allow to cool slightly before mixing |
| Vanilla extract | 1 teaspoon | Pure vanilla extract recommended |
| Almond extract | 1 teaspoon | Key to the muffin flavor profile |
| Dried blueberries | 1 cup | Add after baking to prevent burning |
Instructions and Tips
Creating the perfect muffin almond granola requires attention to detail, but don’t worry—I’ll walk you through every step of my foolproof method. Over the years, I’ve learned that small adjustments make enormous differences in the final product.
Step-by-Step Instructions
Step 1: Prepare Your Workspace Preheat your oven to 300°F (150°C). I always use a lower temperature than most granola recipes because it prevents burning while ensuring even browning. Line a large baking sheet with parchment paper—this prevents sticking and makes cleanup effortless.
Step 2: Mix the Dry Ingredients In a large mixing bowl, combine the oats, sliced almonds, shredded coconut, cinnamon, nutmeg, coconut sugar, and salt. I use a whisk to ensure even distribution, paying special attention to breaking up any clumps in the coconut sugar. Pro tip: If your coconut sugar is particularly clumpy, run it through a fine-mesh sieve first.
Step 3: Prepare the Wet Mixture In a separate bowl, whisk together the maple syrup, melted coconut oil, vanilla extract, and almond extract. The key here is temperature—your coconut oil should be melted but not hot, as excessive heat can cause the maple syrup to become too thin. I usually let the melted coconut oil cool for about 5 minutes before combining.
Step 4: Combine and Mix Pour the wet ingredients over the dry mixture and stir thoroughly. I use a large wooden spoon and make sure every oat is coated. The mixture should look glossy and hold together when pressed. This is where the magic happens—proper coating ensures those coveted clusters we’re after.
Step 5: Baking Process Spread the mixture evenly on your prepared baking sheet. Here’s my secret: don’t spread it too thin. I create a layer about 1/2 inch thick, which promotes cluster formation. Bake for 20-25 minutes, stirring gently every 8-10 minutes to ensure even browning.
Step 6: The Cooling Stage This step is crucial and where many people go wrong. Remove the granola from the oven when it’s golden brown but still slightly soft—it will continue cooking and crisping as it cools. Let it cool completely on the baking sheet without stirring. This patience pays off with perfectly crispy clusters.
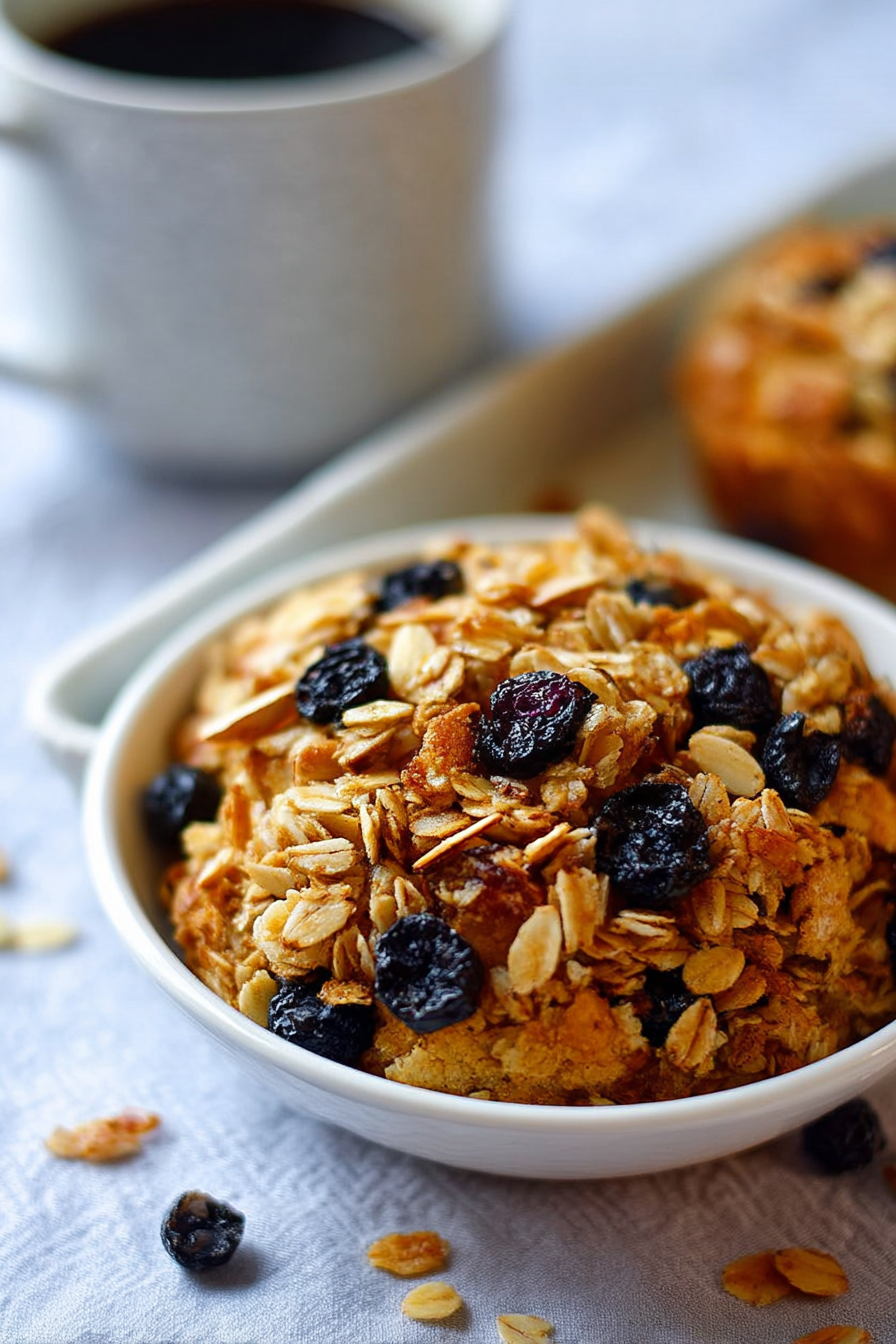
Step 7: Final Assembly Once completely cool, break the granola into desired cluster sizes and gently fold in the dried blueberries. I add the blueberries at the end to prevent them from becoming too hard during baking.
Pro Tips for Success
- Cluster Formation: Press the mixture firmly on the baking sheet before baking. The more compact it is, the better your clusters will be.
- Storage: Store in an airtight container for up to two weeks. I often make double batches because it disappears quickly in my household.
- Customization: This recipe is incredibly forgiving. I’ve successfully substituted pecans for almonds and added dried cranberries instead of blueberries.
The result is absolutely divine—crunchy, flavorful granola with that distinctive muffin taste that makes breakfast feel like a treat.
Serving Suggestions and FAQs
After perfecting this muffin almond granola recipe, I’ve discovered countless ways to enjoy it beyond the traditional bowl with milk. Let me share my favorite serving suggestions and answer the questions I’m asked most frequently about this recipe.
Creative Serving Ideas
Breakfast Perfection My go-to breakfast combines 1/2 cup of this granola with Greek yogurt and fresh berries. The protein from the yogurt, healthy fats from the nuts, and natural sweetness create a balanced meal that keeps me satisfied until lunch. I also love layering it in mason jars with yogurt for grab-and-go breakfasts during busy weeks.
Smoothie Bowl Topping This granola transforms ordinary smoothie bowls into Instagram-worthy masterpieces. I sprinkle it generously over my favorite berry smoothie base, adding sliced bananas and a drizzle of almond butter. The textural contrast is absolutely divine.
Healthy Snacking I keep small portions in glass jars for afternoon snacking. Mixed with a handful of fresh grapes or apple slices, it satisfies those 3 PM cravings without the sugar crash. It’s also perfect for hiking trails or long car rides.
Dessert Applications Don’t overlook this granola’s dessert potential. I’ve used it as a topping for vanilla ice cream, incorporated it into homemade granola bars, and even folded it into muffin batter for extra texture. The muffin flavor profile makes it particularly suited for dessert applications.
Frequently Asked Questions
Q: Can I substitute the coconut oil with another oil? A: Absolutely! I’ve successfully used melted butter, avocado oil, and even olive oil (though this changes the flavor slightly). Coconut oil provides the best flavor and creates superior clusters, but these alternatives work well. If using liquid oils, you might need slightly less quantity.
Q: How do I prevent my granola from burning? A: Low and slow is the key. I always bake at 300°F and check every 8-10 minutes. If your oven runs hot, try 275°F. Also, make sure your baking sheet isn’t too dark—light-colored pans distribute heat more evenly.
Q: Can I make this recipe sugar-free? A: Yes, but with modifications. Replace the coconut sugar with a granulated sugar substitute like erythritol, and use sugar-free maple syrup. The texture might be slightly different, but it’s still delicious. I’ve had success with this adaptation for diabetic family members.
Q: Why isn’t my granola forming clusters? A: Cluster formation depends on several factors: sufficient wet ingredients, proper pressing before baking, and most importantly, not stirring during the cooling process. Make sure your mixture looks glossy and holds together when pressed before baking.
Q: How long does homemade granola last? A: Stored in an airtight container at room temperature, this granola stays fresh for up to two weeks. I’ve found that glass jars work better than plastic containers for maintaining crispness. You can also freeze it for up to three months.
Q: Can I double this recipe? A: Definitely! I often make double batches for meal prep. Just use two baking sheets and rotate them halfway through baking for even results. The preparation time barely increases, making it perfect for batch cooking.
This muffin almond granola has become a staple in my kitchen, and I’m confident it will become one of your favorites too. The combination of wholesome ingredients, incredible flavor, and endless versatility makes it worth every minute of preparation time.
Muffin Almond Granola
Ingredients
Method
- Preheat oven: Set oven to 300°F (150°C) and line a large baking sheet with parchment paper.
- Mix dry ingredients: In a large bowl, whisk together oats, almonds, coconut, cinnamon, nutmeg, coconut sugar, and salt until well combined.
- Prepare wet mixture: In a separate bowl, mix maple syrup, melted coconut oil, vanilla, and almond extracts. Ensure the coconut oil is warm but not hot.
- Combine: Pour wet mixture over dry ingredients. Stir thoroughly until oats are fully coated and mixture begins to clump together slightly.
- Bake: Spread evenly on the baking sheet in a ½-inch thick layer. Bake for 20–25 minutes, gently stirring once or twice for even browning.
- Cool: Remove from oven when golden and let cool completely without stirring to form clusters.
- Finish: Once cooled, break into desired cluster sizes and fold in dried blueberries. Store in an airtight container.