When I first discovered this incredibly simple peanut butter jelly oat bars recipe, I couldn’t believe how something so delicious could require just four pantry staples. As someone who’s always rushing between work and family commitments, I’ve fallen head over heels for these no-bake treats that satisfy my sweet tooth without demanding hours in the kitchen.
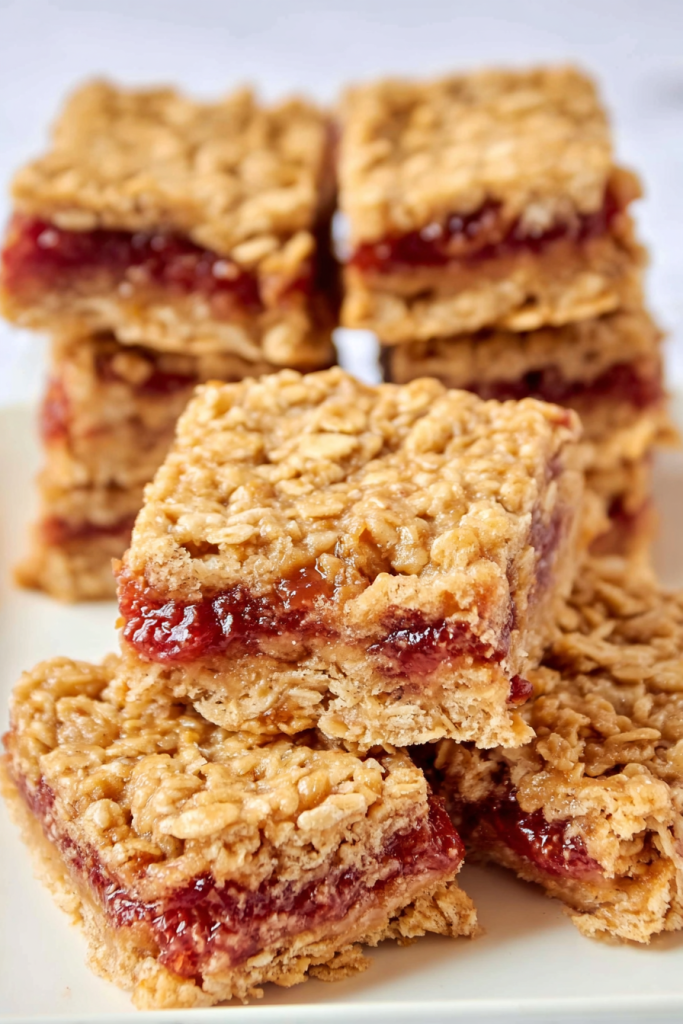
These bars have become my secret weapon for everything from packed lunches to impromptu guests. The beauty lies in their versatility – they’re equally at home as a quick breakfast bar, afternoon snack, or even a guilt-free dessert. What started as a desperate attempt to use up leftover oats has transformed into my most-requested recipe among friends and family.
The Magic of Four Simple Ingredients
Let me walk you through each component and why I’ve chosen these specific ingredients after countless kitchen experiments.
Oats: The Foundation of Everything
I’ve tested this recipe with various oat types, and here’s what I’ve learned: rolled oats are your best friend here. I prefer old-fashioned rolled oats because they maintain their texture beautifully, giving each bite a satisfying chew. Quick oats work too, but they tend to create a softer, more cake-like texture. Steel-cut oats? Skip them – they’re too tough for this no-bake method.
The oats serve as both the base and the binding agent in these bars. They absorb the natural oils from the peanut butter and the sweetness from the maple syrup, creating a cohesive mixture that holds together perfectly once set.
Natural Peanut Butter: The Star Player
This is where quality truly matters. I always reach for natural peanut butter – the kind with just peanuts and maybe a pinch of salt. Those commercial brands loaded with sugar and stabilizers? They’ll throw off the delicate balance of sweetness and texture we’re aiming for.
Pro tip: Always stir your natural peanut butter thoroughly before measuring. Those oils that separate to the top need to be incorporated for the perfect consistency. I’ve learned this the hard way after ending up with dry, crumbly bars when I skipped this step.
Maple Syrup: Nature’s Perfect Binder
Pure maple syrup isn’t just a sweetener here – it’s the glue that holds everything together. I’ve experimented with honey, agave, and other liquid sweeteners, but maple syrup wins every time. Its complex flavor profile adds depth without overwhelming the classic PB&J combination.
The key is using just enough to bind the mixture without making it soggy. Four tablespoons might seem modest, but trust me – it’s the perfect amount to create bars that slice cleanly without falling apart.
Jam: The Flavor Explosion
Here’s where you can get creative! I’ve made these bars with everything from classic strawberry to exotic fig jam. The secret is choosing a jam with good fruit content and not too much added sugar. Homemade jam works beautifully, but a quality store-bought version does the trick too.
Avoid overly runny jams or jellies – they tend to seep into the oat layers and create a soggy mess. I learned this lesson when I tried using a very liquid blackberry jam and ended up with purple-tinged oats throughout!
Ingredients Table
| Ingredient | Quantity | Notes |
|---|---|---|
| Rolled oats | 3 cups (240g) | Old-fashioned preferred for texture |
| Natural peanut butter | ¾ cup (180g) | Stir well before measuring |
| Pure maple syrup | 4 tbsp | Grade A or B work equally well |
| Fruit jam | ½ cup (160g) | Choose medium consistency, not too runny |
Now comes the fun part – actually making these incredible bars! I’ve refined this method through dozens of batches, and I’m excited to share the exact process that guarantees perfect results every time.
Prep Time: 10 minutes | Cook Time: 15 minutes | Total Time: 25 minutes
Servings: 8 bars | Difficulty: Easy
My Foolproof Assembly Method
Step 1: Create Your Base Layer
Start by combining your oats, peanut butter, and maple syrup in a large mixing bowl. This is where I use my hands – yes, you read that right! Clean hands are the best tool for getting everything evenly distributed. The mixture should hold together when squeezed but not be overly wet.
I line an 8×8 inch square pan with parchment paper, leaving overhang for easy removal later. Then I press about 60% of my oat mixture firmly into the bottom. The key word here is “firmly” – I use the bottom of a measuring cup to really compress this base layer.
Step 2: The Jam Layer Magic
Here’s where precision matters. I spread my chosen jam evenly across the compressed oat base, leaving about a quarter-inch border around the edges. This prevents the jam from seeping out the sides when we add the top layer.
The jam layer should be generous but not overwhelming – we want that perfect balance where each bite delivers the classic PB&J flavor without the jam dominating.
Step 3: The Top Layer Technique
This is the trickiest part, and I’ve developed a foolproof method. Instead of dumping the remaining oat mixture on top (which would disturb the jam layer), I sprinkle it evenly with my fingers, then gently press down to seal everything together.
The secret is working from the outside edges toward the center, ensuring complete coverage before applying any serious pressure. This prevents those “jam volcanoes” that used to plague my early attempts!
Setting and Cutting: The Final Steps
Once assembled, these bars need time to set properly. I typically refrigerate them for at least 2 hours, though they’ll firm up at room temperature in about 3-4 hours if you’re patient enough.
For the cleanest cuts, I use a sharp knife wiped clean between each slice. The parchment paper overhang makes removal from the pan effortless – just lift the whole block out and cut on a cutting board.
Storage and Serving Wisdom
These bars keep beautifully in an airtight container for up to a week at room temperature, or up to two weeks in the refrigerator. I often make a double batch on Sunday and portion them into individual containers for grab-and-go snacks throughout the week.
They’re incredibly portable – perfect for lunch boxes, hiking trips, or office snacks. Unlike many homemade treats, they won’t crumble in your bag or melt in moderate heat.
Troubleshooting Common Issues
Through my recipe testing journey, I’ve encountered (and solved) every possible problem:
Bars won’t hold together: Usually means insufficient pressing of the base layer or using peanut butter that’s too dry. Next time, add an extra tablespoon of maple syrup.
Jam layer disappears: This happens when the jam is too runny or the oat layers aren’t compressed enough. Choose a thicker jam and really press those layers firm.
Too sweet or not sweet enough: Remember, your jam contributes significant sweetness. Adjust by choosing a less sweet jam or adding a pinch of salt to balance flavors.
After making these bars countless times, I’ve discovered numerous ways to customize this basic recipe while maintaining its foolproof simplicity. Let me share my favorite variations and answer the questions I hear most often.
Creative Variations That Work
Chocolate Lover’s Version: I sometimes drizzle melted dark chocolate over the top layer before setting. The contrast between the fruity jam and rich chocolate creates an almost truffle-like experience.
Tropical Twist: Swap the peanut butter for almond butter and use mango or pineapple jam. Add a handful of unsweetened coconut flakes to the oat mixture for extra tropical flair.
Protein-Packed Upgrade: I’ve successfully incorporated a scoop of vanilla protein powder into the oat mixture, reducing the maple syrup slightly to compensate for the added bulk.
Seasonal Specials: During fall, I love using apple butter instead of jam and adding a dash of cinnamon to the oat mixture. The result tastes like apple pie in bar form!
Long-Term Storage Solutions
While these bars are best enjoyed within a week, I’ve found they freeze beautifully for up to three months. I wrap individual bars in parchment paper, then store them in a freezer-safe container. They thaw perfectly at room temperature in about 30 minutes.
For meal prep enthusiasts, I recommend cutting the bars but storing them uncut in the refrigerator. This prevents them from drying out at the cut edges while maintaining that fresh-made texture.
Frequently Asked Questions
Can I substitute almond butter or other nut butters?
Absolutely! I’ve successfully used almond butter, cashew butter, and even sunflower seed butter for nut-free versions. The key is ensuring your alternative has a similar consistency to natural peanut butter. Avoid anything too thick or too runny.
What if I don’t have maple syrup?
Honey works well as a 1:1 substitute, though it creates a slightly different flavor profile. I’ve also used agave nectar successfully. Avoid corn syrup or other highly processed sweeteners – they don’t provide the same binding properties.
Can I make these bars refined sugar-free?
Yes! Use a sugar-free jam or make your own chia seed jam using fresh fruit and a touch of stevia or monk fruit sweetener. The bars will be slightly less sweet but equally delicious.
How do I prevent the jam from making the bars soggy?
Choose a jam with good fruit content and medium consistency. Avoid jams that are very liquid or have excess liquid separated on top. If your jam seems too runny, you can thicken it slightly by cooking it down in a small saucepan for a few minutes.
Can I double the recipe?
Definitely! I often make double batches for parties or meal prep. Use a 9×13 inch pan and increase the setting time slightly – about 3-4 hours at room temperature or 2-3 hours in the refrigerator.
Are these bars suitable for special diets?
These bars are naturally gluten-free (if using certified gluten-free oats), dairy-free, and can easily be made vegan by ensuring your jam doesn’t contain gelatin. They’re also grain-free friendly since oats are technically a seed, not a grain.
Final Thoughts and Serving Suggestions
What I love most about this recipe is its incredible versatility and reliability. Whether I’m feeding my family breakfast on a busy morning, packing snacks for a road trip, or bringing treats to a potluck, these bars never disappoint.
They pair beautifully with a glass of cold milk, morning coffee, or even crumbled over yogurt for a more substantial breakfast. I’ve served them at everything from children’s birthday parties to adult book clubs, and they’re always a hit.
The simplicity of this recipe makes it perfect for involving kids in the kitchen. My own children love helping with the mixing and pressing steps, and it’s a great way to teach them about measuring and following recipes.
Remember, the beauty of these bars lies in their simplicity. Don’t overthink the process – trust the recipe, use quality ingredients, and enjoy the process of creating something delicious with minimal effort and maximum satisfaction.
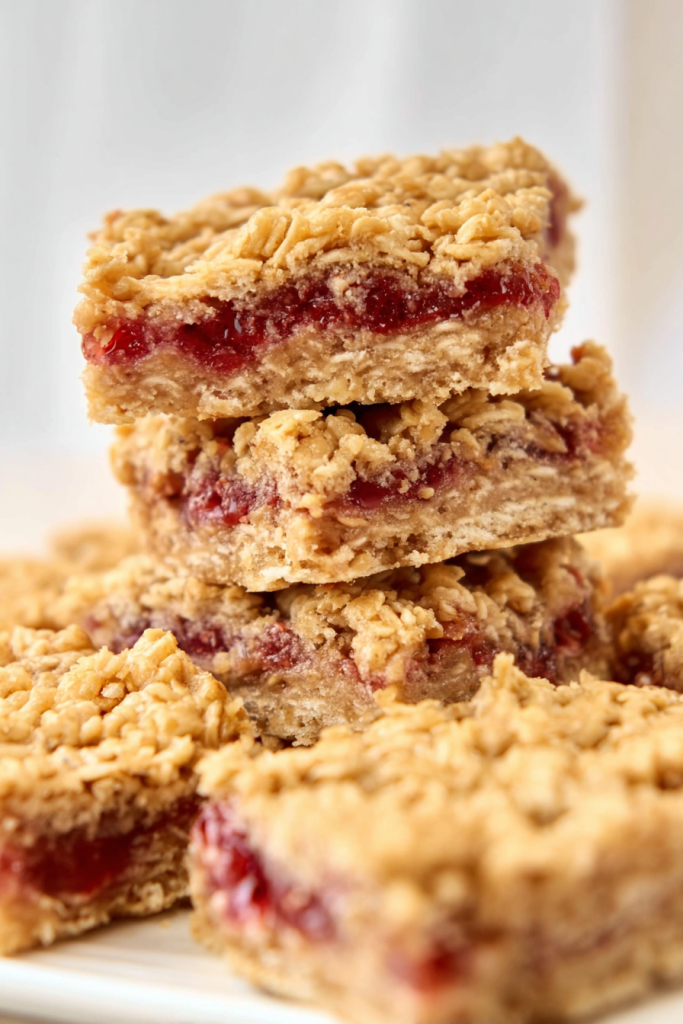
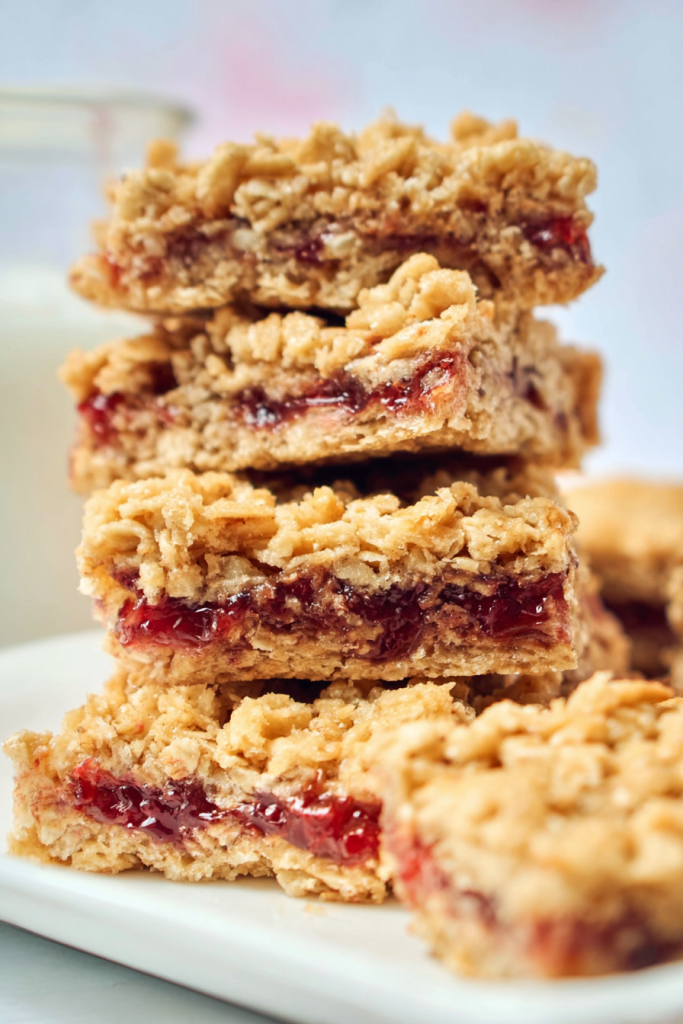
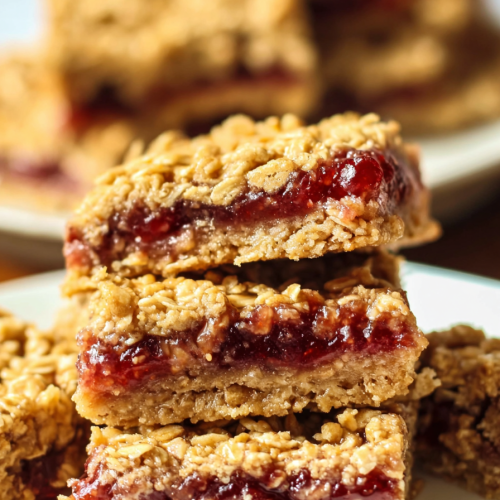
Image Prompt 6: Final styled shot of peanut butter jelly oat bars stacked on a vintage plate with a glass of milk and scattered oats in the background, natural lighting
These no-bake peanut butter jelly oat bars have become more than just a recipe in my kitchen – they’re a reliable source of homemade comfort that brings smiles to faces and satisfaction to busy schedules. Give them a try, and I’m confident they’ll become a staple in your household too!
No-Bake Peanut Butter Jelly Oat Bars
Ingredients
- 3 cups 240g rolled oats – Old-fashioned preferred for texture
- ¾ cup 180g natural peanut butter – Stir well before measuring
- 4 tablespoons pure maple syrup – Grade A or B
- ½ cup 160g fruit jam – Medium consistency, not too runny
Instructions
- Prepare the Base Layer:
- In a large bowl, mix oats, peanut butter, and maple syrup until fully combined. Use clean hands for best results. The mixture should hold together when squeezed.
- Press into Pan:
- Line an 8×8-inch pan with parchment paper. Firmly press about 60% of the oat mixture into the bottom to form a compact base layer.
- Spread Jam:
- Evenly spread jam over the base, leaving a ¼-inch border to prevent seepage. Use a spatula or back of a spoon.
- Add the Top Layer:
- Crumble the remaining oat mixture evenly over the jam. Gently press down, starting from the edges and working inward, to seal the layers together.
- Chill to Set:
- Refrigerate for at least 2 hours (or 3-4 hours at room temp) until firm. Lift bars out using parchment paper and slice into 8 even bars.