I still remember the very first time I tried making oatmeal pancakes. My kids were starving. I was rushing around the kitchen. I poured the batter into the hot pan. I felt so proud of my healthy breakfast idea.
But the result? A gummy, sticky disaster.
The middle was totally raw. The edges were burnt crisp. It was honestly like trying to eat a warm rubber shoe. My kids took one bite and pushed their plates away. I felt completely defeated.
I almost gave up on flourless baking entirely. I thought you absolutely needed regular wheat flour to get that classic, diner style fluffiness.
The good news? I was wrong.
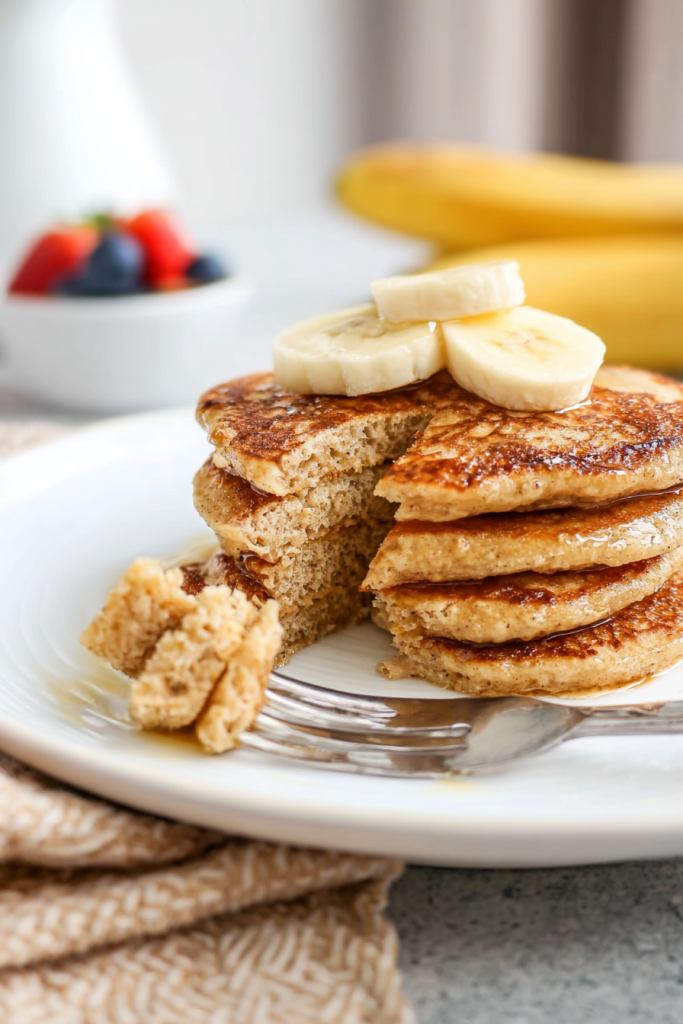
After spending countless Saturday mornings experimenting, I finally cracked the code. I found the perfect ratio of ingredients. Now, I make these pancakes every single weekend. They are light. They are fluffy. They actually taste like a real treat.
If you have ever struggled with heavy or rubbery gluten free pancakes, you are in the right place. This recipe will solve all your breakfast problems.
Why Most Oatmeal Pancakes Fail
Working with oatmeal is very different from using standard white flour.
Oats are basically tiny sponges. They soak up water super fast. If you let your pancake batter sit for too long, it turns into a thick paste. It gets gloopy.
On the other hand, if you panic and add too much water to thin it out? The centers of your pancakes will stay totally soggy. They will never cook through.
That is exactly why this specific recipe works so well. I balanced the moisture from the ripe banana with the sturdy structure of the eggs.
The result? A pancake that holds together beautifully. It stays incredibly soft and airy on the inside.
Plus, they are naturally sweet. You can eat them entirely plain. But they also make the perfect base for all your favorite toppings.
Everything You Need to Make Them
You probably already have all these ingredients sitting in your kitchen right now. We are skipping processed sugars today. We are skipping refined flours.
Instead, we are focusing on wholesome, simple foods.
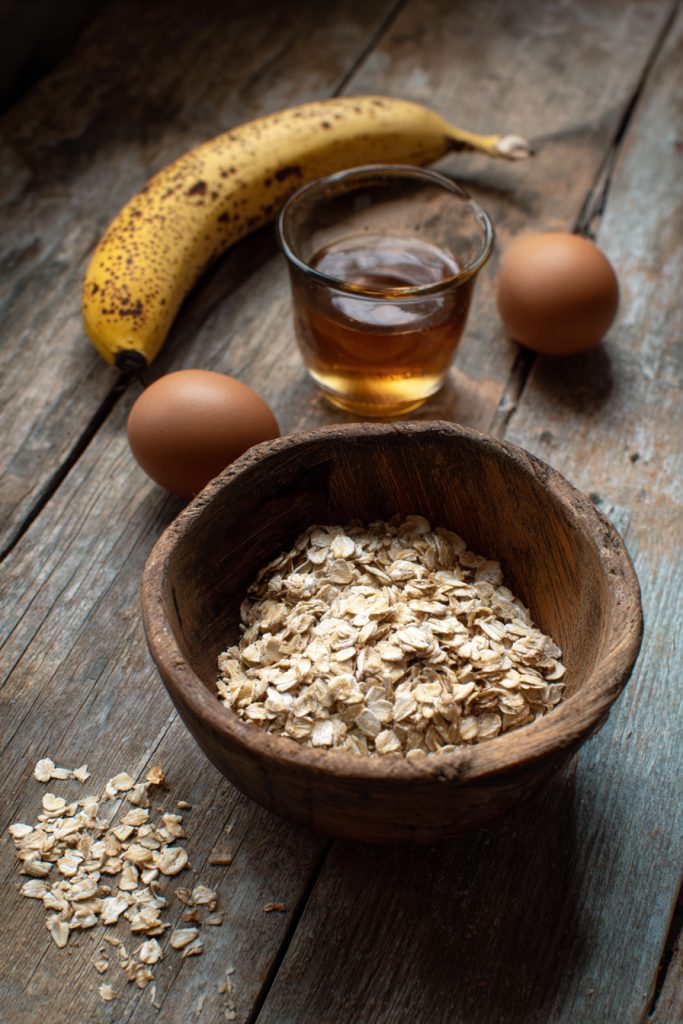
Here is exactly what you need for this recipe.
| Ingredient | Exact Quantity | Why We Need It For This Recipe |
| Eggs | 2 large | They give the pancakes structure and help them rise. |
| Banana | 1 medium | Adds natural sweetness. Look for brown spots on the skin! |
| Maple Syrup | 2 tablespoons | Brings a rich flavor. Use 100 percent pure syrup. |
| Olive Oil | 2 tablespoons | Extra-virgin is best. It keeps the pancakes very moist. |
| Vanilla Extract | 1 teaspoon | Makes the whole kitchen smell amazing. |
| Water | 1/4 cup | Thins the batter to the perfect pouring consistency. |
| Rolled Oats | 1 1/2 cups | Use certified gluten free oats if you have an allergy. |
| Baking Powder | 2 teaspoons | This is the absolute secret to getting fluffy pancakes. |
| Salt | 1/4 teaspoon | Just a pinch balances out all the sweet flavors. |
Let us talk about why these specific items matter so much.
The Power of the Ripe Banana
You really want a banana that looks a little ugly. The more brown spots on the skin, the better. Brown spots mean the starches have turned into sugars. This makes your pancakes naturally sweeter. The banana also acts like a glue to hold the batter together.
Using Rolled Oats as Flour
We are not buying expensive specialty flours. We are just making fresh oat flour right in our blender. Rolled oats work the absolute best for this. They give a much stronger structure than quick oats or instant oatmeal packets.
My Favorite Oil Choice
I love using extra-virgin olive oil. It has healthy fats. It also stays completely liquid at room temperature. If you use coconut oil, it might turn solid when it touches your cold eggs. Olive oil keeps your batter perfectly smooth.
Getting Structure from Eggs
Since we are not using traditional flour, we do not have any gluten. Gluten is normally the stretchy web that holds baked goods together. In this recipe, the eggs take over that job. They act like the building blocks. They keep everything from crumbling apart on your plate.
Step by Step Instructions
I promise this process is incredibly simple. Making a mess in the kitchen is my biggest pet peeve. That is why I love that this entire recipe happens inside a blender.
It is fast. It is easy. Clean up is a total breeze.
Here is the exact method to follow. Do not skip any steps!
Step 1: Create the Batter
Start by placing your liquids into the blender first: the eggs, water, oil, vanilla, and maple syrup. Next, add the banana, oats, baking powder, and salt. Placing liquids at the bottom helps the blades move more efficiently. Blend on high until the mixture is completely uniform. You want a smooth batter, though a tiny bit of oat texture is perfectly fine.
Step 2: Heat the Surface
Place a non-stick skillet or griddle over medium-low heat. You want a steady, gentle heat. A good test is to flick a drop of water onto the pan. If it dances and sizzles, you are ready to go. Lightly grease the surface with a tiny bit of olive oil or cooking spray.
Step 3: Pour and Flip
Use a 1/4 cup measuring cup to pour the batter onto the hot pan. This size makes them easy to flip. Once you see small bubbles forming on the surface and the edges look matte instead of shiny, slide your spatula underneath. Flip gently and cook for another 2 to 3 minutes until the underside is a beautiful golden brown.

My Biggest Kitchen Tip for Success
Pay attention to your batter as you cook.
Like I mentioned earlier, oats are thirsty. They will keep soaking up moisture while you stand there flipping pancakes. By the time you reach the bottom of your blender, the batter will look much thicker.
Your first instinct will be to add more water.
Do not do it!
If you add extra water, the middle of your pancakes will turn to mush. Instead, just scoop the thick batter into the pan. Then, use the back of a metal spoon to gently spread it out into a flat circle.
This simple trick keeps the texture perfect from the first pancake to the very last.
Trying to flip a giant pancake is like trying to balance a heavy book on a single pencil. It usually ends in a mess. Keep them small. The 1/4 cup measurement is your best friend here.
How to Serve Your Pancake Feast
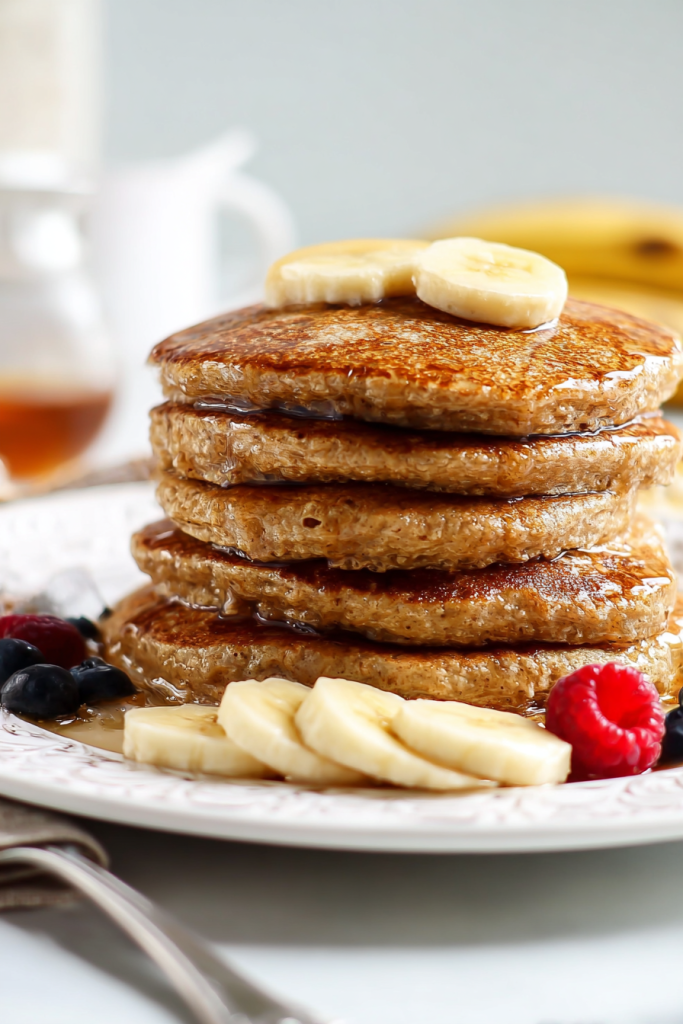
These pancakes taste incredible right out of the pan. The edges are slightly crispy. The insides are warm and soft.
But toppings make everything better.
Here are a few ways my family loves to eat them.
- The Classic: A pat of butter and a heavy pour of warm maple syrup.
- The Protein Boost: A big dollop of plain Greek yogurt and a sprinkle of chia seeds.
- The Sweet Tooth: A spoonful of creamy peanut butter and a handful of dark chocolate chips.
- The Fruity Finish: Fresh sliced strawberries and a handful of plump blueberries.
I actually created a little chart to show you how different toppings change the vibe of your breakfast.
| Topping Idea | Flavor Profile | Added Benefit |
| Fresh Berries | Sweet and slightly tart | Adds lots of great vitamin C and fiber |
| Peanut Butter | Rich, salty, and savory | Keeps you feeling full until lunchtime |
| Greek Yogurt | Tangy and creamy | Adds a massive punch of helpful protein |
| Dark Chocolate | Decadent and bitter | Makes breakfast feel like a fancy dessert |
How to Store Your Leftovers
If you somehow have leftovers, do not throw them away! These pancakes save beautifully.
For short term storage, put them in an airtight plastic container. They will last in the fridge for up to four days.
For long term storage, you can freeze them. Just place a small square of parchment paper between each pancake. This stops them from freezing together in one giant lump. Place the stack in a freezer safe bag. They will stay fresh for up to three whole months.
When you wake up hungry on a Tuesday, just grab a frozen pancake. Pop it straight into your toaster.
Treat it exactly like a frozen store bought waffle. Toast it for about two minutes. The outside gets perfectly crispy again. The inside gets warm and soft. It is the ultimate fast breakfast.
The Sheet Pan Trick for Busy Mornings
Sometimes, you have a lot of mouths to feed. Standing by the stove flipping pancakes one by one takes forever.
I recently discovered a brilliant shortcut. You can just bake the batter!
Here is exactly how you do it.
First, turn your oven on to 350 degrees Fahrenheit. Grab a large metal baking sheet. Cover the bottom with a sheet of parchment paper so nothing sticks.
Next, take your 1/4 cup measuring cup. Pour little puddles of batter all over the baking sheet. Make sure you leave some empty space between each one. They will spread out a little bit as they get hot.
Put the whole pan into the oven. Set a timer for 10 to 12 minutes.
You do not even have to flip them! Just pull the pan out when the centers feel firm to the touch.
They will not have that dark brown crust like pan fried pancakes. But they taste exactly the same. My kids actually prefer them this way because they stay incredibly soft.
Frequently Asked Questions
I get asked a lot of questions about this recipe. Here are the most common things people want to know.
Can I use steel cut oats instead of rolled oats?
I highly advise against this. Steel cut oats are very hard and dense. A normal home blender will not be able to break them down into powder. You will end up with crunchy, gritty pancakes. Stick to rolled oats for the best results.
My pancakes are turning brown too fast but the inside is raw. What happened?
Your stove burner is simply too hot. Oat batters are delicate. They need lower heat than a regular boxed pancake mix. Turn your burner down to a medium-low setting. Take your time. Let them cook slowly.
Can I blend the batter the night before and leave it in the fridge?
I really do not recommend doing this. The baking powder starts working the second it gets wet. If you wait until the next morning, all those fluffy air bubbles will pop. Your pancakes will turn out completely flat. Always make the batter right before you want to cook.
What if my kitchen does not have a blender?
You can absolutely still make these! You just need to buy a bag of pre-ground oat flour from the grocery store. Use a fork to mash your banana on a plate until it looks like baby food. Then, dump all the ingredients into a big bowl and mix it up with a whisk.
Recipe Quick Facts
- Prep Time: 10 minutes
- Cook Time: 15 minutes
- Total Time: 25 minutes
- Servings: 4 hungry people
- Difficulty: Very easy
I really hope you give this recipe a try. It totally changed the way I look at healthy breakfasts. Grab your blender and see for yourself!
Fluffy Blender Oatmeal Pancakes
Ingredients
- 2 large eggs provides structure
- 1 medium banana ripe with brown spots
- 2 tablespoons pure maple syrup
- 2 tablespoons extra-virgin olive oil
- 1 teaspoon vanilla extract
- 1/4 cup water
- 1 1/2 cups rolled oats use certified gluten-free if needed
- 2 teaspoons baking powder the secret to fluffiness
- 1/4 teaspoon salt
Instructions
- Place the liquid ingredients into the blender first (eggs, water, oil, vanilla, and syrup), followed by the banana, oats, baking powder, and salt.
- Blend on high until the mixture is completely uniform and smooth.
- Heat a non-stick skillet or griddle over medium-low heat and lightly grease with olive oil.
- Use a 1/4 cup measure to pour batter onto the pan. Cook until bubbles form and edges look matte.
- Flip gently and cook for another 2 to 3 minutes until golden brown.