You know what? There’s something absolutely magical about lemon and poppy seeds baked together into a perfect loaf.
I’ve messed up this recipe more times than I care to admit. But after years of kitchen disasters and burnt fingers, I finally cracked the code. And I’m so excited to share it with you.
How This All Started
Three years ago, I walked into this tiny bakery near my house. They had a lemon poppy seed loaf in the display case that looked incredible.
I bought a slice.
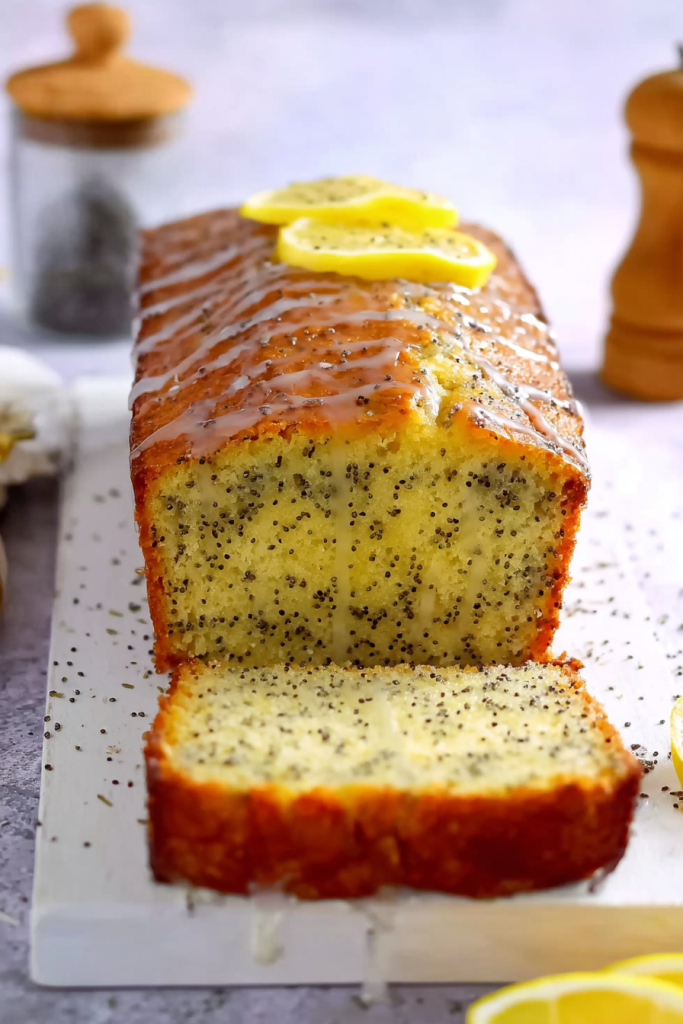
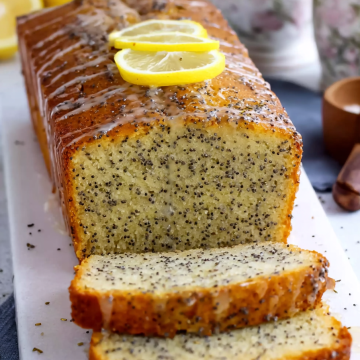
And oh my goodness. The texture was perfect—moist but not gummy. Sturdy enough to slice without crumbling everywhere. The lemon flavor was bright and happy without making your face pucker.
I knew right then I had to figure out how to make it at home.
The Learning Curve (aka My Kitchen Disasters)
My first attempt? Dry as the Sahara desert. Seriously, you could use it as a doorstop.
Second try? Too dense. It felt like eating a lemon-flavored brick.
Third, fourth, fifth tries? Either too bland or so sour it made my eyes water.
And don’t even get me started on the poppy seeds. Here’s the thing nobody tells you about poppy seeds—they’re like tiny little sponges. Add too many and they suck up all the moisture from your batter. You end up with a tough, dry loaf that’s nothing like what you imagined.
Use too few? Well, then what’s the point? You lose that signature speckled look and the subtle crunch.
The Breakthrough Moment
Everything changed when I finally understood one simple truth about butter.
Room temperature butter is not the same as melted butter.
When you cream room temperature butter with sugar properly, you create thousands of tiny air pockets. Those pockets are what make your loaf tender and light. Melted butter? It just doesn’t do the same thing. At all.
This one adjustment completely transformed my results. Suddenly, my loaves were coming out tender, moist, and perfect every single time.
Recipe Timing & Details
Here’s what you need to know upfront:
Prep Time: 15 minutes
Cook Time: 50-55 minutes
Total Time: 1 hour 10 minutes
Servings: 8-10 slices
Difficulty: Intermediate (but totally doable!)
What Makes This Recipe Different
Look, I’ve tried probably twenty different lemon poppy seed loaf recipes. Most of them are… fine. Just fine.
But this one? This one is special.
Here’s why:
The moisture level is spot-on. Your loaf will stay tender for days. Not gummy. Not dry. Just perfectly moist. Each slice holds together when you cut it, but then melts on your tongue.
The lemon flavor actually tastes like lemon. I use fresh juice and zest from two whole lemons. None of that artificial extract business. The flavor is bright and vibrant without being too tart. The sweetness balances everything perfectly.
The poppy seed ratio is exactly right. Two tablespoons. Not one. Not three. Exactly two. This gives you that classic spotted appearance and gentle crunch without stealing all the moisture.
Let’s Talk About Those Tricky Poppy Seeds
Okay, real talk time.
Poppy seeds are moisture magnets. They absorb liquid from your batter like crazy. And that can turn what should be a moist, tender loaf into a dry disappointment.
I know this because I tested it. Multiple times.
One tablespoon? Not enough visual impact. The loaf looked plain.
Two tablespoons? Perfect. Great look, great texture, great crunch.
Three tablespoons? Starting to get dry.
Four tablespoons? Forget it. Total disaster.
The sweet spot is exactly two tablespoons. Trust me on this—I made the mistakes so you don’t have to.
Ingredients & Instructions
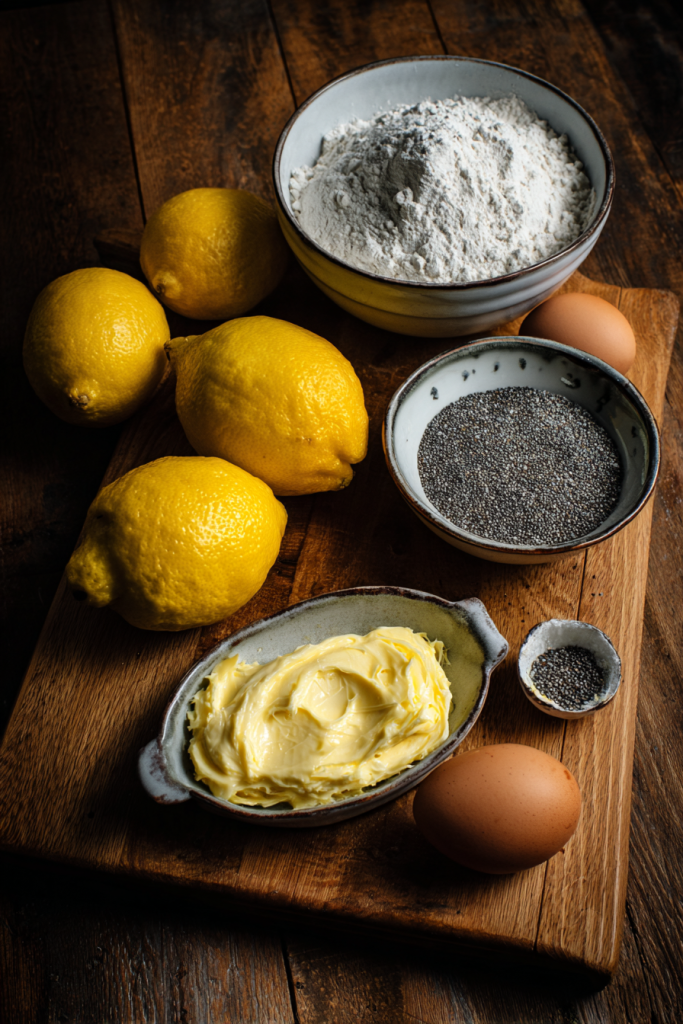
What You’ll Need
For the Lemon Poppy Seed Loaf:
| Ingredient | Quantity | Important Notes |
|---|---|---|
| All-purpose flour | 1¾ cups (225g) | Must be sifted |
| Baking powder | 1 teaspoon | Use fresh—old baking powder won’t rise properly |
| Salt | ½ teaspoon | Don’t skip this—it enhances all the flavors |
| High-quality butter | ¾ cup (175g) | Room temperature, NOT melted (this is crucial!) |
| Granulated sugar | ¾ cup (165g) | Regular white sugar works perfect |
| Large eggs | 3 | Room temperature makes a big difference |
| Fresh lemon juice | 2 tablespoons | From about 1 lemon—bottled juice won’t cut it |
| Lemon zest | From 2 lemons | This is where the flavor magic happens |
| Poppy seeds | 2 tablespoons | Exactly measured—not more, not less |
| Whole milk | ¾ cup (175ml) | Room temperature preferred |
For the Lemon Glaze:
| Ingredient | Quantity | Important Notes |
|---|---|---|
| Powdered sugar | 1 cup (120g) | Sift it or you’ll get lumps |
| Fresh lemon juice | 1 tablespoon | Adjust if you need to |
| Whole milk | 3 teaspoons | Helps get that perfect drizzling texture |
Let’s Make This Loaf
Getting Set Up
Step 1: Prep Your Oven and Pan
Turn your oven to 350°F (180°C). Let it preheat while you work.
Grab your 9×5-inch loaf pan. Now grease it really well. And I mean really well. Bottom, sides, corners—everywhere. I use melted butter because it adds flavor, but neutral oil works too.
Set the pan aside.
Step 2: Get Your Dry Ingredients Ready
Grab a medium bowl. Sift your flour into it.
I know sifting seems old-fashioned. But here’s why it matters: sifting adds air to your flour. It also breaks up any lumps. This means a lighter, more tender loaf.
Add the baking powder and salt to the sifted flour. Whisk everything together really well.
Set this bowl aside for now.
Mixing Time
Step 3: Cream That Butter and Sugar
This is where the magic starts.
Put your softened butter and sugar in your stand mixer bowl. Use the whisk attachment if you have one. Don’t have a stand mixer? A hand mixer on low speed works fine.
Now beat them together. You’re looking for a pale yellow color and a fluffy, cloud-like texture. This usually takes about 3-4 minutes.
Here’s the critical part: If your mixture looks grainy or chunky? Your butter was probably too cold.
Stop everything.
Grab a rubber spatula. Press and work that butter and sugar together manually until it gets creamy. This step is crucial for getting the right texture in your finished loaf.
Step 4: Add Those Eggs
Crack your eggs into a separate small bowl. Beat them lightly with a fork.
Now add them to your butter-sugar mixture. But here’s the key—add them one at a time. Mix on low speed after each egg.
Wait until each egg is fully mixed in before adding the next one.
Why? This prevents your batter from separating and getting weird.
Step 5: Lemon and Poppy Seed Time
Pour in your fresh lemon juice. Add the lemon zest.
Now sprinkle in those poppy seeds.
Mix on low speed just until everything combines evenly.
And oh man—the smell at this point is incredible. Your kitchen will smell like sunshine.
Step 6: The Wet-Dry Dance
Keep your mixer running on the lowest speed possible.
Add half of your flour mixture to the bowl. Right away, pour in half of the milk.
Beat just until combined. You should still see a few streaks of flour. That’s good.
Now add the rest of the flour and milk. Mix only until the batter looks smooth and uniform.
Stop mixing as soon as it’s combined.
This is important. Overmixing develops gluten, which makes your loaf tough and chewy instead of tender. Nobody wants that.
Baking Your Loaf
Step 7: Into the Oven
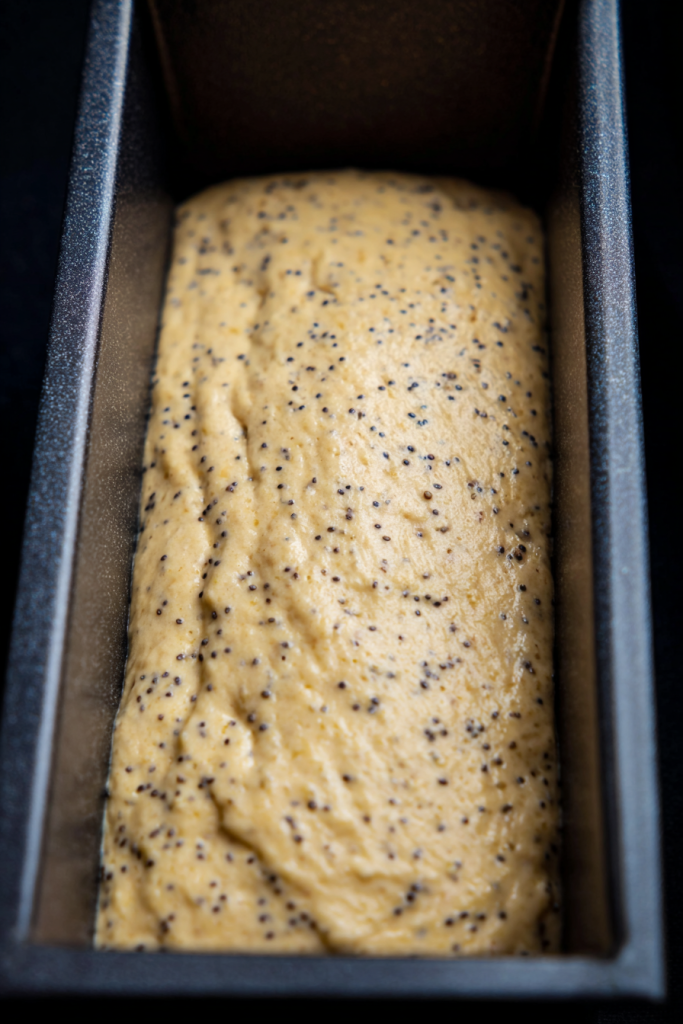
Pour your batter into that greased loaf pan. Use a spatula to smooth the top.
Place the pan in the center of your oven.
Set a timer for 50 minutes.
Here’s what you’re looking for: the loaf is done when a toothpick poked into the center comes out clean. Or with just a few moist crumbs. That’s perfect.
My oven usually takes 52 minutes. But every oven is different. Start checking at the 50-minute mark. Better to check early than to overbake.
Step 8: Let It Cool Down
Take the pan out of the oven. Let it sit on your counter for 10 minutes.
This resting time matters. It lets the loaf set up properly so it doesn’t fall apart when you take it out of the pan.
After 10 minutes, carefully flip the loaf onto a wire cooling rack.
Now here’s the hard part—you need to let it cool completely before you glaze it.
I know. It’s torture.
But if you glaze it while it’s warm, the icing will just melt and disappear into the cake. Trust me, waiting is worth it.
Making That Glaze
Step 9: Mix It Up
Grab a small bowl. Add your sifted powdered sugar and one tablespoon of lemon juice.
Now add the milk gradually. Stir after each addition.
You want it thick but pourable. It should drip slowly off a spoon.
Too thick? Add milk, half a teaspoon at a time.
Too thin? Whisk in more powdered sugar, one tablespoon at a time.
Step 10: The Grand Finale
Your loaf is completely cool now, right?
Good.
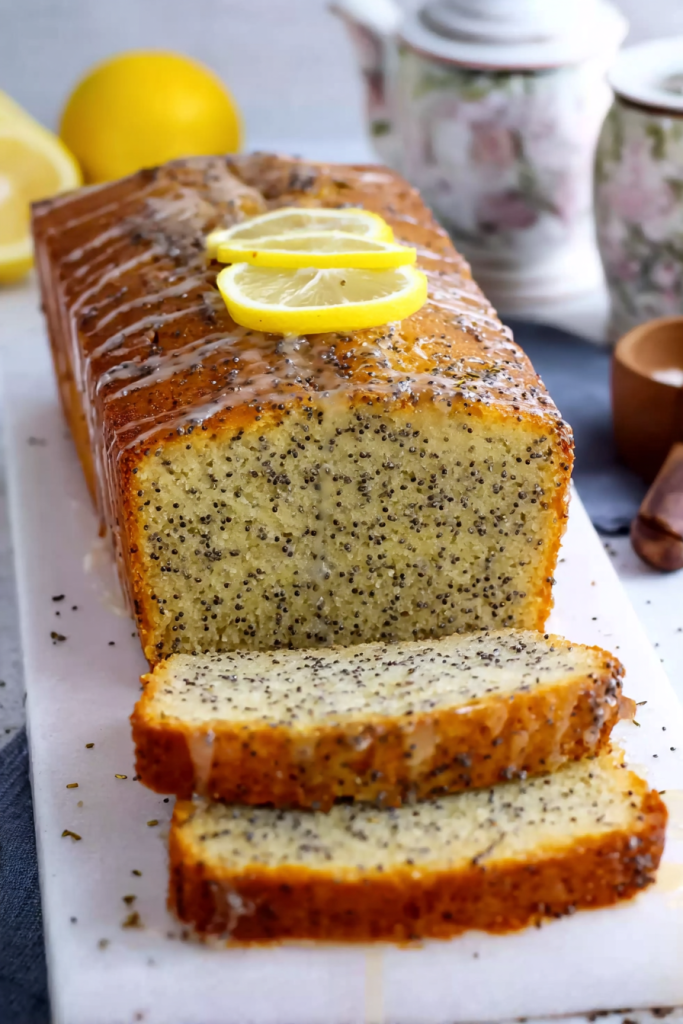
Spoon that glaze over the top. Let it drip down the sides naturally. That’s the classic look we’re going for.
Give the glaze about 15-20 minutes to set before you slice into it.
Tips, Storage & FAQs
How to Make This Perfect Every Time
Temperature Is Everything
Listen, this is the most important tip I can give you.
Room temperature ingredients blend together smoothly. Cold ingredients? They fight each other. Your batter can separate and get lumpy.
Here’s what I do: I take my butter, eggs, and milk out of the fridge 60-90 minutes before I start baking.
How do you know your butter is ready? Press it with your finger. It should give a little but still hold its shape. Not melted. Not hard. Just soft.
Never, Ever Microwave Your Butter
I see people do this all the time. They’re in a hurry, so they zap their butter in the microwave to soften it faster.
Don’t do it.
You’ll get unevenly melted spots. Those spots will ruin your creaming process. And then your whole loaf suffers.
Plan ahead. Leave your butter on the counter. If you’re really desperate for time, cut it into small cubes. That speeds up the natural softening process.
Sifting Isn’t Just for Show
I used to skip sifting. Thought it was unnecessary.
I was wrong.
Sifted flour measures differently than flour you just scoop from the bag. More importantly, sifting adds air. That air helps create a lighter, more tender crumb.
It takes 30 seconds. The difference in texture is noticeable. Just do it.
Low Speed Is the Only Speed
High-speed mixing creates friction. Friction creates heat. Heat melts your butter slightly and deflates all those precious air bubbles you worked to create.
Keep your mixer on low the entire time. I know it takes longer. But it’s worth it.
Test for Doneness the Smart Way
Don’t stick your toothpick directly in the center of the loaf.
Instead, insert it slightly off-center.
Why? The very center is usually the last part to finish baking. It can show moisture even when the rest of the loaf is done.
A few moist crumbs on your toothpick? That’s actually perfect. You want some moisture for a tender texture.
How to Store Your Loaf
Room Temperature Storage
Put your glazed loaf in an airtight container. It’ll stay fresh for up to 4 days on your counter.
Fun fact: the glaze actually helps seal in moisture. So don’t skip it thinking you’re being healthy.
Refrigerator Storage
You don’t really need to refrigerate this. But if you want to, go ahead. It’ll extend the freshness to about 7 days.
Just let your slices come back to room temperature before eating. Or pop them in the microwave for 10 seconds. Warm lemon poppy seed loaf is amazing.
Freezer Storage
This loaf freezes beautifully.
Here’s what I do: I slice the whole loaf. Then I wrap each slice tightly in plastic wrap. Then I put all the wrapped slices in a freezer bag.
They’ll keep for up to 3 months.
To thaw: either leave a slice in the fridge overnight, or let it sit on the counter for about 2 hours.
Questions People Always Ask Me
Can I use less sugar?
You can reduce the sugar by up to 2 tablespoons (about 25g) without problems.
Go beyond that? Your loaf will be less tender.
Here’s why: sugar doesn’t just add sweetness. It also holds onto moisture. And it contributes to that soft, tender crumb structure we’re after.
Why did my loaf crack down the middle?
This is actually a good thing!
That crack means your loaf rose properly in the oven. The top surface sets first while the center is still rising and expanding. That creates the characteristic split down the middle.
This happens with pretty much all quick breads and loaf cakes. It’s completely normal. In fact, it’s desirable.
Can I use almond milk or oat milk?
Yes, but stick with full-fat versions.
Unsweetened almond milk works well. So does oat milk.
Just avoid the low-fat or skim varieties. They’ll make your loaf less rich and tender. The fat content in milk really matters for texture.
Help! My butter and sugar look curdled!
This usually means your ingredients were at different temperatures.
Maybe your eggs were too cold. When you added them to the butter mixture, they “shocked” it.
Here’s the fix: just keep mixing. It often comes together once you add the dry ingredients.
For next time: make sure all your ingredients start at room temperature. This prevents the problem completely.
How do I know if my poppy seeds are still good?
Fresh poppy seeds smell slightly nutty. It’s subtle but pleasant.
Old poppy seeds smell rancid. Or they have no smell at all.
Here’s a storage tip: keep your poppy seeds in an airtight container in the fridge. Or even the freezer.
Why? They contain oils that can go bad at room temperature. Especially if you live somewhere warm.
My Final Thoughts
This recipe took me years to get right.
Years of testing different butter temperatures. Years of measuring poppy seeds to the exact tablespoon. Years of learning the precise mixing technique that creates the perfect crumb.
But you know what? All that trial and error was worth it.
Because now I have a lemon poppy seed loaf recipe that’s genuinely special. Not just “good enough.” Not just “pretty decent.”
Special.
The kind of loaf where people ask for the recipe. Where your family members request it by name. Where you feel proud to bring it to a friend’s house.
Whether you eat it with your morning coffee, serve it at afternoon tea, or have a slice for dessert, this loaf delivers. Every single time.
The butter temperature is right. The poppy seed measurement is perfect. The mixing technique creates that ideal tender crumb.
Everything just works.
So go ahead. Give it a try. Follow the steps. Take your time with the butter. Don’t rush the mixing.
And then? Enjoy the best lemon poppy seed loaf you’ve ever made.
Happy baking, friends!
Perfect Lemon Poppy Seed Loaf
Ingredients
For the Lemon Poppy Seed Loaf
- 1 3/4 cups all-purpose flour sifted (225g)
- 1 teaspoon baking powder fresh
- 1/2 teaspoon salt
- 3/4 cup high-quality butter room temperature, NOT melted (175g)
- 3/4 cup granulated sugar 165g
- 3 large eggs room temperature
- 2 tablespoons fresh lemon juice from about 1 lemon
- lemon zest from 2 lemons
- 2 tablespoons poppy seeds exactly measured
- 3/4 cup whole milk room temperature preferred (175ml)
For the Lemon Glaze
- 1 cup powdered sugar sifted (120g)
- 1 tablespoon fresh lemon juice
- 3 teaspoons whole milk
Instructions
Getting Set Up
- Preheat your oven to 350°F (180°C). Grease a 9×5-inch loaf pan thoroughly with melted butter or neutral oil, covering bottom, sides, and corners. Set aside.
- Sift the flour into a medium bowl. Add baking powder and salt. Whisk together until well combined. Set aside.
Mixing Time
- In a stand mixer bowl with whisk attachment (or using a hand mixer), beat the softened butter and sugar together on low speed for 3-4 minutes until pale yellow and fluffy. If the mixture looks grainy or chunky, stop and press it together with a rubber spatula until creamy.
- Crack eggs into a separate small bowl and beat lightly with a fork. Add eggs to the butter-sugar mixture one at a time, mixing on low speed after each addition. Wait until each egg is fully incorporated before adding the next.
- Pour in the fresh lemon juice, add the lemon zest, and sprinkle in the poppy seeds. Mix on low speed just until evenly combined.
- With mixer on lowest speed, add half of the flour mixture, then immediately pour in half of the milk. Beat just until combined with a few streaks of flour still visible. Add the remaining flour and milk, mixing only until the batter looks smooth and uniform. Do not overmix.
Baking Your Loaf
- Pour batter into the greased loaf pan and smooth the top with a spatula. Place in the center of the oven and bake for 50-55 minutes, or until a toothpick inserted slightly off-center comes out clean or with just a few moist crumbs.
- Remove from oven and let the loaf rest in the pan for 10 minutes. Then carefully flip onto a wire cooling rack and allow to cool completely before glazing.
Making the Glaze
- In a small bowl, combine sifted powdered sugar and 1 tablespoon lemon juice. Add milk gradually, stirring after each addition, until glaze is thick but pourable (should drip slowly off a spoon). Adjust consistency with more milk or powdered sugar as needed.
- Once the loaf is completely cool, spoon the glaze over the top, letting it drip down the sides naturally. Let glaze set for 15-20 minutes before slicing.